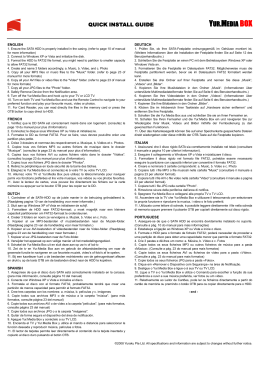
Compatible: PC
User Manual
TECHNICAL FEATURES
1. Digital trigger
2. Multidirectional "Point of View" hat
7. Hand rest rotation screw, with right-
switch
3. Right-handed screw cover
4. Rudder control via rotating handle with
hand rest
5. Throttle
6. 15 action buttons
8. Right-handed thumb rest
9. PC USB connector
10. Left-handed thumb rest
11. Left-handed screw cover
12. Right-handed or left-handed buttons
handed or left-handed positions
selector switch
1/12
GETTING TO KNOW YOUR JOYSTICK
EXCLUSIVE PRECISION TECHNOLOGY:
"H.E.A.R.T™: HallEffect AccuRate Technology"
Your T-16000M joystick features technology providing it with a level of precision currently
unequaled in the world of gaming joysticks, including:
- A 3D (Hall Effect) magnetic sensor on the stick, with a resolution of more than 268 million
values over the X and Y axes (16384 x 16384 values), whereas current competing systems
(even high-end systems) provide resolutions in the neighborhood of only one million values
(1024 x 1024 values).
- A magnet: no friction, for unlimited precision and incredible responsiveness.
- Coil spring on stick (2.8mm): for firm, linear and ultra-fluid tension.
BACKLIGHTING
For even greater precision, there is no dead zone in the central position of the T-16000M's
stick. To symbolize this, the center is backlit in green as soon as you move the stick (even
very slightly); the backlighting switches off after 3 seconds of inactivity, once you have
brought the stick back to dead center.
THROTTLE
Your joystick features a throttle (5), which you can use to easily control your acceleration in
games.
RUDDER FUNCTION
Your joystick features a rudder function (4), which in an airplane corresponds to the pedals
used by the pilot to move the rudder, thereby allowing the plane to pivot around its vertical
axis (making the plane turn to the left or to the right).
This rudder function is available on your joystick by rotating the stick to the left or right.
MULTIDIRECTIONAL "POINT OF VIEW" HAT SWITCH
Your joystick features a "Point of View" hat switch (2) which, as its name indicates, allows
you to instantly view everything that is going on around your aircraft (in games where this
feature is enabled). To use this feature, simply go into your game's setup menu, and
program the different views (rear view, view to the left, view to the right, and also external
views) onto the directions of the "Point of View" hat switch.
If you wish, you can also reserve the "Point of View" hat switch for other uses instead (firing,
etc.).
2/12
AMBIDEXTROUS SYSTEM
Your T-16000M joystick has the advantage of being fully ambidextrous, allowing it to
perfectly adapt to all players, whether they are right-handed or left-handed.
To do so, 3 elements can be adjusted: the configuration of the buttons on the base, the hand
rest, and the thumb rest.
RIGHT-HANDED SETUP
LEFT-HANDED SETUP
3/12
CONFIGURATION OF BUTTONS IN RIGHT-HANDED MODE
To set the positions of the 12 buttons located on the base to right-handed mode, set the
selector switch (12) located under the joystick's base to "RIGHT HANDED":
RIGHT-HANDED MODE CONFIGURATION
4/12
CONFIGURATION OF BUTTONS IN LEFT-HANDED MODE
To set the positions of the 12 buttons located on the base to left-handed mode, set the
selector switch (12) located under the joystick's base to "LEFT HANDED":
LEFT-HANDED MODE CONFIGURATION
5/12
ADJUSTING THE HAND REST FOR RIGHT- OR LEFT-HANDED MODE
By default, the hand rest is configured in RIGHT-HANDED MODE.
To adjust it to LEFT-HANDED MODE:
A) Using a small screwdriver, carefully loosen (without actually removing) the small hand
rest rotation screw (7), located on the left of the hand rest.
B) Turn the hand rest 180°.
C) Completely tighten the screw on the hand rest again (now located on the right).
Note: Carry out this procedure in reverse to return to right-handed mode.
6/12
ADJUSTING THE THUMB REST FOR RIGHT- OR LEFT-HANDED
MODE
By default, the stick's thumb rest is configured in RIGHT-HANDED MODE.
To adjust it to LEFT-HANDED MODE:
A) Remove the right-handed screw cover (3) located on the right of the stick.
B) Using a small screwdriver, unscrew and completely remove the long screw now
accessible (on the right of the stick).
C) Remove the right-handed thumb rest (8) located on the left of the stick.
7/12
D) Position the left-handed thumb rest (10) (included separately in the joystick's box) on the
right of the stick.
E) Position the long screw in the opening on the left of the stick and completely tighten the
screw in order to fasten the left-handed thumb rest in place.
F) Position the left-handed screw cover (11) (included separately in the joystick's box) on the
left of the stick.
Note: Carry out this procedure in reverse to return to right-handed mode.
8/12
PC
INSTALLATION ON PC
1. Connect the PC USB connector (9) to one of your computer’s USB ports.
Windows XP or Vista will automatically detect the new device.
2. The drivers are installed automatically.
Follow the on-screen instructions to complete the installation.
3. Click Start/Settings/Control Panel and double-click Game Controllers.
The Game Controllers dialog box displays the joystick's name with OK status.
4. In the Control Panel, click Properties to test and view all of your joystick's functions.
You are now ready to play!
IMPORTANT NOTE
When connecting your joystick: always set the stick and the rudder to their central positions,
and avoid moving them (to avoid any calibration problems).
9/12
TROUBLESHOOTING AND WARNING
• My joystick isn't functioning properly or seems to be improperly calibrated:
- Power off your computer and disconnect your joystick; then, turn your computer back on,
reconnect your joystick and restart your game.
- When connecting your joystick: always set the stick and the rudder to their central
positions, and avoid moving them (to avoid any calibration problems).
• I can't configure my joystick:
- In your game's "Options/Controller/Gamepad or Joystick" menu: select the appropriate
configuration, or completely reconfigure the controller options.
- Please refer to your game's user manual or online help utility for more information.
• My joystick is too sensitive or not sensitive enough:
- Your joystick self-calibrates independently once you have made some movements along
the different axes.
- In your game's "Options/Controller/Gamepad or Joystick" menu: adjust the sensitivity and
dead zones for your joystick (if these options are available).
• The joystick's central backlighting doesn't turn off automatically:
- Move the stick very slightly so that it is set to the absolute central value; the backlighting
will then switch off after 3 seconds of inactivity.
10/12
TECHNICAL SUPPORT
If you encounter a problem with your product, please go to http://ts.thrustmaster.com and
click Technical Support. From there you will be able to access various utilities (Frequently
Asked Questions (FAQ), the latest versions of drivers and software) that may help to resolve
your problem. If the problem persists, you can contact the Thrustmaster products technical
support service (“Technical Support”):
By email:
In order to take advantage of technical support by email, you must first register online. The
information you provide will help the agents to resolve your problem more quickly. Click
Registration on the left-hand side of the Technical Support page and follow the on-screen
instructions. If you have already registered, fill in the Username and Password fields and
then click Login.
By telephone:
United
Kingdom
08450800942
Charges at local rate
United
States
1-866-889-5036
Canada
1-866-889-2181
Denmark
80887690
Sweden
0200884567
Finland
0800 913060
Free
Gratuit / Free
Free
Free
Free
Monday to Friday from Noon to 4pm and 5pm to 10pm
Saturday from 9am to Noon and 1pm to 7pm
Sunday from 9am to Noon and 1pm to 4pm
Monday to Friday from 7am to 11am and from Noon to 5pm
Saturday and Sunday from 7am to Noon
(Eastern Standard Time)
Monday to Friday from 7am to 11am and from Noon to 5pm
Saturday and Sunday from 7am to Noon
(Eastern Standard Time)
Monday to Friday from 1pm to 5pm and 6pm to 11pm (English)
Saturday from 9am to 1pm and 2pm to 8pm
Sunday from 10am to 1pm and 2pm to 5pm
Monday to Friday from 1pm to 5pm and 6pm to 11pm (English)
Saturday from 9am to 1pm and 2pm to 8pm
Sunday from 10am to 1pm and 2pm to 5pm
Monday to Friday from 2pm to 6pm and 7pm to Midnight (English)
Saturday from 10am to 2pm and 3pm to 9pm
Sunday from 11am to 2pm and 3pm to 6pm
WARRANTY INFORMATION
Worldwide, Guillemot Corporation S.A. (“Guillemot”) warrants to the consumer that this
Thrustmaster product will be free from material defects and manufacturing flaws for a period
of two (2) years from the original date of purchase. Should the product appear to be defective
during the warranty period, immediately contact Technical Support, who will indicate the
procedure to follow. If the defect is confirmed, the product must be returned to its place of
purchase (or any other location indicated by Technical Support).
Within the context of this warranty, the consumer’s defective product will, at Technical
Support’s option, be either repaired or replaced. Where authorized by applicable law, the full
liability of Guillemot and its subsidiaries (including for indirect damages) is limited to the repair
or replacement of the Thrustmaster product. The consumer’s legal rights with respect to
legislation applicable to the sale of consumer goods are not affected by this warranty.
This warranty shall not apply: (1) if the product has been modified, opened, altered, or has
suffered damage as a result of inappropriate or abusive use, negligence, an accident, normal
wear, or any other cause not related to a material defect or manufacturing flaw; (2) in the
event of failure to comply with the instructions provided by Technical Support; (3) to software
not published by Guillemot, said software being subject to a specific warranty provided by its
publisher.
11/12
Additional warranty provisions
In the United States of America and in Canada, this warranty is limited to the product’s
internal mechanism and external housing. Any applicable implied warranties, including
warranties of merchantability and fitness for a particular purpose, are hereby limited to two (2)
years from the date of purchase and are subject to the conditions set forth in this limited
warranty. In no event shall Guillemot Corporation S.A. or its affiliates be liable for
consequential or incidental damage resulting from the breach of any express or implied
warranties. Some States/Provinces do not allow limitation on how long an implied warranty
lasts or exclusion or limitation of incidental/consequential damages, so the above limitation
may not apply to you. This warranty gives you specific legal rights, and you may also have
other legal rights which vary from State to State or Province to Province.
COPYRIGHT
© 2008 Guillemot Corporation S.A. All rights reserved. Thrustmaster® is a registered
trademark of Guillemot Corporation S.A. Windows®, XP and Vista are registered trademarks
of Microsoft Corporation in the United States and/or other countries. All other trademarks and
brand names are hereby acknowledged and are property of their respective owners.
Illustrations not binding. Contents, designs and specifications are subject to change without
notice and may vary from one country to another. Made in China.
ENVIRONMENTAL PROTECTION RECOMMENDATION
At the end of its working life, this product should not be disposed
of with standard household waste, but rather dropped off at a
collection point for the disposal of Waste Electrical and Electronic
Equipment (WEEE) for recycling.
This is confirmed by the symbol found on the product, user
manual or packaging.
Depending on their characteristics, the materials may be
recycled. Through recycling and other forms of processing Waste
Electrical and Electronic Equipment, you can make a significant
contribution towards helping to protect the environment.
Please contact your local authorities for information on the
collection point nearest you.
FAQs, tips and drivers available at www.thrustmaster.com
12/12
Compatible : PC
Manuel de l'utilisateur
CARACTÉRISTIQUES TECHNIQUES
Gâchette numérique
Croix multidirectionnelle Point de Vue
Cache-vis Droitier
Palonnier par rotation du manche avec
Repose-main
5. Manette des gaz
6. 15 boutons d’action
1.
2.
3.
4.
7. Vis pour rotation du Repose-main avec
position Droitier ou Gaucher
8. Repose-pouce Droitier
9. Connecteur USB PC
10. Repose-pouce Gaucher
11. Cache-vis Gaucher
12.Sélecteur Boutons Droitier ou Gaucher
1/12
A LA DECOUVERTE DE VOTRE JOYSTICK
TECHNOLOGIE DE PRECISION EXCLUSIVE :
« H.E.A.R.T™ : HallEffect AccuRate Technology »
Votre Joystick T-16000M a la particularité de disposer d’une technologie qui lui permet une
précision inégalée à ce jour dans l’univers des joysticks de jeu avec :
- un capteur magnétique 3D (Hall Effect) sur le manche d’une résolution de plus de 268
millions de valeurs sur l’ensemble des axes X et Y (soit 16384 x 16384) alors que les
systèmes actuels concurrents (même haut de gamme) varient aux alentours de seulement 1
million de valeurs (soit 1024 x 1024)
- Un aimant : pour éviter toute friction et garantir une précision illimitée dans le temps
- Un ressort de manche hélicoïdal 2.8mm : pour une tension ferme, linéaire et ultra fluide.
RETRO-ECLAIRAGE
Pour encore plus de précision le centre du manche du T-16000M ne possède aucune zone
morte. Pour le symboliser, son centre se rétro-éclaire en vert dès que vous bougez le
manche (et ce même très légèrement) et s’éteint après 3 secondes d’inactivité lorsque vous
le ramenez au centre parfait.
MANETTE DES GAZ
Votre joystick dispose d’une manette des gaz (5) grâce à laquelle vous pourrez aisément
contrôler l’accélération de votre appareil.
FONCTION PALONNIER
Votre joystick dispose d’une fonction palonnier (4) qui correspond dans un avion aux pédales
actionnées par le pilote pour faire braquer la gouverne de direction, permettant de faire pivoter
l’avion autour de son axe vertical (entraînant ainsi un virage de l’avion vers la gauche ou la
droite).
Cette fonction palonnier est accessible sur votre joystick par rotation du manche vers la gauche
ou la droite
CROIX MULTIDIRECTIONNELLE « POINT DE VUE »
Votre joystick est doté d’une croix point de vue (2) qui, comme son nom l’indique, vous
permettra (dans les jeux le permettant) de surveiller instantanément tout ce qui se passe
autour de votre avion. Il vous suffit pour cela, depuis le menu de configuration de votre jeu,
de programmer les différentes vues (vue arrière, vue sur la gauche, vue sur la droite, mais
aussi vues externes) sur les directions de la croix point de vue.
Vous pouvez bien entendu réserver la croix point de vue à d’autres utilisations (tir, etc.).
2/12
SYSTEME AMBIDEXTRE
Votre joystick T-16000M à l’avantage d’être entièrement ambidextre afin de s’adapter
parfaitement à tous les joueurs qu’ils soient droitiers ou gauchers.
Pour ce faire, 3 éléments sont ajustables : la disposition des boutons sur la base, le reposemain ainsi que le repose-pouce.
AJUSTEMENT TYPE DROITIER
AJUSTEMENT TYPE GAUCHER
3/12
CONFIGURATION DES BOUTONS EN MODE DROITIER
Pour ajuster la position des 12 boutons situés sur la base en mode « DROITIER »,
positionnez le sélecteur (12) situé sous la base du joystick sur « RIGHT HANDED » :
CONFIGURATION EN MODE DROITIER
4/12
CONFIGURATION DES BOUTONS EN MODE GAUCHER
Pour ajuster la position des boutons en mode « GAUCHER », positionnez le sélecteur (12)
situé sous la base du joystick sur « LEFT HANDED » :
CONFIGURATION EN MODE GAUCHER
5/12
AJUSTER LE REPOSE-MAIN EN MODE DROITIER OU GAUCHER
Par défaut, le repose-main du manche est positionné en mode DROITIER.
Pour l’ajuster en mode GAUCHER :
A) A l’aide d’un petit tournevis, dévissez légèrement (sans la retirer) la petite vis (7)
du repose-main situé à gauche de celui-ci.
B) Tournez le « repose-main » de 180°.
C) Revissez complètement la vis du repose-main (désormais situé à droite).
Remarque : Effectuez l’opération inverse pour revenir en mode Droitier.
6/12
AJUSTER LE REPOSE POUCE EN MODE DROITIER OU GAUCHER
Par défaut, le repose-pouce du manche est positionné en mode DROITIER.
Pour l’ajuster en mode GAUCHER :
A) Retirez le « cache-vis Droitier » (3) situé à droite du manche.
B) A l’aide d’un petit tournevis, dévissez et retirez complètement la longue vis désormais
accessible (à droite du manche).
C) Retirez le repose-pouce Droitier (8) situé à gauche du manche.
7/12
D) Positionnez le repose-Pouce Gaucher (10) (inclus séparément dans la boite du joystick) à
droite du manche.
E) Positionnez et vissez au maximum la longue vis à gauche du manche afin de fixer le
repose-pouce Gaucher.
F) Positionnez le cache-vis Gaucher (11) (inclus séparément dans la boite du joystick) à
gauche du manche.
Remarque : Effectuez l’opération inverse pour revenir en mode Droitier.
8/12
PC
INSTALLATION SUR PC
1. Reliez le connecteur USB (9) à l'un des ports USB de votre unité centrale.
Windows XP ou Vista détectera automatiquement le nouveau périphérique.
3. L'installation des pilotes est automatique.
Suivez les instructions affichées à l'écran pour terminer l'installation.
4. Sélectionnez Démarrer/Paramètres/Panneau de configuration puis double-cliquez sur
Contrôleurs de jeu
La boîte de dialogue Contrôleurs de jeu affichera le nom du joystick avec l'état OK.
5. Dans le Control Panel, cliquez sur Propriétés pour tester et visualiser l’ensemble des
fonctions.
Vous êtes maintenant prêt à jouer !
REMARQUES IMPORTANTES SUR « PC »
Lorsque vous branchez votre joystick : laissez toujours le manche et le palonnier centrés et
évitez de les déplacer (pour éviter tout problème de calibration).
9/12
DEPANNAGE ET AVERTISSEMENT
• Mon joystick ne fonctionne pas correctement ou semble mal calibré :
- Eteignez votre ordinateur, déconnectez votre joystick, rebranchez et relancez votre jeu.
- Lorsque vous branchez votre joystick : laissez le manche et le palonnier centrés et évitez
de les déplacer (pour éviter tout problème de calibration).
• Je n’arrive pas à configurer mon joystick :
- Dans le menu « Options / Contrôleur / Manettes ou Joystick » de votre jeu : choisissez la
configuration appropriée ou reconfigurez complètement les options du contrôleur.
- Reportez-vous au manuel de l’utilisateur ou à l’aide en ligne de votre jeu pour plus
d’informations.
• Mon joystick est trop ou pas assez sensible :
- Votre joystick s’auto-calibre de manière autonome après quelques mouvements effectués
sur les différents axes.
- Dans le menu « Options / Contrôleur / Manettes ou Joystick » de votre jeu : ajustez la
sensibilité et les zones mortes de votre contrôleur (si l’option est disponible).
• Le rétro-éclairage central du joystick ne s’éteint pas automatiquement
- Bougez très légèrement le manche afin qu’il atteigne la valeur centrale absolue et s’éteigne
après 3 secondes d’inactivité.
10/12
SUPPORT TECHNIQUE
Si vous rencontrez un problème avec votre produit, rendez-vous sur le site
http://ts.thrustmaster.com et cliquez sur Support Technique. Vous aurez alors accès à
différents services (Foire Aux Questions (FAQ), dernières versions des pilotes et logiciels)
susceptibles de résoudre votre problème. Si le problème persiste, vous pouvez contacter le
support technique des produits Thrustmaster (« Support Technique ») :
Par e-mail :
Pour bénéficier du support technique par e-mail, vous devez d’abord vous enregistrer en
ligne. Les informations fournies vont permettre aux techniciens de résoudre plus rapidement
votre problème. Cliquez sur Enregistrement à gauche de la page Support technique et suivez
les instructions à l’écran. Si vous êtes déjà enregistré, renseignez les champs Nom
d’utilisateur et Mot de passe puis cliquez sur Connexion.
Par téléphone (si vous n’avez pas d’accès Internet) :
Canada
France
Suisse
Belgique
Du lundi au vendredi de 7h à 11h et de 12h à 17h
Le samedi et le dimanche de 7h à 12h
(Heure de l’Est)
1-866-889-2181
Gratuit
Du lundi au vendredi de 13h à 17h et de 18h à 22h
Le samedi de 9h à 13h et de 14h à 20h
Le dimanche de 10h à 13h et de 14h à 17h
0 826 09 21 03
Numéro Indigo®
(0,15€ TTC/minute*)
Du lundi au vendredi de 13h à 17h et de 18h à 22h
Le samedi de 9h à 13h et de 14h à 20h
Le dimanche de 10h à 13h et de 14h à 17h
0842 000 022
Tarif d’une communication locale
078 16 60 56
Tarif d’une communication nationale
Du lundi au vendredi de 13h à 17h et de 18h à 22h
Le samedi de 9h à 13h et de 14h à 20h
Le dimanche de 10h à 13h et de 14h à 17h
* Tarif indicatif (hors coût de mise en relation)
INFORMATIONS RELATIVES À LA GARANTIE
Dans le monde entier, Guillemot Corporation S.A. (« Guillemot ») garantit au consommateur
que le présent produit Thrustmaster est exempt de défauts matériels et de vices de
fabrication, et ce, pour une période de deux (2) ans à compter de la date d’achat d’origine.
Si, au cours de la période de garantie, le produit semble défectueux, contactez
immédiatement le Support Technique qui vous indiquera la procédure à suivre. Si le défaut
est confirmé, le produit devra être retourné à son lieu d’achat (ou tout autre lieu indiqué par
le Support Technique).
Dans le cadre de la garantie, le consommateur bénéficiera, au choix du Support Technique,
du remplacement ou de la réparation du produit défectueux. Lorsque la loi applicable
l’autorise, toute responsabilité de Guillemot et ses filiales (y compris pour les dommages
indirects) se limite à la réparation ou au remplacement du produit Thrustmaster. Les droits
légaux du consommateur au titre de la législation applicable à la vente de biens de
consommation ne sont pas affectés par la présente garantie.
Cette garantie ne s’appliquera pas : (1) si le produit a été modifié, ouvert, altéré, ou a subi
des dommages résultant d’une utilisation inappropriée ou abusive, d’une négligence, d’un
accident, de l’usure normale, ou de toute autre cause non liée à un défaut matériel ou à un
vice de fabrication ; (2) en cas de non-respect des instructions du Support Technique ; (3)
aux logiciels non-édités par Guillemot, lesdits logiciels faisant l’objet d’une garantie
spécifique accordée par leurs éditeurs.
11/12
Stipulations additionnelles à la garantie
Aux États-Unis d’Amérique et au Canada, cette garantie est limitée au mécanisme interne et
au boîtier externe du produit. Toute garantie implicite applicable, incluant les garanties de
qualité marchande ou d’adaptation à un usage particulier, est limitée à deux (2) ans à compter
de la date d’achat et soumise aux conditions de la présente garantie limitée. En aucun cas,
Guillemot Corporation S.A. ou ses sociétés affiliées ne sauraient être tenues responsables
envers qui que ce soit de tous dommages indirects ou dommages accessoires résultant du
non-respect des garanties expresses ou implicites. Certains États/Provinces n’autorisent pas
la limitation sur la durée d’une garantie implicite, ou l’exclusion ou la limitation de
responsabilité pour les dommages indirects ou accessoires, de sorte que les limitations ou
exclusions ci-dessus peuvent ne pas vous être applicables. Cette garantie vous confère des
droits spécifiques ; vous pouvez également bénéficier d’autres droits qui peuvent différer d’un
État/Province à l’autre.
COPYRIGHT
© 2008 Guillemot Corporation S.A. Tous droits réservés. Thrustmaster® est une marque
déposée de Guillemot Corporation S.A. Windows®, XP et Vista sont des marques déposées
de Microsoft Corporation aux Etats-Unis et/ou dans d’autres pays. Toutes les autres marques
déposées et noms commerciaux sont reconnus par les présentes et sont la propriété de leurs
propriétaires respectifs. Illustrations non contractuelles. Le contenu, la conception et les
spécifications sont susceptibles de changer sans préavis et de varier selon les pays. Fabriqué
en Chine.
RECOMMANDATION RELATIVE À LA PROTECTION DE L’ENVIRONNEMENT
En fin de vie, ce produit ne doit pas être éliminé avec les déchets
ménagers normaux mais déposé à un point de collecte des déchets
d'équipements électriques et électroniques en vue de son recyclage.
Ceci est confirmé par le symbole figurant sur le produit, le manuel
utilisateur ou l’emballage.
En fonction de leurs caractéristiques, les matériaux peuvent être
recyclés. Par le recyclage et par les autres formes de valorisation
des déchets d'équipements électriques et électroniques, vous
contribuez de manière significative à la protection de
l’environnement.
Veuillez consulter les autorités locales qui vous indiqueront le point
de collecte concerné.
FAQ, astuces et pilotes sur www.thrustmaster.com
12/12
Kompatibel: PC
Benutzerhandbuch
TECHNISCHE FEATURES
1. Digitaler Trigger
2. Multidirektionaler "Point of View
7. Handstützen-Rotationsschraube mit
(Panoramasicht)" Kopfschalter
3. Rechtshändige Schraubenabdeckung
4. Ruderkontrolle via Drehgriff mit
Handstütze
5. Gashebel
6. 15 Actionbuttons
8. Rechtshändige Daumenstütze
9. PC USB Stecker
10. Linkshändige Daumenstütze
11. Linkshändige Schraubenabdeckung
12. Rechts- oder linkshändiger Button-
rechts- oder linkshändigen Positionen
Wahlschalter
1/12
LERNEN SIE IHREN JOYSTICK KENNEN
EXKLUSIVE PRÄZISIONSTECHNOLOGIE:
"H.E.A.R.T™: HallEffect AccuRate Technology"
Ihr T-16000M Joystick beinhaltet Technologie, die diesen mit einer Präzisionsstufe
ausstattet, die derzeit beispiellos in der Welt der Spiel-Joysticks ist, inklusive:
- Einen 3D (Hall Effect) Magnetsensor am Stick, mit einer Auflösung von mehr als 268 Mio.
Werten über den X und Y Achsen (16384 x 16384 Werte), wohingegen aktuelle
Mitbewerbersysteme (selbst High-End-Systeme) Auflösungen in der Nähe von nur 1 Mio.
Werten (1024 x 1024 Werte) bieten.
Ein Magnet: Keine Reibung, für unbegrenzte Präzision und unglaubliche
Ansprechempfindlichkeit.
- Spiraldruckfeder am Stick (2.8mm): Für beständige, lineare und ultrageschmeidige
Federkraft.
HINTERGRUNDBELEUCHTUNG
Für noch größere Präzision gibt es keine Blindzone in der mittigen Position des T-16000M
Sticks. Um das Zentrum anzuzeigen und sobald Sie den Stick bewegen (auch sehr leicht) ist
dieses grün beleuchtet. Die Hintergrundbeleuchtung schaltet sich nach 3-sekündiger
Inaktivität aus, sobald Sie den Stick mittig gesetzt haben.
GASHEBEL
Ihr Joystick verfügt über einen Gashebel (5), den Sie für die leichte Kontrolle von
Beschleunigung in Ihren Spielen nutzen können.
RUDERFUNKTION
Ihr Joystick verfügt über eine Ruderfunktion (4), die IN EINEM Flugzeug den Pedalen
entspricht, die durch den Piloten zum Bewegen des Ruders benutzt werden und das
Flugzeug zu einer Drehbewegung um die vertikale Achse veranlaßt (Links- oder
Rechtsdrehung des Flugzeugs).
Diese Ruderfunktion ist bei Ihrem Joystick durch drehen des Sticks nach links oder rechts
verfügbar.
MULTIDIREKTIONALER "POINT OF VIEW " KOPFSCHALTER
Ihr Joystick verfügt über einen "Point of View" Kopfschalter (2), der – wie der Name besagt –
Ihnen ermöglicht, alles was um Ihr Flugzeug herum geschieht, zu sehen (in Spielen, in
denen dieses Feature aktiviert ist). Um dieses Feature zu nutzen, gehen Sie einfach in das
Setup-Menü Ihres Spiels und programmieren die verschiedenen Blickwinkel (Blick nach
hinten, links rechts und ebenso externe Blickwinkel) auf den "Point of View" Kopfschalter.
Wenn gewünscht, können Sie den "Point of View" Kopfschalter stattdessen auch mit
anderen Nutzungen belegen (Feuern, etc.).
2/12
BEIDHÄNDIGES SYSTEM
Ihr T-16000M Joystick hat den Vorzug vollständig Beidhändig zu sein und somit zu allen
Spielern zu passen, egal ob diese Rechts- oder Linkshänder sind. Dafür können 3 Elemente
eingestellt werden: Die Konfiguration der Buttons an der Basis, die Handstütze und die
Daumenstütze.
RECHTSHÄNDER-EINSTELLUNG
LINKSHÄNDER-EINSTELLUNG
3/12
KONFIGURATION DER BUTTONS IM RECHTSHÄNDIGEN MODUS
Um die Positionen der 12 Buttons an der Basis in den rechtshändigen Modus zu stellen,
stellen Sie den Wahlschalter (12) unter der Joystickbasis auf "RECHTSHÄNDIG":
KONFIGURATION RECHTSHÄNDIG
4/12
KONFIGURATION DER BUTTONS IM LINKSHÄNDIGEN MODUS
Um die Positionen der 12 Buttons an der Basis in den linkshändigen Modus zu stellen,
stellen Sie den Wahlschalter (12) unter der Joystickbasis auf "LINKSHÄNDIG":
KONFIGURATION LINKSHÄNDIG
5/12
EINSTELLEN DER
LINKSHÄNDER
HANDSTÜTZE
FÜR
RECHTS-
ODER
Werksseitig ist die Handstütze für RECHTSHÄNDER montiert.
Um diese für den LINKSHÄNDIGEN Gebrauch einzustellen:
A) Benutzen Sie einen kleinen Schraubendreher zum lösen der kleinen HandstützenRotationsschraube(7) (ohne diese vollständig zu entfernen), die sich links der Handstütze
befindet.
B) Drehen Sie die Handstütze um 180°.
C) Ziehen Sie die Schraube, die sich nun rechts befindet wieder fest an.
Bitte beachten: Führen Sie diese Prozedur in umgekehrter Reihenfolge durch, um zum
rechtshändigen Betrieb zurückzukehren.
6/12
EINSTELLEN DER DAUMENSTÜTZE
LINKSHÄNDIGEN BETRIEB
FÜR
RECHTS-
ODER
Werksseitig ist die Daumenstütze für RECHTSHÄNDER montiert.
Um diese für den LINKSHÄNDIGEN Gebrauch einzustellen:
A) Entfernen Sie rechterhand am Stick die Schraubenabdeckung (3).
B) Benutzen Sie einen kleinen Schraubendreher und schrauben die nun zugängliche, lange
Schraube, rechts am Stick, los und entfernen diese.
C) Entfernen Sie die rechtshändige Daumenstütze (8), zu finden links am Stick.
7/12
D) Positionieren Sie die linkshändige Daumenstütze (10) (separat in der Joystickbox
enthalten) rechts am Stick.
E) Stecken Sie die lange Schraube durch die Öffnung links am Stick und ziehen diese fest
an, um die linkshändige Daumenstütze fest zu montieren.
F) Setzen Sie die linkshändige Schraubenabdeckung (11) (separat in der Joystickbox
enthalten x) links am Stick ein.
Bitte beachten: Führen Sie diese Prozedur in umgekehrter Reihenfolge durch, um zum
rechtshändigen Betrieb zurückzukehren.
8/12
PC
INSTALLATION AUF DEM PC
1. Schließen Sie den PC USB Stecker (9) an einen der USB Ports Ihres Computers an.
Windows XP oder Vista erkennt automatisch das neue Gerät.
2. Die Treiber werden automatisch installiert.
Folgen Sie den Bildschirmanweisungen, um die Installation abschließen zu können.
3. Klicken Sie auf Start/Einstellungen/Systemsteuerung und (doppel)klicken dann auf
Gamecontroller.
In der Gamecontroller-Dialogbox wird der Joystickname mit dem OK Status angezeigt.
4. Im Bedienpanel, auf Eigenschaften klicken, um alle Funktionen des Joysticks
anzusehen und zu testen.
Sie sind nun spielbereit!
WICHTIGE ANMERKUNG
Wenn Sie Ihren Joystick anschließen: Stellen Sie den Stick und das Ruder auf deren
zentrale Positionen und vermeiden es diese zu bewegen (um jedwede
Kalibrierungsprobleme zu vermeiden).
9/12
FEHLERBESEITIGUNG UND WARNUNG
• Mein Joystick funktioniert nicht richtig oder schein falsch kalibriert zu sein:
- Schalten Sie Ihren Computer aus und stöpseln Ihren Joystick aus, schalten Sie Ihren
Computer wieder ein, stöpseln den Joystick wieder ein und starten Ihr Spiel erneut.
- Wenn Sie Ihren Joystick anschließen: Stellen Sie den Stick und das Ruder auf deren
mittige Positionen und vermeiden es diese zu bewegen (um jedwede Kalibrierungsprobleme
zu vermeiden).
• Ich kann meinen Joystick nicht konfigurieren:
- Im Menü Ihres Spieles "Optionen/Controller/Gamepad oder Joystick": Wählen Sie
adäquate Konfiguration oder konfigurieren die Controlleroptionen vollständig neu.
- Bitte lesen Sie für mehr Informationen im Benutzerhandbuch oder der Online-Hilfe Ihres
Spiels nach.
• Mein Joystick ist zu empfindlich oder nicht empfindlich genug:
- Ihr Joystick kalibriert sich unabhängig sobald Sie ein paar Bewegungen auf den
verschiedenen Achsen getätigt haben.
- Im Menü Ihres Spieles "Optionen/Controller/Gamepad oder Joystick": Stellen Sie die
Empfindlichkeit und Todzonen für Ihren Joystick ein, falls diese Optionen verfügbar sind.
• Die mittige Hintergrundbeleuchtung schaltet sich nicht automatisch aus:
- Bewegen Sie den Stick sehr leicht, so daß dieser absolut mittig steht – die
Hintergrundbeleuchtung schaltet sich nach 3-sekündiger Inaktivität aus.
10/12
TECHNISCHER SUPPORT
Sollten Sie mit Ihrem Produkt ein Problem haben, besuchen Sie bitte die Seite http://ts.thrustmaster.com und
klicken Sie auf Technischer Support. Von dort aus können Sie auf verschiedene Hilfen zugreifen (Fragen und
Antworten (FAQ), die neuesten Versionen von Treibern und Software), die Ihnen bei der Lösung Ihres Problems
helfen könnten. Falls das Problem weiterhin besteht, können Sie mit dem technischen Support für Thrustmaster
Produkte in Kontakt treten („Technischer Support“):
Per Email:
Um den technischen Supports per Email in Anspruch nehmen zu können, müssen Sie sich zunächst online
registrieren. Mit den Informationen, die Sie uns so zukommen lassen, können die Mitarbeiter Ihr Problem
schneller lösen. Klicken Sie bitte auf Registrierung links auf der Seite des technischen Supports und folgen Sie
den Anweisungen auf dem Bildschirm. Falls Sie bereits registriert sind, füllen Sie die Textfelder Anwendername
und Paßwort aus und klicken dann auf Login.
Per Telefon:
Deutschland
08000 00 1445
Kostenlos
Österreich
0810 10 1809
Zum Preis eines
Ortsgesprächs
Montag bis Freitag 13:00 bis 17:00 Uhr und 18:00 bis 22:00 Uhr
Samstag 9:00 bis 13:00 Uhr und 14:00 bis 20:00 Uhr
Sonntag 10:00 bis 13:00 Uhr und 14:00 bis 17:00 Uhr
Montag bis Freitag 13:00 bis 17:00 Uhr und 18:00 bis 22:00 Uhr
Samstag 9:00 bis 13:00 Uhr und 14:00 bis 20:00 Uhr
Sonntag 10:00 bis 13:00 Uhr und 14:00 bis 17:00 Uhr
Schweiz
0842 000 022
Zum Preis eines
Ortsgesprächs
Montag bis Freitag 13:00 bis 17:00 Uhr und 18:00 bis 22:00 Uhr
Samstag 9:00 bis 13:00 Uhr und 14:00 bis 20:00 Uhr
Sonntag 10:00 bis 13:00 Uhr und 14:00 bis 17:00 Uhr
GEWÄHRLEISTUNGSINFORMATION
Guillemot Corporation S.A. („Guillemot“) bietet dem Kunden ab dem Kaufdatum weltweit eine 2-jährige Garantie
auf Materialschäden und Herstellungsmängel. Sollte das Produkt dennoch während dieser zwei Jahre Schäden
oder Mängel aufweisen, kontaktieren Sie bitte unverzüglich den technischen Support, der Ihnen die weitere
Verfahrensweise mitteilen wird. Im Falle eines technischen Defektes können Sie da Produkt dort, wo Sie es
gekauft haben, zurückgeben (oder an die vom Technischen Support angegebene Adresse).
Im Rahmen dieser Garantie wird das defekte Produkt nach Ermessen des technischen Supports entweder
repariert oder ersetzt. Überall wo es geltendes Recht zuläßt, wird die Haftung von Guillemot und seinen
Niederlassungen für das jeweilige Produkt(einschließlich für indirekte Beschädigungen), nur soweit übernommen,
als das eine Reparatur durchgeführt wird oder Ersatz geleistet wird. Die Rechte des Käufers gemäß dem
geltenden Recht des jeweiligen Landes werden durch diese Garantie nicht beeinflußt.
Diese Garantie tritt unter folgenden Umständen nicht in Kraft:
(1) Falls am Produkt etwas verändert wurde oder es geöffnet wurde, ein Schaden durch unangebrachte Nutzung,
Fahrlässigkeit, einen Unfall, Verschleiß oder irgendeinen anderen Grund verursacht wurde, der nicht im
Zusammenhang mit einem Materialdefekt oder Herstellungsmangel aufgetreten ist.
(2) Im Falle der Nichtbeachtung der durch den technischen Support erteilten Anweisungen.
(3) Software, die nicht von Guillemot herausgegeben wurde, unterliegt der speziellen Garantie des jeweiligen
Softwareherstellers.
11/12
COPYRIGHT
© 2008 Guillemot Corporation S.A. Alle Rechte vorbehalten. Thrustmaster® ist ein
eingetragenes Warenzeichen der Guillemot Corporation S.A. Microsoft® Windows®, XP und
Vista sind eingetragene Warenzeichen der Microsoft Corporation in den Vereinigten Staaten
von Amerika und/oder anderen Ländern Alle anderen Warenzeichen und Markennamen
werden hiermit anerkannt und sind Eigentum ihrer jeweiligen Eigentümer. Fotos und
Abbildungen nicht bindend. Inhalt, Design und Eigenschaften des Produkts können ohne
Bekanntmachung geändert werden und variieren von Land zu Land.
Hergestellt in China.
HINWEISE ZUM UMWELTSCHUTZ
Dieses Produkt darf am Ende seiner Lebensdauer nicht über den
normalen Haushaltsabfall entsorgt werden, sondern muss an
einem Sammelpunkt für das Recycling von elektrischen und
elektronischen Geräten abgegeben werden.
Das Symbol auf dem Produkt, der Gebrauchsanleitung oder der
Verpackung weist darauf hin.
Die
Werkstoffe
sind
gemäß
ihrer
Kennzeichnung
wiederverwertbar. Mit der Wiederverwendung, der stofflichen
Verwertung oder anderen Formen der Verwertung von Altgeräten
leisten Sie einen wichtigen Beitrag zum Schutze unserer Umwelt.
Bitte erfragen Sie bei der Gemeindeverwaltung die zuständige
Entsorgungsstelle.
FAQs, Tips und Treiber erhalten Sie auf www.thrustmaster.com
12/12
Compatibel met: pc
Handleiding
TECHNISCHE KENMERKEN
1. Digitale trigger
2. Multidirectionele "Point of View"-hat-
7. Draaischroef voor handsteun, instelbaar
switch
3. Afdekplaatje bij rechtshandig gebruik
4. Roerbediening via draaihendel met
handsteun
5. Throttle
6. 15 actieknoppen
8. Duimsteun bij rechtshandig gebruik
9. USB-connector (voor pc)
10. Duimsteun bij linkshandig gebruik
11. Afdekplaatje bij linkshandig gebruik
12. Schakelaar voor rechtshandig of
voor rechts- of linkshandig gebruik
linkshandig gebruik van de knoppen
1/12
DE DIVERSE FUNCTIES VAN DE JOYSTICK
EXCLUSIEVE PRECISIETECHNOLOGIE:
"H.E.A.R.T™: HallEffect AccuRate Technology"
De T-16000M is uitgerust met technologie die garant staat voor ongeëvenaarde
nauwkeurigheid:
- Een magnetische 3D-sensor (Hall Effect) op de stick, met een resolutie van meer dan 268
miljoen waarden voor de X- en Y-as (16384 x 16384 waarden), terwijl de huidige
concurrerende systemen (zelfs de meest geavanceerde) slechts een resolutie bieden van
circa 1 miljoen waarden (1024 x 1024 waarden).
- Een magneet: geen wrijving, grenzeloos nauwkeurig en ongelooflijk snel reagerend.
- Spiraalveer op stick (2,8 mm): voor stevige, lineaire en vloeiende weerstand.
ACHTERGRONDVERLICHTING
Voor extra nauwkeurigheid hebben we er voor gezorgd dat er geen dode zone is als de stick
van de T-16000M in de middenstand staat. Om dit te benadrukken, krijgt het
middengedeelte een groene achtergrondverlichting zodra de stick wordt bewogen (hoe
minimaal die beweging ook is). De achtergrondverlichting wordt uitgeschakeld na 3
seconden inactiviteit, wanneer de stick is teruggebracht naar de middenstand.
THROTTLE
De joystick heeft een throttle (5) die uitermate geschikt is om gas te geven in games.
ROERFUNCTIE
De joystick heeft een roerfunctie (4) die correspondeert met de pedalen in een vliegtuig
waarmee het roer wordt bediend om het vliegtuig om de verticale as te kantelen (een bocht
naar links of rechts maken).
Deze roerfunctie is beschikbaar op de joystick door de stick naar links of rechts te draaien.
MULTIDIRECTIONELE POINT-OF-VIEW-HAT-SWITCH
De joystick heeft een "Point Of View"-hat-switch (2) waarmee u in één keer een overzicht
krijgt van alles wat zich rondom het vliegtuig afspeelt (als deze functie is ingeschakeld in de
game). Als u deze functie wilt gebruiken, hoeft u alleen maar in het setup-menu van de
game de verschillende views (links, rechts, naar voren, naar achteren) op de richtingen van
de Point-of-View-hat-switch te programmeren.
De "Point Of View"-hat-switch kan desgewenst ook voor andere functies worden gebruikt,
bijvoorbeeld om te schieten.
2/12
SYSTEEM VOOR LINKS- EN RECHTSHANDIG GEBRUIK
De T-16000M is instelbaar voor links- of rechtshandig gebruik.
Er kunnen 3 elementen worden ingesteld: de configuratie van de knoppen op de voet, de
handsteun en de duimsteun.
CONFIGURATIE VOOR RECHTSHANDIG
GEBRUIK
CONFIGURATIE VOOR LINKSHANDIG
GEBRUIK
3/12
CONFIGURATIE VAN DE KNOPPEN VOOR RECHTSHANDIG
GEBRUIK
Als u de positie van de 12 knoppen op de voet wilt omzetten voor rechtshandig gebruik, stelt
u de schakelaar (12) onder de voet van de joystick in op "RIGHT HANDED":
CONFIGURATIE VOOR RECHTSHANDIG GEBRUIK
4/12
CONFIGURATIE VAN DE KNOPPEN VOOR LINKSHANDIG GEBRUIK
Als u de positie van de 12 knoppen op de voet wilt omzetten voor linkshandig gebruik, stelt
u de schakelaar (12) onder de voet van de joystick in op "LEFT HANDED":
CONFIGURATIE VOOR LINKSHANDIG GEBRUIK
5/12
DE HANDSTEUN INSTELLEN VOOR RECHTS- OF LINKSHANDIG
GEBRUIK
Standaard is de handsteun geconfigureerd voor RECHTSHANDIG GEBRUIK.
Ga als volgt te werk om de steun te configureren voor LINKSHANDIG GEBRUIK:
A) Draai met een kleine schroevendraaier voorzichtig de kleine draaischroef voor de
handsteun (7) los (zonder de schroef te verwijderen), die zich aan de linkerzijde van de
handsteun bevindt.
B) Draai de handsteun 180°.
C) Draai de schroef op de handsteun (die zich nu aan de rechterzijde bevindt) weer
helemaal vast.
Opmerking: voer deze procedure in omgekeerde volgorde uit om de steun weer in te stellen
op rechtshandig gebruik.
6/12
DE DUIMSTEUN INSTELLEN VOOR RECHTS- OF LINKSHANDIG
GEBRUIK
Standaard is de duimsteun van de stick geconfigureerd voor RECHTSHANDIG GEBRUIK.
Ga als volgt te werk om de steun te configureren voor LINKSHANDIG GEBRUIK:
A) Verwijder het afdekplaatje voor rechtshandig gebruik (3) aan de rechterzijde van de stick.
B) Schroef met een kleine schroevendraaier de lange schroef die nu zichtbaar is (aan de
rechterzijde van de stick) helemaal los en verwijder deze schroef.
C) Verwijder de duimsteun voor rechtshandig gebruik (8) aan de linkerzijde van de stick.
7/12
D) Plaats de duimsteun voor linkshandig gebruik (10) (los meegeleverd bij de joystick) aan
de rechterzijde van de stick.
E) Plaats de lange schroef in de opening aan de linkerzijde van de joystick en draai de
schroef helemaal vast om de duimsteun voor linkshandig gebruik te bevestigen.
F) Plaats het afdekplaatje voor linkshandig gebruik (11) (los meegeleverd bij de joystick) aan
de linkerzijde van de stick.
Opmerking: voer deze procedure in omgekeerde volgorde uit om de steun weer in te stellen
op rechtshandig gebruik.
8/12
PC
INSTALLATIE OP DE PC
1. Sluit de USB-connector (9) aan op een van de USB-poorten van de computer.
Windows XP of Vista herkent het nieuwe apparaat automatisch.
2. De drivers worden automatisch geïnstalleerd.
Volg de aanwijzingen op het scherm om de installatie te voltooien.
3. Klik op Start/Configuratiescherm en dubbelklik op Spelbesturingen.
In het dialoogvenster Spelbesturingen dat nu wordt geopend, ziet u de naam van de
joystick met als status OK.
4. Klik op Eigenschappen in het Configuratiescherm om de joystick te testen en te
configureren.
Nu kan er gespeeld worden!
BELANGRIJKE OPMERKING
Bij het aansluiten van de joystick: plaats de stick en het roer altijd in de middenstand en
beweeg de stick en het roer niet (om kalibratieproblemen te voorkomen).
9/12
PROBLEMEN OPLOSSEN EN WAARSCHUWINGEN
• Mijn joystick werkt niet goed of lijkt niet goed gekalibreerd te zijn:
- Zet de computer uit en koppel de joystick los, zet vervolgens de computer weer aan en
sluit de joystick opnieuw aan en start de game opnieuw.
- Bij het aansluiten van de joystick: plaats de stick en het roer altijd in de middenstand en
beweeg de stick en het roer niet (om kalibratieproblemen te voorkomen).
• Ik kan mijn joystick niet configureren:
- Ga in de game naar het menu met opties voor de controller, gamepad of joystick. Selecteer
de gewenste configuratie of stel alle controller-opties volledig opnieuw in.
Raadpleeg de handleiding of de online help van de game voor meer informatie.
• Mijn joystick reageert te gevoelig of reageert niet gevoelig genoeg:
- De joystick wordt automatisch gekalibreerd wanneer u deze een paar maal in de richting
van de verschillende assen hebt bewogen.
- Ga in de game naar het menu met opties voor de controller, gamepad of joystick. Pas de
gevoeligheid en dode zones van de joystick aan (indien deze opties beschikbaar zijn).
• De achtergrondverlichting in het midden van de joystick gaat niet automatisch uit:
- Beweeg de stick een heel klein beetje zodat deze precies in het midden staat. De
achtergrondverlichting wordt dan uitgeschakeld na 3 seconden inactiviteit.
10/12
TECHNISCHE ONDERSTEUNING
Mocht u problemen ondervinden met dit product, ga dan naar http://ts.thrustmaster.com en klik op
Technical Support. U hebt daar toegang tot verschillende onderwerpen die u helpen bij het vinden van
oplossingen, zoals de FAQ (veelgestelde vragen) en de meest recente drivers en software. Als het
probleem op die manier niet kan worden verholpen, kunt u contact opnemen met de Thrustmaster
product technical support service (Technical Support).
Per e-mail:
Voordat u gebruik kunt maken van technische ondersteuning per e-mail dient u zich eerst online te
registreren. Met de door u verstrekte informatie kan uw probleem sneller en beter worden opgelost. Klik
op Registration aan de linkerzijde van de pagina Technical Support en volg de aanwijzingen op het
scherm. Indien u reeds geregistreerd bent, vult u de velden Username en Password in en klikt u op
Login.
Per telefoon:
078 16 60 56
Belgïe
Nederland
Van maandag t/m vrijdag van 18:00 tot 22:00
Kosten van interlokaal
gesprek
0900 0400 118
Kosten van lokaal
gesprek
Van maandag t/m vrijdag van 18:00 tot 22:00
* Tijdelijk is de Nederlandstalige technische dienst enkel bereikbaar van 18u00 tot 22u00. Tijdens de
andere uren kunt U steeds terecht voor Engels-, Duits-, of Franstalige support.
INFORMATIE MET BETREKKING TOT DE GARANTIE
Wereldwijd garandeert Guillemot Corporation S.A. (“Guillemot”) de koper dat dit Thrustmaster-product
gedurende een periode van twee (2) jaar vanaf de oorspronkelijke aankoopdatum vrij zal zijn van
materiaal- en fabricagefouten. Indien u in de garantieperiode een defect meent te constateren aan dit
product, neem dan onmiddellijk contact op met de Technical Support, die u zal informeren over de te
volgen procedure. Als het defect wordt bevestigd, dient het product te worden geretourneerd naar de
plaats van aankoop (of een andere locatie die wordt opgegeven door Technical Support).
Binnen het gestelde van deze garantie wordt het defecte product van de consument gerepareerd of
vervangen, zulks ter beoordeling van Technical Support. Indien toegestaan door van de geldende
wetgeving, beperkt de volledige aansprakelijkheid van Guillemot en haar dochterondernemingen
(inclusief de aansprakelijkheid voor indirecte schade) zich tot het repareren of vervangen van het
Thrustmaster product. De wettelijke rechten van de klant volgens de wetgeving die van toepassing is op
de verkoop van consumentproducten, worden op generlei wijze beperkt door deze garantie.
Deze garantie is niet van kracht: (1) indien het product aangepast, geopend of gewijzigd is, of
beschadigd is ten gevolge van oneigenlijk of onvoorzichtig gebruik, verwaarlozing, een ongeluk, normale
slijtage, of enige andere oorzaak die niet gerelateerd is aan een materiaal- of fabricagefout; (2) indien u
zich niet houdt aan de instructies zoals verstrekt door Technical Support; of (3) op software die niet is
geleverd door Guillemot en daardoor onder de specifieke garantie valt zoals verstrekt door degene die
deze software levert.
11/12
COPYRIGHT
© 2008 Guillemot Corporation S.A. Alle rechten voorbehouden. Thrustmaster® is een geregistreerd
handelsmerk van Guillemot Corporation S.A. Windows®, XP en Vista zijn geregistreerde handelsmerken
van Microsoft Corporation in de Verenigde Staten en/of andere landen. Alle overige handelsmerken en
merknamen worden hierbij erkend en zijn het eigendom van de respectieve eigenaren. Afbeeldingen zijn
niet bindend. Inhoud, ontwerp en specificaties kunnen zonder kennisgeving vooraf worden gewijzigd en
kunnen per land verschillen. Geproduceerd in China.
AANBEVELINGEN VOOR DE BESCHERMING VAN HET MILIEU
Gooi dit product na het einde van de levensduur niet weg met het normale afval,
maar breng het naar het door uw gemeente aangewezen inzamelpunt voor
elektrische en/of computerapparatuur.
Ter herinnering is hiertoe op het product, de gebruikshandleiding of de
verpakking een symbool aangebracht.
De meeste materialen kunnen worden gerecycled. Dankzij recycling en andere
methodes voor het verwerken van afgedankte elektrische en elektronische
apparaten kunt u een belangrijke bijdrage leveren aan de bescherming van het
milieu.
Neem contact op met uw gemeente voor informatie over een inzamelpunt
bij u in de buurt.
Veelgestelde vragen, tips en drivers zijn te vinden op
www.thrustmaster.com
12/12
PC compatibile
Manuale d’uso
CARATTERISTICHE TECNICHE
1. Grilletto digitale
2. Hat switch "Angolo di visuale"
multidirezionale
3. Copri-vite per destrimani
4. Controllo del timone tramite
impugnatura rotante con zona di
riposo per la mano
5. Manetta
6. 15 pulsanti azione
7. Vite per la rotazione della zona di riposo
per la mano, con posizioni per destrimani
o mancini
8. Appoggia-pollice per destrimani
9. Connettore PC USB
10. Appoggia-pollice per mancini
11. Copri-vite per mancini
12. Selettore per pulsanti in configurazione
utente destrimane o mancino
1/12
CONOSCERE IL TUO JOYSTICK
ESCLUSIVA TECNOLOGIA DI PRECISIONE:
"H.E.A.R.T™: HallEffect AccuRate Technology"
Il tuo joystick T-16000M è dotato di una tecnologia in grado di garantire un livello di
precisione ineguagliabile nel mondo dei joystick per giocare; in particolare:
- Un sensore 3D magnetico (Hall Effect) garantisce una risoluzione da oltre 268 milioni da
valori per gli assi X e Y (16384 x 16384 valori), mentre gli attuali sistemi concorrenti (perfino
i sistemi high-end) offrono risoluzioni prossime ad un solo milione di valori (1024 x 1024
valori).
- Un magnete: niente attrito, per una precisione senza limiti e una risposta incredibile.
- Molla elicoidale (2,8mm) nella leva: per una tensione decisa, lineare e ultra-fluida.
RETROILLUMINAZIONE
Per una precisione ancor più grande, nella posizione centrale della leva del T-16000M non
sono presenti zone morte. Per rappresentare questa caratteristica, mentre muovi la leva
(anche leggermente), il centro viene retroilluminato in verde; la retroilluminazione si spegne
dopo 3 secondi di inattività, una volta che la leva è tornata nella posizione centrale.
MANETTA
Il tuo joystick è dotato di manetta (5), tramite la quale potrai facilmente controllare la tua
accelerazione nei giochi.
FUNZIONE TIMONE
Il tuo joystick è dotato di una funzione timone (4), che in un aeroplano corrisponde ai pedali
utilizzati dal pilota per muovere il timone, in modo tale che il velivolo ruoti attorno al proprio
asse verticale (l’aereo gira verso destra o verso sinistra).
Con il tuo joystick, questa funzione timone è attivabile ruotando la leva verso destra o
sinistra.
HAT SWITCH "ANGOLO DI VISUALE" MULTIDIREZIONALE
Il tuo joystick è dotato di un hat switch "Angolo di visuale" (2), che, come il nome stesso
indica, ti consente di vedere istantaneamente ciò che sta accadendo attorno al tuo
aeroplano (nei giochi in cui è attiva tale funzione). Per utilizzare questa funzione, non devi
far altro che accedere al menu di configurazione del tuo gioco ed associare le varie visuali
(visuale posteriore, visuale destra, visuale sinistra e perfino le visuali esterne) alle direzioni
dell’hat switch "Angolo di visuale".
Se lo desideri, puoi destinare l’hat switch "Angolo di visuale" ad altri usi (sparo, ecc.).
2/12
SISTEMA AMBIDESTRO
Il tuo joystick T-16000M ha il vantaggio di essere totalmente ambidestro: si adatta
perfettamente a tutti i giocatori, sia destrimani che mancini.
Per permettere questa possibilità, vi sono 3 elementi configurabili: i pulsanti presenti nella
base, la zona di riposo per la mano e l’appoggia-pollice.
CONFIGURAZIONE DESTRIMANE
CONFIGURAZIONE MANCINO
3/12
CONFIGURAZIONE DEI PULSANTI IN MODALITÀ DESTRIMANE
Per impostare la configurazione destrimane delle posizioni dei 12 pulsanti della base, sposta
l’apposito switch (12), posto sotto la base del joystick, su "RIGHT HANDED":
CONFIGURAZIONE MODALITÀ DESTRIMANE
4/12
CONFIGURAZIONE DEI PULSANTI IN MODALITÀ MANCINO
Per impostare la configurazione destrimane delle posizioni dei 12 pulsanti della base,
sposta l’apposito switch (12), posto sotto la base del joystick, su "LEFT HANDED":
CONFIGURAZIONE MODALITÀ MANCINO
5/12
IMPOSTAZIONE DELLA ZONA DI RIPOSO PER LA MANO NELLA
MODALITÀ DESTRIMANE O MANCINO
Per default, la zona di riposo per la mano è configurata in MODALITÀ DESTRIMANE.
Per spostarla in MODALITÀ MANCINO:
A) Tramite un piccolo cacciavite, allenta accuratamente (senza rimuoverla) la piccola vite di
rotazione della zona di riposo per la mano the (7), presente sulla parte sinistra di tale zona.
B) Ruota di 180°la zona di riposo per la mano.
C) Stringi nuovamente la vite della zona di riposo per la mano (ora presente sulla destra).
Nota: Per ritornare alla modalità destrimane, esegui al contrario la presente procedura.
6/12
REGOLAZIONE DELL’APPOGGIA-POLLICE PER LA MODALITÀ
DESTRIMANE O MANCINO
Per default, l’appoggia-pollice presente sulla leva è posizionato in MODALITÀ
DESTRIMANE.
Per regolarlo in MODALITÀ MANCINO:
A) Rimuovi il copri-vite per destrimani (3) posto sulla parte destra della leva.
B) Utilizzando un piccolo cacciavite, svita completamente e rimuovi la lunga vite divenuta
ora accessibile (presente sulla parte destra della leva).
C) Rimuovi l’appoggia-pollice destro (8) posto sulla parte sinistra della leva.
7/12
D) Colloca l’appoggia-pollice mancino (10) (presente separatamente nella confezione del
joystick) sulla parte sinistra della leva.
E) Inserisci ed avvita completamente la lunga vite nell’apposita apertura presente nella parte
sinistra della leva, in modo tale da fissare in saldamente l’appoggia-pollice mancino.
F) Inserisci il copri-vite mancino (11) (presente separatamente nella confezione del joystick)
nella parte sinistra della leva.
Nota: Carry Per ritornare alla modalità destrimane, esegui al contrario la presente
procedura.
8/12
PC
INSTALLAZIONE SU PC
1. Collega il connettore PC USB (9) ad una porta USB del tuo computer.
Windows XP, o Vista, individuerà automaticamente la nuova periferica.
2. I driver vengono installati automaticamente.
Completa l’installazione seguendo le istruzioni che compaiono sullo schermo.
3. Clicca su Start/Impostazioni/Panello di controllo e fai doppio clic su Periferiche di
gioco.
Nella finestra di dialogo Periferiche di gioco, comparirà il nome del joystick con
associato lo stato di OK.
4. Nel Panello di controllo, clicca su Proprietà per testare e visualizzare tutte le funzioni
del tuo joystick.
Ora sei pronto per giocare!
NOTA IMPORTANTE
Quando colleghi il tuo joystick, per evitare eventuali problemi di calibrazione, colloca la leva
e il timone nelle rispettive posizioni centrali.
9/12
RISOLUZIONE DEI PROBLEMI E AVVISI
• Il mio joystick non funziona correttamente o sembra non essere ben calibrato:
- Spegni il tuo computer and scollega il tuo joystick; quindi, riaccendi il computer, ricollega il
tuo joystick e riavvia il gioco.
- Per non imbatterti in problemi di calibrazione, quando colleghi il tuo joystick, lascia sempre
la leva e il timone nelle rispettive posizioni centrali, evitando di muoverli.
• Non riesco a configurare il mio joystick:
- Nel menu "Opzioni/Controller/Gamepad o Joystick" del tuo gioco: seleziona la
configurazione appropriata, oppure riconfigura completamente le opzioni del controller.
- Per ulteriori informazioni, consulta il manuale d’uso o l’utility di aiuto online del tuo gioco.
• Il mio joystick è troppo sensibile o non sensibile abbastanza:
- Il tuo joystick si calibra automaticamente non appena avrai effettuato alcuni movimenti
lungo i vari assi.
- Nel menu "Opzioni/Controller/Gamepad o Joystick" del tuo gioco: imposta la sensibilità e le
zone morte del tuo joystick (qualora queste opzioni siano disponibili).
• La retroilluminazione del centro del joystick non si spegne automaticamente:
- Muovi di pochissimo la leva fino a che questa non si trovi nella posizione centrale assoluta:
la retroilluminazione si spegnerà dopo 3 secondi di inattività.
10/12
ASSISTENZA TECNICA
Qualora riscontrassi un problema con il tuo prodotto, accedi al sito http://ts.thrustmaster.com e clicca su
Assistenza tecnica. Da qui, potrai accedere a vari servizi ed informazioni (Risposte alle Domande più
Frequenti (FAQ), le più recenti versioni di driver e software) che potrebbero esserti utili per risolvere il tuo
problema. Qualora il problema persistesse, puoi contattare il servizio di assistenza tecnica Thrustmaster
(“Technical Support”):
Tramite e-mail:
Per poter usufruire del servizio di assistenza tecnica tramite e-mail, dovrai prima registrarti online. Le
informazioni che fornirai aiuteranno i nostri esperti a risolvere più rapidamente il tuo problema. Fai clic su
Registrazione nella parte sinistra della pagina di Assistenza Tecnica e segui le istruzioni che
appariranno sullo schermo. Se sei già registrato, riempi i campi Username e Password e clicca quindi
su Login.
Per telefono:
Italia
848999817
costo chiamata locale*
Lun - Ven: 13:00-17:00 e 18:00-22:00
*costo massimo alla riposta de 0.1 Euro
INFORMAZIONI SULLA GARANZIA
Nel mondo, Guillemot Corporation S.A. (“Guillemot”) garantisce al consumatore che questo prodotto
Thrustmaster è privo di difetti nei materiali e nell’assemblaggio per un periodo di due (2) anni dalla prima
data di acquisto. Qualora il prodotto presentasse dei difetti durante tale periodo, contatta
immediatamente il servizio di Assistenza Tecnica, che ti indicherà la procedura da seguire. Se il difetto
viene confermato, il prodotto dovrà essere riconsegnato al luogo di acquisto (o a qualsiasi altra
destinazione indicata dall’assistenza tecnica).
Contestualmente a tale garanzia, il prodotto difettoso potrà essere riparato o sostituito, secondo il parere
del servizio di Assistenza Tecnica. Dove ciò è concesso dalle leggi vigenti, gli obblighi di Guillemot e
delle sue controllate sono limitati alla riparazione o alla sostituzione del prodotto Thrustmaster (compresi
eventuali danni indiretti). I diritti legali del consumatore, stabiliti dalla legge riguardante la vendita di beni
di consumo, non vengono intaccati da tale garanzia.
Questa garanzia non è applicabile se: (1) il prodotto è stato modificato, aperto, alterato o ha subito danni
derivati da un uso improprio o non corretto, da negligenza, da un incidente, dalla normale usura o da
qualsiasi altra causa non riconducibile a difetti nei materiali o nell’assemblaggio; (2) non vengono
rispettate le istruzioni fornite dal servizio di Assistenza Tecnica; (3) si stia utilizzando un software non
pubblicato da Guillemot, ossia un software soggetto ad una specifica garanzia offerta dal suo
distributore.
COPYRIGHT
© 2008 Guillemot Corporation S.A. Tutti i diritti riservati. Thrustmaster® è un marchio registrato di
proprietà di Guillemot Corporation S.A. Windows®, XP e Vista sono marchi registrati di proprietà di
Microsoft Corporation per gli Stati Uniti e/o altri Paesi. Tutti gli altri marchi e nomi commerciali vengono
qui citati previa autorizzazione ed appartengono ai legittimi proprietari. Illustrazioni escluse. I contenuti, i
design e le caratteristiche possono essere oggetto di modifiche senza preavviso e possono variare da un
Paese all’altro.
Fabbricato in Cina.
11/12
RACCOMANDAZIONI PER LA SALVAGUARDIA DELL’AMBIENTE
Al termine della sua vita operativa, questo prodotto non dovrebbe essere gettato
assieme ai comuni rifiuti, ma dovrebbe essere portato ad un apposito punto di raccolta
destinato al riciclaggio del Materiale Elettrico ed Elettronico.
Ciò è confermato dal simbolo riportato sul prodotto, nel manuale d’uso o sulla
confezione.
A seconda delle proprie caratteristiche, i materiali potrebbero essere riciclati. Tramite il
riciclaggio ed altre forme di trattamento del Materiale Elettrico ed Elettronico, è
possibile fornire un importante contributo per la salvaguardia dell’ambiente.
Per conoscere i punti di raccolta più vicini a te, contatta le autorità locali
competenti.
FAQ, consigli e driver disponibili sul sito
www.thrustmaster.com
12/12
Compatible: PC
Manual del usuario
CARACTERÍSTICAS TÉCNICAS
1. Gatillo digital
2. Hat switch multidireccional "Punto de
7. Tornillo de rotación del reposamanos,
vista"
3. Tapa del tornillo en posición diestra
4. Control de timón mediante mango
giratorio con reposamanos
5. Mando de potencia
6. 15 botones de acción
8. Reposapulgares para diestros
9. Conector USB para PC
10. Reposapulgares para zurdos
11. Tapa del tornillo en posición zurda
12. Interruptor selector de botones para
con posiciones para diestros y zurdos
diestros o zurdos
1/12
INTRODUCCIÓN A TU JOYSTICK
TECNOLOGÍA DE PRECISIÓN EXCLUSIVA:
"H.E.A.R.T™: HallEffect AccuRate Technology"
Tu joystick T-16000M incorpora tecnología que le ofrece un nivel de precisión actualmente
inigualada en el mundo de los joysticks de juego, que incluye:
- Un sensor magnético 3D (Hall Effect) en la palanca, con una resolución de más de 268
millones de valores en los ejes X e Y (16384 x 16384 valores), mientras que los sistemas
actuales de la competencia (incluso sistemas de alto nivel) ofrecen resoluciones próximas a
sólo un millón de valores (1024 x 1024 valores).
- Un imán: sin fricción, para lograr una precisión ilimitada y una receptividad increíble.
- Muelle de bobina en la palanca (2,8 mm): para lograr una tensión firme, lineal y muy
homogénea.
RETROILUMINACIÓN
Para lograr una precisión aún mayor, no hay zonas muertas en la posición central de la
palanca del T-16000M. Para simbolizarlo, el centro se retroilumina en verde en cuanto se
mueve la palanca (incluso de manera muy ligera); la retroiluminación se apaga después de
3 segundos de inactividad, una vez que has devuelto la palanca al punto muerto del centro.
MANDO DE POTENCIA
Tu joystick incorpora un mando de potencia (5), que puedes utilizar para controlar
fácilmente la aceleración en los juegos.
FUNCIÓN DE TIMÓN
Tu joystick incorpora una función de timón (4), que en un avión corresponde con los pedales
que el piloto utiliza para mover el timón, que permiten que el avión pivote sobre su eje
vertical (haciendo que el avión gire hacia la izquierda o hacia la derecha).
Esta función de timón está disponible en tu joystick rotando la palanca a la izquierda o a la
derecha.
HAT SWITCH MULTIDIRECCIONAL "PUNTO DE VISTA"
Tu joystick incorpora un hat switch "Punto de vista" (2) que, como su nombre indica, te
permite ver instantáneamente todo lo que pasa alrededor de tu avión (en los juegos que
dispongan de esta función). Para utilizar esta función, dirígete al menú de configuración del
juego y programa las diferentes vistas (vista trasera, vista a la izquierda, vista a la derecha y
también las vistas externas) en las direcciones del hat switch "Punto de vista".
Si lo deseas, también puedes reservar el hat switch "Punto de vista" para otros usos
(disparar, etc.).
2/12
SISTEMA AMBIDEXTRO
Tu joystick T-16000M tiene la ventaja de ser totalmente ambidextro, lo que le permite
adaptarse a todos los jugadores, tanto si son diestros como zurdos.
Para ello, se pueden ajustar 3 elementos: la configuración de los botones de la base, el
reposamanos y el reposapulgares.
CONFIGURACIÓN DIESTRA
CONFIGURACIÓN ZURDA
3/12
CONFIGURACIÓN DE BOTONES EN MODO DIESTRO
Para fijar las posiciones de los 12 botones situados en la base en el modo diestro, pon el
interruptor selector (12) situado debajo de la base del joystick en "RIGHT HANDED":
CONFIGURACIÓN DEL MODO DIESTRO
4/12
CONFIGURACIÓN DE BOTONES EN MODO ZURDO
Para fijar las posiciones de los 12 botones situados en la base en el modo zurdo, pon el
interruptor selector (12) situado debajo de la base del joystick en "LEFT HANDED":
CONFIGURACIÓN DEL MODO ZURDO
5/12
AJUSTE DEL REPOSAMANOS EN MODO DIESTRO O ZURDO
De forma predeterminada, el reposamanos está configurado en MODO DIESTRO.
Para ajustarlo a MODO ZURDO:
A) Utilizando un destornillador pequeño, afloja con cuidado (sin llegar a quitarlo) el pequeño
tornillo de rotación del reposamanos (7), situado en la parte izquierda del reposamanos.
B) Gira el reposamanos 180°.
C) Vuelve a apretar totalmente el tornillo del reposamanos (ahora situado a la derecha).
Nota: Realiza este procedimiento a la inversa para volver al modo diestro.
6/12
AJUSTE DEL REPOSAPULGARES EN MODO DIESTRO O ZURDO
De forma predeterminada, el reposapulgares de la palanca está configurado en MODO
DIESTRO.
Para ajustarlo a MODO ZURDO:
A) Quita la tapa del tornillo en posición diestra (3) situada en la parte derecha de la palanca.
B) Utilizando un destornillador pequeño, desatornilla y quita por completo el tornillo largo
ahora accesible (en la parte derecha de la palanca).
C) Quita la tapa del tornillo en posición diestra (8) situada en la parte izquierda de la
palanca.
7/12
D) Coloca el reposapulgares para zurdos (10) (incluido por separado en la caja del joystick)
en la parte derecha de la palanca.
E) Coloca el tornillo largo en la abertura de la parte izquierda de la palanca y aprieta
totalmente el tornillo para asegurar el reposapulgares para zurdos en su sitio.
F) Coloca la tapa del tornillo en posición zurda (11) (incluida por separado en la caja del
joystick) en la parte izquierda de la palanca.
Nota: Realiza este procedimiento a la inversa para volver al modo diestro.
8/12
PC
INSTALACIÓN EN PC
1. Enchufa el conector USB para PC (9) en uno de los puertos USB de tu ordenador.
Windows XP o Vista detectarán automáticamente el nuevo dispositivo.
2. Los controladores se instalan automáticamente.
Sigue las instrucciones en pantalla para terminar la instalación.
3. Haz clic en Inicio/Configuración/Panel de control y haz doble clic en Dispositivos de
juego.
El cuadro de diálogo Dispositivos de juego muestra el nombre del joystick con el
estado OK.
4. En el Panel de control, haz clic en Propiedades para probar y ver todas las funciones
del joystick.
¡Ya estás preparado para jugar!
NOTA IMPORTANTE
Al conectar el joystick: coloca siempre la palanca y el timón en sus posiciones centrales, y
no los muevas (para evitar problemas de calibración).
9/12
RESOLUCIÓN DE PROBLEMAS Y ADVERTENCIAS
• Mi joystick no funciona correctamente o parece no estar bien calibrado:
- Apaga el ordenador y desconecta el joystick; luego, vuelve a encender el ordenador,
vuelve a conectar el joystick y reinicia el juego.
- Al conectar el joystick: coloca siempre la palanca y el timón en sus posiciones centrales, y
no los muevas (para evitar problemas de calibración).
• No puedo configurar mi joystick:
- En el menú "Opciones/Mando/Gamepad o Joystick" del juego: selecciona la configuración
apropiada, o reconfigura completamente las opciones del mando.
- Consulta el manual del usuario o la ayuda en línea del juego para obtener más
información.
• Mi joystick es demasiado sensible o no lo bastante sensible:
- Tu joystick se autocalibra de forma independiente una vez que has realizado algunos
movimientos en los distintos ejes.
- En el menú "Opciones/Mando/Gamepad o Joystick" del juego: ajusta la sensibilidad y las
zonas muertas del joystick (si esas opciones están disponibles).
• La retroiluminación central del joystick no se apaga automáticamente:
- Mueve la palanca muy ligeramente para que quede en su valor central absoluto; la
retroiluminación se apagará después de 3 segundos de inactividad.
10/12
SOPORTE TÉCNICO
Si encuentras un problema con tu producto, visita http://ts.thrustmaster.com y haz clic en Technical
Support. Desde allí podrás acceder a distintas utilidades (preguntas frecuentes (Frequently Asked
Questions, FAQ), las últimas versiones de controladores y software) que pueden ayudarte a resolver tu
problema. Si el problema persiste, puedes contactar con el servicio de soporte técnico de los productos
de Thrustmaster (“Soporte Técnico”):
Por correo electrónico:
Para utilizar el soporte técnico por correo electrónico, primero debes registrarte online. La información
que proporciones ayudará a los agentes a resolver más rápidamente tu problema. Haz clic en
Registration en la parte izquierda de la página de Soporte técnico y sigue las instrucciones en pantalla.
Si ya te has registrado, rellena los campos Username y Password y después haz clic en Login.
Por teléfono:
España
901988060
Precio de una llamada telefónica local
de lunes a viernes
de 13:00 a 17:00 y de 18:00 a 22:00
INFORMACIÓN DE GARANTÍA
En todo el mundo, Guillemot Corporation S.A. (“Guillemot”) garantiza al consumidor que este producto de
Thrustmaster estará libre de defectos materiales y fallos de fabricación por un periodo de dos (2) años a
partir de la fecha de compra original. Si el producto pareciera estar defectuoso durante el periodo de
garantía, contacte inmediatamente con el Soporte Técnico, que le indicará el procedimiento a seguir. Si
el defecto se confirma, el producto debe devolverse a su lugar de compra (o a cualquier otro lugar
indicado por el Soporte Técnico).
Dentro del contexto de esta garantía, el producto defectuoso del consumidor será reparado o
reemplazado, a elección del Soporte Técnico. En los casos que lo autorice la ley aplicable, toda la
responsabilidad de Guillemot y de sus filiales (incluyendo sobre daños indirectos) está limitada a la
reparación o sustitución del producto de Thrustmaster. Los derechos legales del consumidor con
respecto a la legislación aplicable a la venta de bienes de consumo no se ven afectados por esta
garantía.
Esta garantía no se aplicará: (1) si el producto ha sido modificado, abierto, alterado, o ha sufrido daños
como resultado de una utilización inapropiada u ofensiva, negligencia, accidente, desgaste normal, o
cualquier otra causa no relacionada con un defecto material o fallo de fabricación; (2) en caso de no
cumplimiento de las instrucciones proporcionadas por el Soporte Técnico; (3) a software no publicado
por Guillemot, o sea, a software que está sujeto a una garantía específica proporcionada por su
fabricante.
11/12
COPYRIGHT
© 2008 Guillemot Corporation S.A. Todos los derechos reservados. Thrustmaster® es una marca
comercial registrada de Guillemot Corporation S.A. Windows®, XP y Vista son marcas comerciales
registradas de Microsoft Corporation en Estados Unidos y/o en otros países. Todas las demás marcas
comerciales y nombres de marca se reconocen aquí y son propiedad de sus respectivos dueños.
Ilustraciones no definitivas. Los contenidos, diseños y especificaciones están sujetos a cambios sin previo
aviso y pueden variar de un país a otro. Fabricado en China.
RECOMENDACIÓN DE PROTECCIÓN AMBIENTAL
Al terminar su vida útil, este producto no debe tirarse en un contenedor de
basuras estándar, sino que debe dejarse en un punto de recogida de
desechos eléctricos y equipamiento electrónico para ser reciclado.
Esto viene confirmado por el símbolo que se encuentra en el producto,
manual del usuario o embalaje.
Dependiendo de sus características, los materiales pueden reciclarse.
Mediante el reciclaje y otras formas de procesamiento de los desechos
eléctricos y el equipamiento electrónico puedes contribuir de forma
significativa a ayudar a proteger el medio ambiente.
Contacta con las autoridades locales para más información sobre el
punto de recogida más cercano.
FAQ, consejos y controladores disponibles en
www.thrustmaster.com
12/12
Compatível: PC
Manual do Utilizador
CARACTERÍSTICAS TÉCNICAS
1. Gatilho digital
2. Hat switch multidireccional de “ponto
7. Parafuso de rotação do descanso, com
de vista”
3. Tampa direita do parafuso
4. Leme de direcção controlado via
rotação da coluna com descanso
5. Manete
6. 15 botões de acção
8. Descanso para o polegar direito
9. Conector PC USB
10. Descanso para o polegar esquerdo
11. Tampa esquerda do parafuso
12. Selector dos botões para a posição
posições à esquerda ou à direita
direita ou esquerda
1/12
CONHEÇA O SEU JOYSTICK
TECNOLOGIA DE PRECISÃO EXCLUSIVA:
“H.E.A.R.T™: Hall Effect AccuRate Technology”
A tecnologia integrada no seu joystick T-16000M confere-lhe um nível de precisão
presentemente sem igual no mundo dos joysticks para jogos, incluindo:
- Sensor magnético 3D (Hall Effect) na coluna, com uma resolução superior a 268 milhões
nos eixos X e Y (valores de 16.384 x 16.384), ao passo que os sistemas rivais existentes
(inclusive os de topo de gama) oferecem resoluções que rondam apenas valores de um
milhão (1024 x 1024).
- Íman: sem fricção, para uma precisão ilimitada e uma capacidade de resposta incrível.
- Mola helicoidal na coluna (2,8 mm de diâmetro): tensão firme, linear e ultrafluida.
RETROILUMINAÇÃO
A fim de aumentar ainda mais a precisão, não há uma zona morta na posição central da
coluna do T-16000M. Simbolicamente, o centro fica retroiluminado a verde assim que move
a coluna (ainda que ligeiramente); a retroiluminação apaga-se ao fim de 3 segundos de
inactividade, depois de a coluna regressar ao centro.
MANETE
O seu joystick possui uma manete (5), que pode usar para controlar facilmente a aceleração
nos jogos.
FUNÇÃO DE LEME DE DIRECÇÃO
O joystick dispõe de uma função de leme de direcção (4), que numa aeronave corresponde
aos pedais utilizados pelo piloto para mover o leme de direcção, permitindo assim que
aquela rode no seu eixo vertical (e, por conseguinte, vire à esquerda ou à direita).
Esta função está disponível no joystick via rotação da coluna para a esquerda ou direita.
HAT SWITCH MULTIDIRECCIONAL DE “PONTO DE VISTA”
O seu joystick possui um hat switch de “ponto de vista” (2), que, tal como o nome indica,
permite-lhe ver imediatamente o que se passa à volta da aeronave (nos jogos que suportam
esta funcionalidade). Para tal, basta aceder ao menu de configuração do jogo e programar
as diferentes vistas (retaguarda, esquerda, direita e também as vistas externas) nas
direcções do hat switch de “ponto de vista”.
Se desejar, também pode usar o hat switch de “ponto de vista” para em vez disso realizar
outras funções (disparar, etc.).
2/12
SISTEMA AMBIDESTRO
O seu joystick T-16000M tem a vantagem de ser totalmente ambidestro, o que lhe permite
adaptar-se na perfeição a todos os jogadores, tanto destros como esquerdinos.
Para tal, é possível ajustar três elementos: a configuração dos botões na base, o descanso
para as mãos e o descanso do polegar.
CONFIGURAÇÃO DESTRA
CONFIGURAÇÃO ESQUERDINA
3/12
CONFIGURAÇÃO DOS BOTÕES NO MODO DESTRO
A fim de definir as posições dos 12 botões da base no modo destro, ajuste o selector (12)
sob a base do joystick para “RIGHT HANDED”:
CONFIGURAÇÃO NO MODO DESTRO
4/12
CONFIGURAÇÃO DOS BOTÕES NO MODO ESQUERDINO
A fim de definir as posições dos 12 botões da base no modo esquerdino , ajuste o selector
(12) sob a base do joystick para “LEFT HANDED”:
CONFIGURAÇÃO NO MODO ESQUERDINO
5/12
DESCANSO DAS MÃOS NO MODO DESTRO OU ESQUERDINO
Por predefinição, o descanso para as mãos está configurado no MODO DESTRO.
Para ajustá-lo para o MODO ESQUERDINO:
A) Com uma chave de fendas pequena, desaperte (sem chegar a remover) o pequeno
parafuso de rotação do descanso das mãos (7), no lado esquerdo ou direito do descanso.
B) Rode o descanso para as mãos 180°.
C) Volte a apertar completamente o parafuso do descanso para as mãos (agora à direita).
Nota: Execute este procedimento no sentido inverso para regressar ao modo destro.
6/12
DESCANSO DO POLEGAR NO MODO DESTRO OU ESQUERDINO
Por predefinição, o descanso do polegar está configurado no MODO DESTRO.
Para ajustá-lo para o MODO ESQUERDINO:
A) Remova a tampa direita do parafuso (3) situada no lado direito da coluna.
B) Com uma chave de fendas pequena, desaperte e remova por completo o parafuso
comprido que está agora acessível (no lado direito da coluna).
C) Remova o descanso para o polegar direito (8), situado no lado esquerdo da coluna.
7/12
D) Posicione o descanso para o polegar esquerdo (10) (incluído à parte na caixa do joystick)
no lado direito da coluna.
E) Posicione o parafuso comprido no orifício existente no lado esquerdo da coluna e aperteo completamente a fim de fixar o descanso para o polegar esquerdo no sítio.
F) Posicione a tampa esquerda do parafuso (11) (incluída à parte na caixa do joystick) no
lado esquerdo da coluna.
Nota: Execute este procedimento no sentido inverso para regressar ao modo destro.
8/12
PC
INSTALAÇÃO NO PC
1. Ligue o conector PC USB (9) numa das portas USB do computador.
O Windows XP ou Vista detecta automaticamente o novo dispositivo.
2. Os controladores são instalados automaticamente.
Siga as instruções que surgirem no ecrã para concluir a instalação.
3. Clique em Iniciar/Definições/Painel de controlo e depois duas vezes em
Controladores de jogos.
A caixa de diálogo Controladores de jogos mostra o nome do joystick com o estado
OK.
4. No Painel de controlo, clique em Propriedades para testar e ver todas as funções do
joystick.
Está pronto para começar a jogar!
NOTA IMPORTANTE
Quando ligar o joystick: coloque sempre a coluna e o leme de direcção nas respectivas
posições centrais, e evite movê-los (para evitar problemas de calibração).
9/12
RESOLUÇÃO DE PROBLEMAS E AVISO
• O meu joystick não funciona correctamente ou parece estar mal calibrado:
- Encerre o computador e desconecte o joystick; em seguida, volte a ligar o computador,
conecte novamente o joystick e reinicie o jogo.
- Quando ligar o joystick: coloque sempre a coluna e o leme de direcção nas respectivas
posições centrais, e evite movê-los (para evitar problemas de calibração).
• Não consigo configurar o meu joystick:
- No menu “Options/Controller/Gamepad or Joystick” do jogo: seleccione a configuração
mais adequada ou reconfigure por completo as opções do controlador.
- Consulte o manual de utilizador do jogo ou a ajuda online para obter mais informações.
• O meu joystick é demasiado sensível ou não é suficientemente sensível:
- O seu joystick autocalibra-se independentemente assim que executar alguns movimentos
nos diferentes eixos.
- No menu “Options/Controller/Gamepad or Joystick” do jogo: ajuste a sensibilidade e as
zonas mortas do joystick (caso estas opções estejam disponíveis).
• A retroiluminação central do joystick não se apaga automaticamente:
- Mova a coluna muito ligeiramente de modo que fique ajustada no valor central absoluto; a
retroiluminação irá então apagar-se ao fim de 3 segundos de inactividade.
10/12
SUPORTE TÉCNICO
Se surgir algum problema com o seu produto, vá até http://ts.thrustmaster.com e clique em
Technical Support. A partir daqui pode aceder a vários utilitários, como as perguntas mais
frequentes (FAQ) ou as versões mais recentes dos controladores e do software, capazes
de ajudá-lo a resolver o seu problema. Se o problema se mantiver, contacte o serviço de
suporte técnico dos produtos Thrustmaster (“Technical Support”):
Por correio electrónico:
Para tirar partido do suporte técnico por correio electrónico, primeiro tem de se registar
online. As informações que fornecer ajudarão os agentes a resolver mais rapidamente o
seu problema. Clique em Registration no lado esquerdo da página Technical Support e
siga as instruções que surgirem no ecrã. Se já tiver feito o seu registo, preencha os campos
Username e Password e clique em Login.
INFORMAÇÃO DA GARANTIA
A Guillemot Corporation S.A. (“Guillemot”) garante ao consumidor, a nível mundial, que
este produto Thrustmaster está isento de defeitos de material e de falhas de fabrico durante
um período de dois (2) anos a partir da data de compra original. Se o produto apresentar
algum defeito dentro do período da garantia, contacte imediatamente o Suporte Técnico,
que lhe indicará o procedimento a seguir. A confirmar-se o defeito, devolva o produto ao
respectivo local de compra (ou qualquer outro local indicado pelo Suporte Técnico).
No âmbito do contexto desta garantia, e por decisão do Suporte Técnico, o produto
defeituoso do consumidor será reparado ou substituído. Sempre que a lei em vigor o
autorizar, a responsabilidade máxima da Guillemot e das suas filiais (incluindo nos danos
indirectos) limitar-se-á à reparação ou substituição do produto Thrustmaster. Os direitos
legais do consumidor em relação à legislação aplicável à venda de bens de consumo não
são afectados por esta garantia.
Esta garantia não se aplicará: (1) se o produto tiver sido modificado, aberto, alterado ou
sofrido danos em resultado de uso inadequado ou abusivo, negligência, acidente, desgaste
normal ou qualquer outra causa que não esteja relacionada com um defeito de material ou
uma falha de fabrico; (2) no caso de desobediência às instruções fornecidas pelo Suporte
Técnico; (3) ao software que não tenha sido publicado pela Guillemot, o qual estará sujeito
a uma garantia específica fornecida pela respectiva editora.
Provisões adicionais da garantia
Nos EUA e no Canadá, esta garantia está limitada ao mecanismo interno e ao revestimento
externo do produto. Quaisquer garantias implícitas aplicáveis, incluindo garantias de
comerciabilidade e adequação a um fim específico, têm um limite de dois (2) anos a partir
da data de compra e estão sujeitas às condições estabelecidas na presente garantia
limitada. Em circunstância alguma a Guillemot Corporation S.A. ou as suas filiais serão
responsáveis por danos indirectos ou acidentais resultantes da violação de quaisquer
garantias expressas ou implícitas. Certos Estados/Províncias não autorizam limitações à
duração de uma garantia implícita ou a exclusão ou limitação de danos
acidentais/indirectos, pelo que a limitação acima mencionada pode não se aplicar a si. A
presente garantia confere-lhe direitos legais específicos, e também pode ter outros direitos
que variam consoante o Estado ou a Província.
11/12
DIREITOS DE AUTOR
© 2008 Guillemot Corporation S.A. Todos os direitos reservados. Thrustmaster® é uma
marca registada da Guillemot Corporation S.A. Windows®, XP e Vista são marcas registadas
da Microsoft Corporation nos Estados Unidos e/ou noutros países. Todas as outras marcas
comerciais e nomes de marcas são por este meio reconhecidas e pertencem aos respectivos
proprietários. As ilustrações não são vinculativas. Os conteúdos, desenhos e especificações
estão sujeitos a alteração sem aviso prévio e podem variar de país para país. Fabricado na
China.
RECOMENDAÇÕES DE PROTECÇÃO AMBIENTAL
Quando este produto chegar ao fim da sua vida útil, não o
elimine juntamente com os resíduos domésticos normais; em vez
disso, deixe-o num ponto de recolha de resíduos de equipamento
eléctrico e electrónico para posterior reciclagem.
O símbolo presente no produto, no manual do utilizador ou na
caixa confirma isto.
Os materiais podem ser reciclados, dependendo das suas
características. Através da reciclagem e de outras formas de
processamento de resíduos de equipamento eléctrico e
electrónico, pode dar um importante contributo no sentido de
ajudar a proteger o ambiente.
Contacte as autoridades locais para saber onde fica o ponto de
recolha mais perto da sua área de residência.
FAQ, dicas e controladores disponíveis em
www.thrustmaster.com
12/12
Совместим с ПК
Руководство пользователя
ТЕХНИЧЕСКИЕ ХАРАКТЕРИСТИКИ
1. Цифровое пусковое устройство
2. Многонаправленный миниджойстик
7. Вращающийся болт опоры с
«Вид обзора»
3. Крепление накладки для правой
руки
4. Руль направления с поворотной
рукояткой и опорой руки
5. Ручка управления скоростью
6. 15 командных кнопок
8. Опора для большого пальца правой
положениями для правой и левой руки
руки
9. Разъем USB для ПК
10. Опора для большого пальца левой руки
11. Крепление накладки для левой руки
12. Многопозиционный переключатель
кнопок правой и левой руки
1/12
ДОПОЛНИТЕЛЬНО О ДЖОЙСТИКЕ
УНИКАЛЬНАЯ ТОЧНАЯ ТЕХНОЛОГИЯ:
«H.E.A.R.T™ – точная технология гальваномагнитного эффекта»
Джойстик T-16000M разработан на основе уникальной технологии (не имеющей аналогов в
мире игровых джойстиков), которая обеспечивает высокий уровень точности, благодаря
таким элементам:
- трехмерный (с гальваномагнитным эффектом) магнитный сенсор на рукоятке, с
предельным значением более 268 млн. единиц на осях X и Y (16384 x 16384), в то время
как конкурирующие системы (даже самого высокого класса) предлагают максимальное
значение приблизительно в 1 млн. единиц (1024 x 1024).
- магнит: неограниченная точность и поразительная маневренность возможна благодаря
отсутствию трения.
- спиральная пружина на рукоятке (диаметром 2,8 мм) обеспечивает устойчивость и
равномерно распределяет напряжение.
ФОНОВАЯ ПОДСВЕТКА
Для повышения уровня точности в центральном положении джойстика T-16000M
устранены нечувствительные зоны. Об этом свидетельствует тот факт, что центр рукоятки
подсвечивается зеленым светом даже при незначительном ее движении. Если рукоятка
находится в режиме ожидания на протяжении 3 секунд, фоновая подсветка выключается.
РУЧКА УПРАВЛЕНИЯ СКОРОСТЬЮ
Джойстик оснащен небольшой ручкой управления скоростью (5), благодаря которой можно
легко управлять процессами ускорения в любой игре.
ФУНКЦИИ РУЛЯ НАПРАВЛЕНИЯ
Джойстик имеет функцию руля направления (4), которая является симулятором педалей
настоящего самолета. Педали используются пилотом для управления рулем и позволяют
изменять положение самолета относительно вертикальной оси, поворачивая его влево или
вправо.
Достаточно повернуть рукоятку джойстика влево или вправо и функция активируется
автоматически.
МНОГОНАПРАВЛЕННЫЙ МИНИДЖОЙСТИК «ВИД ОБЗОРА»
Устройство оснащено миниджойстиком «Вид обзора» (2), который позволяет немедленно
отображать все, что происходит вокруг самолета (особенно в играх, которые
поддерживают эту функцию). Для использования данной функции достаточно зайти в
настройки вашего игрового меню и задать различные виды обзоров (вид сзади, слева,
справа, а также внешние обзоры) в соответствии с направлениями миниджойстика «Вид
обзора».
По необходимости миниджойстик «Вид обзора» можно настроить для других функций
(например, стрельбы и др.).
2/12
Система для правой и левой руки
Джойстик T-16000M оснащен специальной системой для правой и левой руки, которая
позволяет идеально приспособить устройство как для правшей, так и для левшей.
Для этого необходимо выполнить настройку 3 элементов: кнопок на панели, опоры
для руки и опоры для большого пальца.
НАСТРОЙКИ ДЛЯ ПРАВОЙ РУКИ
НАСТРОЙКИ ДЛЯ ЛЕВОЙ РУКИ
3/12
Настройки кнопок В режимЕ правой руки
Для настройки 12 кнопок, расположенных на панели, в режиме правой руки, выставьте
многопозиционный переключатель (12), расположенный под основой джойстика, в режим
«ПРАВАЯ РУКА»:
НАСТРОЙКА РЕЖИМА ПРАВОЙ РУКИ
4/12
НАСТРОЙКА КНОПОК В РЕЖИМЕ ЛЕВОЙ РУКИ
Для настройки 12 кнопок, расположенных на панели, в режиме левой руки, выставьте
многопозиционный переключатель (12), расположенный под основой джойстика, в
режим «ЛЕВАЯ РУКА»:
НАСТРОЙКА РЕЖИМА ЛЕВОЙ РУКИ
5/12
ОТЛАДКА ОПОРЫ ДЛЯ ПРАВОЙ И ЛЕВОЙ РУКИ
Опора руки по умолчанию задана в РЕЖИМЕ ПРАВОЙ РУКИ.
Для отладки опоры в РЕЖИМЕ ЛЕВОЙ РУКИ выполняйте указанные ниже действия.
A) С помощью небольшой отвертки осторожно раскрутите вращающийся болт, который
фиксирует опору руки (7) и расположен с левой стороны от опоры.
B) Поверните опору на 180°.
C) Плотно закрутите болт на опоре руки (теперь расположенной с правой стороны).
Примечание: выполняйте данную процедуру в обратном порядке при настройке режима
правой руки.
6/12
ОТЛАДКА ОПОРЫ БОЛЬШОГО ПАЛЬЦА ДЛЯ РЕЖИМА ПРАВОЙ
И ЛЕВОЙ РУКИ
Опора для большого пальца по умолчанию задана в РЕЖИМЕ ПРАВОЙ РУКИ.
Для отладки опоры в РЕЖИМЕ ЛЕВОЙ РУКИ выполняйте указанные ниже действия.
A) Снимите крепление накладки для правой руки (3), расположенное с правой стороны
от рукоятки.
B) С помощью небольшой отвертки раскрутите удлиненный болт и полностью
извлеките его из отверстия (болт расположен с правой стороны от рукоятки).
C) Уберите опору для большого пальца правой руки (8), которая расположена с левой
стороны от рукоятки.
7/12
D) Расположите опору для большого пальца левой руки (10) (прилагается к комплекту для
джойстика отдельно) с правой стороны от рукоятки.
E) Поместите удлиненный болт в отверстие с левой стороны от рукоятки и плотно
закрутите его, чтобы зафиксировать опору для большого пальца левой руки.
F) Расположите крепление накаладки для левой руки (11) (прилагается к комплекту для
джойстика отдельно) с левой стороны от рукоятки.
Примечание: выполняйте данную процедуру в обратном порядке при настройке режима
правой руки.
8/12
ПК
УСТАНОВКА НА ПК
1. Подключите разъем USB (9) к одному из USB-портов компьютера.
Операционные системы Windows XP или Vista автоматически обнаружат новое
устройство.
2. Драйверы устанавливаются автоматически.
Для завершения процесса установки следуйте инструкциям на экране.
3. Выберите Start (Пуск)/Settings (Настройка)/Control Panel (Панель управления) и
двойным нажатием кнопки мыши откройте вкладку Game Controllers (Игровые
устройства).
Диалоговое окно Game Controllers (Игровые устройства) выводит название
джойстика и его статус (OK).
4. Сontrol Panel (Панели управления) выберите вкладку Properties (Свойства) для
испытания и просмотра функций джойстика.
Теперь можно начинать игру!
ВАЖНОЕ ПРИМЕЧАНИЕ
При подключении джойстика всегда располагайте рукоятку и руль в центральном
положении во избежание непредусмотренного смещения или проблем с калибровкой.
9/12
УСТРАНЕНИЕ НЕИСПРАВНОСТЕЙ И ПРЕДУПРЕЖДЕНИЕ
• Джойстик работает неправильно или не калибровка не выполнена должным
образом:
- выключите компьютер и отсоедините джойстик, затем снова включите компьютер,
подключите джойстик и запустите игру.
- при подключении джойстика всегда располагайте рукоятку и руль в центральном
положении во избежание непредусмотренного движения или проблем с калибровкой.
• Не удается настроить джойстик:
- в меню игры Options (Параметры)/Controller (Контроллер)/ Gamepad (Игровой
контроллер) или Joystick (джойстик) выберите соответствующие настройки или
задайте совершенно новые настройки функции контроллера.
- дополнительные сведения см. в руководстве пользователя игры или в Интернете.
• Джойстик слишком или недостаточно чувствительный:
- калибровка джойстика осуществляется автоматически даже при незначительном
движении вокруг осей.
- в меню игры Options (Параметры)/Controller (Контроллер)/ Gamepad (Игровой
контроллер) или Joystick (джойстик) настройте режим чувствительности или
нечувствительности для контроллера (при наличии данных функций).
• Центральная подсветка джойстика не включается автоматически:
- слегка подвигайте рукояткой для отладки абсолютного центрального значения;
подсветка автоматически выключится по истечению 3 секунд ожидания.
10/12
ТЕХНИЧЕСКАЯ ПОДДЕРЖКА
При возникновении проблем, связанных с использованием контроллера, зайдите на
веб-сайт http://ts.thrustmaster.com и перейдите по ссылке Technical Support
(техническая поддержка). На этой странице имеется доступ к различным утилитам
(разделу "Часто задаваемые вопросы" (FAQ), самым новым версиям драйверов и
программного обеспечения), – это может помочь решению проблемы. Если это не
помогло, можно связаться со службой технической поддержки Thrustmaster (“Technical
Support”):
По электронной почте:
Чтобы отправить запрос в службу технической поддержки по электронной почте,
необходимо зарегистрироваться на веб-сайте. Предоставленная вами информация
поможет быстрее решить проблему.
Перейдите по ссылке Registration
(Регистрация), которая находится слева на странице технической поддержки, и
следуйте инструкциям, выводимым на экран. Если вы уже зарегистрированы, введите
имя пользователя и пароль в поля Username и Password соответственно, после
чего нажмите кнопку Login (Вход).
ИНФОРМАЦИЯ О ГАРАНТИИ
Во всех странах, корпорация Guillemot Corporation S.A. (“Guillemot”) дает гарантию на
изделия Thrustmaster в том, что эти изделия не имеют дефектов материалов или
производства на (2) года от даты покупки. При обнаружении дефекта в течение
гарантийного срока немедленно свяжитесь со службой технической поддержки,
которая разъяснит последовательность действий. Если наличие дефекта
подтвердится, изделие будет необходимо вернуть по месту приобретения (или по
другому месту, указанному службой технической поддержки).
Если неисправное изделие попадает под условия гарантии, оно будет либо заменено,
либо отремонтировано. При наличии регулирующего законодательства, наибольшая
ответственность (включая косвенные убытки) корпорации Guillemot и ее дочерних
предприятий ограничена ремонтом или заменой изделия Thrustmaster. Указанные
гарантийные обязательства не влияют на юридические права потребителя в
отношении законодательства, применимого к продажам потребительских товаров.
Данная гарантия не распространяется: (1) на изделия модифицированные, вскрытые,
доработанные или поврежденные в результате неправильного или грубого
обращения, неосмотрительности, случайного повреждения, нормального износа, или
имеющие любой другой дефект, не связанный с качеством материала или
изготовления; (2) в случае несоблюдения инструкций, выданных технической
поддержкой; (3) на программные продукты, разработанные не корпорацией Guillemot,
распространяется гарантия/ответственность разработчика программ.
11/12
АВТОРСКОЕ ПРАВО
© 2008 Guillemot Corporation S.A. Все права защищены. Thrustmaster® является
зарегистрированной торговой маркой Guillemot Corporation S.A. Windows®, XP и Vista
являются зарегистрированными торговыми марками Microsoft Corporation в
Соединенных Штатах Америки и/или других странах. Все прочие торговые марки и
фирменные названия, приведенные в данном документе, являются собственностью
соответствующих владельцев. Иллюстрации могут не соответствовать внешнему
виду/функциям конкретного изделия. Содержание руководства, конструкция и
технические характеристики изделия изменяются без предварительного уведомления и
зависят от страны приобретения. Сделано в Китае.
РЕКОМЕНДАЦИИ ПО ЗАЩИТЕ ОКРУЖАЮЩЕЙ СРЕДЫ
По окончании срока службы данное изделие следует
утилизировать отдельно от бытового мусора в пункте сбора
отходов электрического и электронного оборудования.
Подтверждением этому является наличие соответствующего
символа, нанесенного на изделие, руководство пользователя
или упаковку.
В зависимости от свойств, материалы могут передаваться на
повторную переработку.
Способствуя повторной
переработке отходов электрического и электронного
оборудования, вы вносите значительный вклад в сохранение
окружающей среды.
Обратитесь в местные органы власти за информацией о
ближайшем пункте приема таких отходов.
Ответы на часто задаваемые вопросы, советы и
драйверы, вы найдете на www.thrustmaster.com
12/12
Baixar