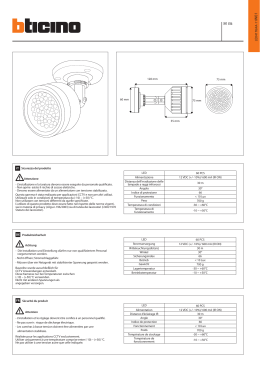
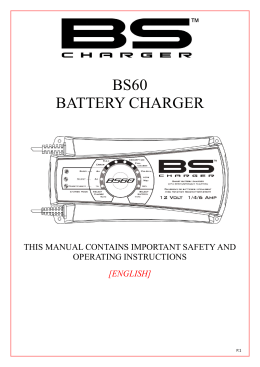
LEM61211 art. 620
IT
CARICA BATTERIA
BATTERIELADEGERÄT
CARGA BATERÍA
BATTERY CHARGER
CHARGEUR DE BATTERIES
CARREGADOR DE BATERIAS
Istruzioni per l’uso .................2
EN
Operating Instructions............. 7
DE Gebrauchsanleitung .............12
FR
Mode d’emploi ...................... 17
ES
PT
Instruções.............................. 27
Instrucciones de uso
...............22
APPLICAZIONI - APPLICATIONS - ANWENDUNGEN – APPLICATIONS – APLICACIONES – APLICAÇÕES
IT
AVVERTENZE DA LEGGERE ATTENTAMENTE
• Questo caricabatteria è progettato per caricare vari tipi di batterie al piombo, (come WET, GEL,
AGM ecc.), principalmente usate nelle autovetture, motociclette ed altri tipi di veicoli. Non caricare
batterie di tipo diverso o difettose.
• Leggere le istruzioni per l’uso prima dell’utilizzo.
• Adatto solo per uso interno.
• Proteggere il carica batteria da umidità e schizzi d’acqua o pioggia.
• Tenere lontano da superfici riscaldate durante il funzionamento.
• Controllare che i cavi siano integri, in caso contrario sostituirli.
• Eventuali prolunghe del cavo di alimentazione devono essere di sezione adeguata.
• Non utilizzare il caricabatterie se presenta l’involucro danneggiato. Portarlo da una persona
qualificata per controllarlo e ripararlo.
• Non smontare il caricabatteria, un incorretto montaggio potrebbe causare scosse elettriche o fiamme.
• Assicurarsi di usare la corretta tensione di alimentazione, altrimenti il funzionamento del dispositivo
potrebbe essere difettoso.
• Quando collegato all’alimentazione, il dispositivo si resetterà automaticamente e resterà nello stato di
standby se nessun’altra azione sarà eseguita dall’utente.
• Le batterie vanno caricate con i tappi degli elementi allentati.
• Il livello dell'elettrolito deve essere più alto dei separatori di alcuni millimetri.
• Se la batteria è un modello ad auto-riempimento, prodotta da Dagenite o Exide, il vetro ed il lungo
tappo del filtro, devono essere lasciati al loro posto durante la carica.
• Disporre il carica batterie il più distante possibile dalla batteria da caricare.
• Le batterie generano gas esplosivi per cui evitare la formazione di fiamme e scintille e la carica in
ambienti non aerati.
• Per evitare che si formino scintille ai capi delle pinze assicurarsi, prima di accendere il carica batterie,
che le pinze facciano un buon contatto con i morsetti della batteria.
• Evitare di mettere in cortocircuito le pinze dell'apparecchio. Fare molta attenzione a non mettere in
cortocircuito i poli della batteria, potrebbe esplodere.
• Non mettere in nessun momento il viso sopra la batteria mentre si effettuano i collegamenti.
• ATTENZIONE l’acido delle batterie è corrosivo! Eventuali schizzi sulla pelle o vestiti vanno lavati
con acqua e sapone da bucato. In caso di schizzi sugli occhi, sciacquare abbondantemente e
rivolgersi ad un medico.
• Scollegare la presa del carica batteria dalla rete prima di collegare o scollegare la batteria.
• Se entro 120 ore (max) la batteria non sarà caricata completamente, il caricabatteria dovrà essere
disconnesso manualmente.
• Le batterie lasciate scariche si danneggiano gravemente per solfatazione e a basse temperature
ghiacciano facilmente.
• Non caricare mai una batteria ghiacciata.
• Non ricaricare batterie non ricaricabili.
• Non usare il caricabatterie per caricare batterie a secco. Potrebbero scoppiare e causare lesioni e
danni.
ISTRUZIONI DI COLLEGAMENTO
Per il collegamento dell’apparecchio eseguire in successione le seguenti operazioni:
• Scollegare la presa del carica batteria dalla rete prima di collegare o scollegare la batteria.
• collegare il cavo di uscita ROSSO al morsetto della batteria non collegata a massa.
• collegare il cavo di uscita NERO al telaio dell’autovettura, lontano dalla batteria e dal condotto del
carburante.
Per scollegare la batteria occorre:
• scollegare l’alimentazione dell’apparecchio.
• scollegare il cavo dal telaio (nero).
• scollegare il cavo dal morsetto della batteria (rosso).
Utilizzo dei terminali ad occhiello.
• collegare il conduttore di uscita con occhiello nero al morsetto (-) negativo della batteria.
• collegare il conduttore di uscita con occhiello rosso al morsetto (+) positivo della batteria.
2
• Assicurarsi che i due occhielli siano fissati correttamente ai morsetti della batteria garantendo un
contatto elettrico ottimale.
Il connettore rapido dei conduttori con terminali ad occhiello è dotato di cappuccio isolante di protezione
da reinserire sempre una volta terminata la carica.
CARATTERISTICHE
Le caratteristiche di carica del dispositivo, permettono di caricare la batteria al 100% della sua capacità e
ne consentono una lunga connessione al caricabatteria anche quando non è in uso, per mantenerla
sempre in buono stato, senza danneggiarla.
Sono disponibili diverse modalità di carica.
E’ disponibile una funzione speciale per recuperare batterie esaurite.
La completa protezione contro connessioni errate, inversione di polarità e corti circuiti, assicura
operazioni di carica sicure.
L’interruttore elettronico incorporato impedisce al caricabatteria di attivarsi immediatamente quando
viene collegato alla batteria ma solo in seguito alla selezione di una modalità di carica.
Il controllo e l’esecuzione del ciclo di carica è gestito da un microprocessore.
DOTAZIONE STANDARD
Morsetti di collegamento alla batteria.
Cavi di collegamento per moto.
MANUTENZIONE
Quando non si usa, il caricabatteria deve essere tenuto in un luogo asciutto. Per la pulizia esterna,
scollegare l’apparecchio e utilizzare un panno umido, non usare acqua corrente o detersivi. Per
eventuali riparazioni, rivolgersi solo a un centro autorizzato.
3
CARICA BATTERIA ART. 620 – LEM61211
PRIMA DI USARE IL CARICABATTERIA, LEGGERE ATTENTAMENTE LE AVVERTENZE E LE
ISTRUZIONI DI COLLEGAMENTO.
Questo caricabatteria è progettato per caricare vari tipi di batterie a 6V e 12V al piombo, (come WET,
GEL, AGM ecc.), principalmente usate nelle autovetture, motociclette ed altri tipi di veicoli, con capacità
2,2Ah - 40Ah a 12V o 2,2Ah - 14Ah a 6V. Non caricare batterie di tipo diverso o difettose.
Grado di protezione IP65 contro polvere e acqua.
Non inteso per fornire alimentazione ad un sistema elettrico di bassa tensione. Non usare per nessun
altro scopo.
1. SPECIFICHE TECNICHE
Alimentazione
Corrente assorbita
Corrente d’ingresso
Tensione di interruzione carica
Corrente di carica
Corrente Back Drain
Ripple
Tipo di batteria
220/240V AC 50/60Hz
30W
0.35A RMS.Max
14.4 +/-0.25V o 7.2+/-0.25V
1.1A +/- 10%
<5mA (No AC input)
150mV Max 0.3A
12V al piombo: 2.2Ah - 40Ah
6V al piombo: 2.2Ah - 14Ah
IP65
<50dB (test da 500mm di distanza)
0 - +40° C
1.0A/250V
Grado protezione
Rumore
Temperatura di utilizzo
Fusibile interno
2. SEGNALAZIONI LUMINOSE
Indicazione
Stato
LED
ON (verde)
Modalità STANDBY
LED
LED
ON (arancione)
ON (rosso)
Polarità inversa
Modalità 1
Modalità 2
Osservazioni
Standby, batteria in carica o in caso
di circuito aperto o corto circuito
Polarità inversa
Modalità 6V (7.2V - 1.1A)
Modalità 12V (14.4V - 1.1A)
In carica
In carica (sotto 25%)
In carica
In carica (sotto 50%)
In carica
In carica (sotto 75%)
In carica
In carica (sotto 100%)
In mantenimento
Carica completata, in mantenimento
Indicatore di errore
Batteria guasta
LED
ON (rosso)
LED 25% lampeggiante
(rosso)
LED 25% ON,
LED 50% lampeggiante
(rosso)
LED 25%, 50% ON, LED
75% lampeggiante (giallo)
LED 25%, 50% , 75% ON,
LED 100% lampeggiante
(verde)
LED 25%, 50%, 75%, 100%
lampeggianti
LED
e LED 25%, 50%,
75%, 100% lampeggianti
4
3. COME SELEZIONARE LE DIVERSE MODALITÀ
L’utente può selezionare la modalità desiderata premendo il pulsante di selezione MODE.
4. PROCESSO DI CARICA
LED DI CARICA - Gruppo di 4 LED, etichettati da sinistra a destra 25%, 50%, 75%, 100%. I LED 25% e
50% sono di colore rosso, il LED 75% giallo ed il LED 100% verde. Questi LED indicano la percentuale
di carica e quando questa è al 100% il caricabatteria entra in modalità di carica di mantenimento.
LED FALLIMENTO - Questo LED
arancione si illuminerà e rimarrà fisso in caso di inversione di
polarità. In tutti gli altri casi di errore, (basso o alto voltaggio), il LED lampeggerà con i LED di carica.
4.1. RESET
Quando connesso alla tensione di alimentazione, il dispositivo si resetterà automaticamente e resterà
nella fase di standby se nessun’altra azione verrà eseguita dall’utente.
4.2. MODALITÀ STANDBY:
Il LED
verde lampeggerà fino a quando non verrà selezionata una modalità 12V o 6V. In modalità
standby, il caricabatterie non produrrà nessun voltaggio di carica. Per selezionare una modalità di carica,
bisogna prima connettere una batteria.
4.3. MODALITÀ 6V:
Questa modalità è principalmente usata per caricare batterie da 6V con una capacità superiore a 2.2Ah
in condizioni normali. Prima di caricare la batteria, collegare i terminali d’uscita del caricatore alla batteria
con la corretta polarità (vedi istruzioni di collegamento) e premere il tasto MODE per selezionare la
modalità 6V. Dopo aver effettuato questa operazione, il LED
lampeggerà ed inizierà il processo di
carica con corrente 1.1A +/- 10%. Se tutto è ok, avverrà l’intero processo di carica fino al raggiungimento
di 7.2V +/- 0.25V. Quando la batteria sarà completamente carica, i LED 25% 50% 75% 100% si
accenderanno e sarà erogata solo una piccola corrente di mantenimento della carica della batteria.
Nota: se il voltaggio della batteria è tra 0.6V+/-0.5V e 2V+/-0.5V, il caricabatteria non comincerà la carica
della batteria in modalità 6V ma si posizionerà in modalità fallimento, se è tra 2V +/- 0.5V e 7V +/-0.25V,
il caricabatteria comincerà a caricare. Se il voltaggio della batteria è maggiore di 7V +/-0.25V, il
caricabatteria non inizierà la carica ma si posizionerà in modalità fallimento.
4.4. MODALITÀ 12V:
Questa modalità è principalmente usata per caricare batterie da 12V con una capacità superiore a 2.2Ah
in condizioni normali. Prima di caricare la batteria, collegare i terminali d’uscita del caricatore alla batteria
con la corretta polarità (vedi istruzioni di collegamento) e premere il tasto MODE per selezionare la
modalità 12V. Dopo aver effettuato questa operazione, il LED
lampeggerà ed inizierà il processo di
carica con corrente 1.1A +/- 10%. Se tutto è ok, avverrà l’intero processo di carica fino al raggiungimento
di 14.4V +/- 0.25V. Quando la batteria è completamente carica, i LED 25%,50%,75%,100% si
accenderanno e sarà erogata solo una piccola corrente di mantenimento della carica della batteria.
Nota: se il voltaggio della batteria è più basso di 7V +/- 0.25V, il caricabatteria non comincerà la carica
della batteria in modalità 12V ma si posizionerà in modalità fallimento, se è tra 7V +/- 0.25V e 14V +/0.25V, il caricabatteria comincerà a caricare. Se il voltaggio della batteria è maggiore di 14V +/-0.25V, il
caricabatteria non inizierà la carica ma si posizionerà in modalità fallimento.
5. RECUPERO BATTERIE ESAURITE
Quando si collega l’apparecchio ad una batteria e si inizia un processo di carica, il caricabatteria rileva
automaticamente il voltaggio della batteria e passa in modalità di carica ad impulsi se il voltaggio è tra
2V +/-0.5V e 5.25V +/- 0.5V per batterie da 6V e da 7V +/-0.25V a 10.5V +/- 0.25V per batterie da 12V.
Questo processo di carica ad impulsi non si fermerà fino a che il voltaggio della batteria non arriverà a
5.25V +/- 0.5V o 10.5V +/- 0.25V. Arrivato a questo punto, il caricabatteria passerà alla normale modalità
di carica selezionata dall’utente all’inizio dell’operazione e la batteria potrà essere caricata velocemente
ed in maniera sicura. Con questo metodo, si possono recuperare la maggior parte delle batterie molto
scariche. Se la carica ad impulsi durerà per oltre 6 ore ed il voltaggio della batteria rimarrà sotto al valore
di 5.25V +/- 0.5V per le batterie da 6V o di 10.5V +/- 0.25V per le batterie da 12V, il caricabatteria si
posizionerà in modalità fallimento.
6. PROTEZIONE PER ANOMALIE
Se dovesse presentarsi una delle seguenti situazioni anomale: corto circuito, modalità recupero
superiore a 6 ore, bulk charging superiore a 96 ore, circuito aperto o connessione inversa dei terminali
d’uscita, l’interruttore elettronico integrato spegnerà il caricabatteria e passerà alla modalità di fallimento
per evitare danni. Se non riceverà nessun altro ordine, il dispositivo resterà nella modalità di fallimento
ed il rispettivo LED lampeggerà per indicare l’errore. Inoltre, in caso inversione di polarità, si accenderà il
LED per indicare questo tipo di errore.
5
7. PROTEZIONE TEMPERATURA
Durante il processo di carica, se la temperatura del caricabatteria, per un qualsiasi motivo, diventa
troppo alta, il dispositivo riduce la potenza di uscita per proteggersi da eventuali danni.
8. INDICAZIONE DELLO STATO DI CARICA
LED (25%)
LED (50%)
LED (75%)
Lampeggiante
OFF
OFF
ON
Lampeggiante
OFF
ON
ON
Lampeggiante
ON
ON
ON
ON
ON
ON
LED (100%)
OFF
OFF
OFF
Lampeggiante
ON
STATO DI CARICA
Sotto al 25%
Sotto al 50%
Sotto al 75%
Sotto al 100%
Completamente carica
NOTA BENE:
1. Se, durante la carica di mantenimento, il voltaggio diventa superiore a 15V +/- 0.25V in modalità 12V
o a 7.5V +/- 0.25V in modalità 6V, il caricabatteria spegnerà la corrente di carica. Quando il voltaggio
si abbasserà a 12.8V o 6.4V +/- 0.25V, il caricabatteria riprenderà nuovamente la carica ma senza
l’accensione degli indicatori di carica.
2. Quando si collega la spina del caricabatterie all’alimentazione, si accendono tutti i LED per circa
mezzo secondo poi il caricabatteria passa nella modalità standby o nell’ultima modalità in cui era
stato lasciato, a meno che entro 5 secondi l’utente non prema il pulsante MODE per cambiare
modalità.
9. TEMPO DI EROGAZIONE CARICA MASSIMA (BULK CHARGING)
Batteria (Ah)
Per una carica circa dell’80% (ore)
Per una carica circa dell’80% (ore)
6V
12V
2.2
1.5
1.5
7.2
5
5
14
8.5
8.5
25
15.5
30
18
40
24.5
6
EN
WARNINGS - READ CAREFULLY
• This charger is designed to charge various lead batteries (as WET, GEL, AGM etc.), widely used in
cars, motorcycles and other types of vehicle. Do not charge different types of batteries or faulty
batteries.
• Read carefully instructions before using the charger.
• For indoor use only.
• Protect the battery charger from moisture and water or rain drops.
• The charger has to be placed away from heated surfaces during use.
• Do not use charger if cords or wires are defective. Replace immediately.
• Any supply extension cable should be of the correct cross sectional area.
• Do not use the charger if its case is broken. Take it to qualified personnel for inspection and repair.
• Do not disassemble charger, an incorrect reassembly may cause electric shocks or fire.
• Make sure to use the correct input power supply otherwise the device could not work properly.
• When plugged to the power mains, the charger resets itself automatically and stays in standby state if
no further action is executed by the user.
• While charging battery, leave the battery caps loose.
• Ensure that electrolyte level in each battery cell is some millimetres higher than the plates.
• If the battery is an AutoFill type, manufactured b Dagenite or Exide, the glass halls and the long filter
cap must be left in place for the duration of the charge.
• Place the charger as far away as possible from the battery to be charged.
• Batteries generate explosive gas fumes when charging. Use charger in a well ventilated room. Do not
smoke, strike a match, cause a spark or have an open flame near battery while charging.
• To avoid that sparks may develop at the end of the clamps, before switching on the charger, ensure
tight and cleaned connections between the charger clamps and the battery terminals.
• Do not short circuit charger clamps. Do not allow clamps to touch one another at any time. Ensure
that there is no short circuit on the battery poles otherwise the battery may explode.
• Do not position your face above batteries at any time while making connections and during charging
process.
• ATTENTION! The acid of batteries is corrosive. If battery acid comes into contact with skin or
clothing it should be washed immediately with water. If it comes into contact with eyes they should
immediately be washed in a water eyebath and a doctor should be consulted.
• Always unplug the power supply cable of the charger from the mains before connecting or
disconnecting the battery.
• If the battery does not reach the full charge in 120 hours (MAX), the charger must be disconnected
manually.
• Batteries left discharged may be seriously damaged by sulphation and can easily freeze in a low
temperature room.
• Never charge frozen batteries.
• Do not attempt to re-charge non rechargeable batteries.
• Do not use the charger for charging dry-cell batteries as they may burst and cause injury to persons
and damage to property.
CONNECTION INSTRUCTIONS
For connecting the charger to the battery, follow the following operations in the sequence indicated:
• Always unplug the power supply cable of the charger from the mains before connecting or
disconnecting the battery.
• Connect the RED output cable to the battery terminal post not connected to the ground.
• Connect the BLACK output cable to the chassis of the vehicle, away from the battery and the fuel
pipes.
For disconnecting the charger from the battery:
• Unplug the power supply cable of the charger from the power mains.
• Disconnect the black clamp from the chassis.
• Disconnect the red clamp from the battery terminal post.
Using eyelet type terminals.
• Connect the output lead with black eyelet to the negative terminal (-) of the battery.
• Connect the output lead with red eyelet to the positive terminal (+) of the battery.
• Make sure the two eyelets are secured correctly to the terminals of the battery so that they generate
an optimal electrical contact.
7
The quick-fit connector of the conductors with eyelet terminals is fitted with an insulating protective cap
to be always replaced on the quick-fit connector once charging has been completed.
SPECIFICATIONS
The charging properties of this device permit to charge the battery to 100% of its capacity and make it
possible long time connections of the battery to the charger when not in use to maintain the battery in
good conditions without damaging it.
Different charging modes are available.
It is available a special function for rescuing deeply discharged batteries.
Full protection against wrong connections, polarity reversals and short circuits assure safe charging
operations.
The built-in electronic switch prevents the charger from starting immediately when connected to the
battery but only after the user will select a charging mode.
The control and fulfilment of the charge cycle is managed by a microprocessor.
INCLUDING AS STANDARD:
Connecting clamps to the battery.
Eyelet type terminals for motorbike connection.
MAINTENANCE
When the battery charger is not in use, it must be stored in a dry place.
To clean the outer case, disconnect the appliance and use a moister cloth. Do not use running water or
detergents.
The battery charger shall be repaired or serviced exclusively by qualified personnel.
8
BATTERY CHARGER ITEM 620 – LEM61211
BEFORE USING YOUR BATTERY CHARGER READ WARNINGS AND INSTRUCTIONS CAREFULLY
This charger is designed to charge various types of 6 and 12 Volt lead batteries (for example WET,
GEL, AGM etc.), widely used in cars, motorcycles and other kind of vehicles, with capacity range from
2,2 Ah to 40 Ah at 12 Volt or 2,2 Ah to 14Ah at 6 Volt. Do not charge different types of batteries or faulty
batteries.
Protection rating IP65 against external agents.
Not suitable to supply power to a low voltage electrical system.
Do not use for any other purpose.
1. TECHNICAL SPECIFICATIONS
Input power supply
Absorbed power
Input current
Cut off voltage
Charging current
Back Drain Current
Ripple
Type of battery
220-240V AC 50/60Hz
30W
0.35 A RMS. Max
14.4 +/-0.25V or 7.2 +/- 0.25V
1.1A +/- 10%
<5mA (No AC input)
150mV Max o.3 A
Lead 12V: 2.2Ah - 40Ah
Lead 6V: 2.2Ah - 14Ah
IP65
<50dB (tests carried out at 500mm)
0 - +40° C
1.0A/250V
Protection class
Noise
Operating temperature
Internal fuse
2. LUMINOUS SIGNALLING
Signal
LED
Condition
ON (green)
LED
ON (orange)
LED 6V ON (red)
LED 12V ON (red)
LED 25% blinking (red)
LED 25% ON;
LED 50% blinking (red)
LED 25%, 50% ON
Led 75% blinking (yellow)
LED 25%,50%,75% ON
LED 100% blinking (green)
LED 25%,50%,75%,100% ON
LED
and LED
25%,50%,75%,100% blinking
Reversed polarity
Mode 1
Mode 2
Charging
Remarks
Standby, battery charging or in case
of open circuit or short circuit
Reverse the polarity
Mode 6V (7.2V – 1.1A)
Mode 12V (14.4V – 1.1A)
Charging (below 25%)
Charging
Charging (below 50%)
Charging
Charging (below 75%)
Charging
Charging (below 100%)
In maintenance
Fully charged, in maintenance
Error indicator
Faulty battery
Mode STANDBY
3. HOW TO SELECT THE DIFFERENT MODES
You can select the desired mode by pressing the MODE button.
9
4. CHARGING PROCESS
CHARGE LEDs – Group of 4 LEDs, labelled from left to right 25%, 50%, 75%, 100%. LEDs 25% and
50% are red, LED 75% is yellow and LED 100% is green. These LEDs indicate the percentage of the
charge and when the charge is 100% the charger switches itself to the maintenance charge mode.
FAILURE LED - This orange LED
lights up and remains lit in case of reversed polarity. In all other
error cases (low or high voltage), this LED starts blinking together with the charge LEDs.
4.1. RESET
When connected to the power mains, the charger resets itself automatically and remains in standby
mode if no other operation will be carried out by the user.
4.2. STANDBY MODE:
The green LED
blinks until a 12V or a 6V mode is selected. In standby mode, the charger is not
supplying any current. To select a charge mode, it is necessary to connect a battery first.
4.3. MODE 6V
This mode is suitable to charge 6V batteries with a capacity higher than 2.2 Ah in normal condition.
Before charging the battery, connect correctly (see connection instructions) the output terminals of the
charger to the battery and press the MODE button to select the 6V mode. Having done this operation,
the corresponding LED
will blink and the charging process will start with a current of 1.1A +/- 10%.
If everything is ok, the complete charge process goes on till the battery charger will reach 7.2V +/-0.25V.
When the battery is fully charged the charge LEDs 25%, 50%, 75%, 100% will light up and only a low
maintenance current will be supplied to the battery. Remark: if the battery voltage is among 0.6V +/-0.5V
and 2V +/-0.5V, the charger will not start charging in 6V mode but will switch itself in failure mode, if it is
among 2V +/-0.5V and 7V +/-0.25V, the charger will start charging. If the battery voltage is higher than
7V +/-0.25V, the charger will not start charging but will switch itself in failure mode.
4.4. MODE 12V
This mode is suitable to charge 12V batteries with a capacity higher than 2.2 Ah in normal condition.
Before charging the battery, connect correctly (see connection instructions) the output terminals of the
charger to the battery and press the MODE button to select the 12V mode. Having done this operation,
the corresponding LED
will blink and the charging process will start with a current of 1.1A +/- 10%.
If everything is ok, the complete charge process goes on till the battery charger will reach 14.4V +/0.25V. When the battery is fully charged the charge LEDs 25%, 50%, 75%, 100% will light up and only a
low maintenance current will be supplied to the battery. Remark: if the battery voltage is lower than 7V
+/-0.25V, the charger will not start charging in 12V mode but will switch itself in failure mode, if it is
among 7V +/-0.25V and 14V +/-0.25V, the charger will start charging. If the battery voltage is higher than
14V +/-0.25V, the charger will not start charging but will switch itself in failure mode.
5. FUNCTION TO RESCUE DEEP DISCHARGED BATTERIES
When the battery is connected to the charger and a charging mode is selected, the appliance detects
automatically the voltage of the battery and in case values are in a range from 2V +/-0.5V to 5.25V +/0.5V for 6V batteries and from 7V +/-0.25V to 10.5V +/-0.25V for 12V batteries, the charger will activate
the pulse charging mode. This pulse charging process goes on till the battery voltage reaches a value of
5.25V +/-0.5V or 10.5V +/-0.25V. Once this charge level is reached, the charger will start the initial
charging mode selected by the user and the battery shall be charged quickly and safety. Thanks to this
pulse charging mode, you may rescue most part of deeply discharged batteries. If the pulse charge goes
on for over 6 hours and the voltage of the battery remains below the value of 5.25V +/-0.5V for 6V
batteries or 10.5V +/-0.25V for 12V batteries, the charger will switch itself to failure mode.
6. PROTECTION AGAINST FAULTS
If one of the following faults occurs: short circuit, recover process longer than 6 hours, bulk charging time
longer than 96 hours, open circuit or reversed connection of output terminals, the built-in electronic
switch will turn off the charger and will go in failure mode in order to avoid damages. If the appliance
does not receive any other input, it will remain in failure mode and the corresponding LED will blink to
indicate the error. In addition, in case of polarity reversal, the LED
will light up to signal this type of
error.
7. TEMPERATURE PROTECTION
If, for any reason, the temperature of the charger increases too much during the charging process, the
appliance will reduce its output power in order to protect itself against possible damages.
10
8. CHARGE STATE INDICATION
LED 25%
LED 50%
Blinking
OFF
ON
Blinking
ON
ON
ON
ON
ON
ON
LED 75%
OFF
OFF
Blinking
ON
ON
LED 100%
OFF
OFF
OFF
Blinking
ON
CHARGE STATE
Below 25%
Below 50%
Below 75%
Below 100%
Fully charged
REMARK
1. If, during the trickle charge, the voltage goes over 15V +/- 0.25V in 12V mode or over 7.5V +/- 0.25V
in 6V mode, the charger will interrupt the delivery of charging current. When the voltage will drop to
12.8V or 6.4V +/- 0.25V, the charger will start again charging but without the charge state lights.
2. When the charger is plugged to the mains supply, all LEDs light up for approx. 0.5 seconds, then it
configures itself in standby mode or goes to the last selected mode unless, within 5 seconds, the
user selects a different charge mode by pressing the MODE button.
9. BULK CHARGING TIME
To charge to approx. 80% of capacity (hours) To charge to approx. 80% of capacity (hours)
Battery (Ah)
6V
12V
2.2
1.5
1.5
7.2
5
5
14
8.5
8.5
25
15.5
30
18
40
24.5
11
DE
HINWEISE - AUFMERKSAM LESEN
• Dieses Batterieladegerät wurde dazu entworfen, um unterschiedliche Typen von Bleibatterien (wie
WET, GEL, AGM usw.) aufzuladen, die normalerweise in Autos, Motorrädern und andere Arten von
Fahrzeugen verwendet werden. Laden Sie keine andere Art Batterien oder defekte Batterien auf.
• Es empfehlt sich, die Gebrauchsanleitungen vor dem Gebrauch durchzulesen.
• Nur für den Innenbereich geeignet.
• Das Gerät niemals Regen oder Schnee aussetzen.
• Während des Betriebs von heißen Oberflächen fernhalten.
• Überprüfen, ob die Kabel in Ordnung sind, ansonsten auswechseln.
• Eventuelle Verlängerungen des Versorgungskabels müssen einen geeigneten Querschnitt haben.
• Das Batterieladegerät nicht verwenden, wenn sein Gehäuse beschädigt ist. Von qualifiziertem
Personal kontrollieren und reparieren lassen.
• Das Batterieladegerät nicht demontieren, eine fehlerhafte Montage könnte zu Stromschlägen oder
Flammen führen.
• Sicherstellen, dass die korrekte Versorgungsspannung angewendet wird, ansonsten könnte der
Betrieb der Vorrichtung defekt sein.
• Wenn die Versorgung angelegt ist, stellt sich das Gerät automatisch zurück und bleibt im Modus
Stand-by, wenn der Benutzer keine weiteren Eingriffe vornimmt.
• Während des Aufladens der Batterien müssen die Zellenverschlüsse geöffnet sein.
• Die Batterieflüssigkeit muss einige Millimeter über den Platten stehen.
• Ist Ihre Batterie vom Typ Autofil, hergestellt von Dagenite oder Exide, dann dürfen die Glaskugeln und
die lange Filterkappe während des Ladens nicht entnommen werden.
• Das Ladegerät soweit wie möglich von der zu ladenden Batterie aufstellen.
• Batterien erzeugen explosive Gase, daher die Bildung von Flammen und Funken vermeiden und den
Ladevorgang nur in gut belüfteten Bereichen ausführen.
• Um zu vermeiden, dass an den Enden der Clips Funken entstehen, vor Einschalten des Ladegeräts
überprüfen, ob die Clips einen einwandfreien Kontakt mit den Klemmen der Batterie herstellen.
• Vermeiden Sie einen Kurzschluss der Zangen. Vermeiden Sie einen Kurzschluß der Polen der
Batterie, da die Batterie sonst explodieren könnte.
• Während des Durchführens der Anschlüsse das Gesicht in keinem Fall über der Batterie halten.
• ACHTUNG! Batteriesäure ist korrosiv! Bei Berührung mit der Haut oder mit der Kleidung mit
Wasser und Waschseife waschen. Bei Kontakt mit den Augen mit viel Wasser ausspülen und einen
Arzt aufsuchen.
• Den Stecker des Batterieladegeräts herausziehen, bevor man die Batterie anschließt oder abklemmt.
• Wenn die Batterie innerhalb von 120 h (max) nicht vollständig aufgeladen ist, muss das
Batterieladegerät manuell abgetrennt werden.
• Batterien nehmen Schaden, wenn Sie längere Zeit ungeladen bleiben Sie vereisen leicht bei Frost.
• Laden Sie niemals vereiste Batterien auf.
• Nicht aufladbare Batterien dürfen nicht aufgeladen werden.
• Verwenden Sie das Ladegerät nicht, um Trockenbatterien aufzuladen. Sie könnten explodieren oder
zu Verletzungen bzw. Schäden führen.
ANMERKUNGEN ZUM ANSCHLUSS
Für den Anschluß des Geräts die folgenden Eingriffe in der angegebenen Reihenfolge durchführen:
• Den Stecker des Batterieladegeräts herausziehen, bevor man die Batterie anschließt oder abklemmt.
• Das ROTE Ausgangskabel an die Klemme der nicht geerdeten Batterie anschließen.
• Das SCHWARZE Ausgangskabel an den Kraftfahrzeugrahmen, weit weg von der Batterie und von
der Kraftstoffleitung, anschließen.
Für das Abklemmen der Batterie muß man:
• Das Gerät spannungsfrei schalten.
• Das Kabel (schwarz) vom Rahmen abklemmen.
• Das Kabel (rot) von der Batterieklemme abklemmen.
Verwendung vom Ösenkabel:
• Den Ausgangsleiter mit schwarzer Öse an den Minuspol (-) der Batterie anschließen.
• Den Ausgangsleiter mit roter Öse an den Pluspol (+) der Batterie anschließen.
12
• Sicherstellen, dass die beiden Ösen korrekt an den Batterieklemmen befestigt sind, sodass für einen
optimalen elektrischen Kontakt garantiert ist.
Der Steckverbinder der Leiter mit Ösenklemmen beinhaltet eine isolierende Schutzkappe, die am Ende
des Ladevorgangs wieder eingesetzt werden muss.
MERKMALE
Die Ladeeigenschaften der Vorrichtung garantieren die Ladung der Batterie bis zu 100 % ihrer Kapazität
und ermöglichen einen lange dauernden Anschluss an das Ladegerät, auch wenn es nicht in Gebrauch
ist, um es immer in gutem Zustand und unbeschädigt zu erhalten.
Es sind unterschiedliche Lademodalitäten möglich.
Dank einer Spezialfunktion können verbrauchte Batterien wieder gewonnen werden.
Der komplette Schutz gegen fehlerhafte Anschlüsse, Inversion der Polarität und Kurzschluss garantieren
ein sicheres Laden.
Der eingebaute elektronische Schalter verhindert, dass das Ladegerät sofort nach Anschluss an die
Batterie aktiviert wird, er ermöglicht den Start nur nach Auswahl der Lademodalität.
Die Kontrolle und die Ausführung des Ladezyklus werden über einen Mikroprozessor gesteuert.
STANDARDAUSRÜSTUNG
Anschlussklemmen an die Batterie.
Ösenkabel für Motorräder.
WARTUNG
Wenn das Ladegerät nicht in Gebrauch ist, muss es an einem trockenen Ort aufbewahrt werden. Zum
Reinigen vom Gehäuse der Ladegeräts den Netzstecker vom Ladegerät abziehen und das Gehäuse mit
einem feuchten Lappen abwischen. Kein fließendes Wasser und keine lösemittelhaltige Reinigungsmittel
verwenden! Die Reparatur des Ladegeräts darf nur eine autorisierte Werkstatt vornehmen.
13
BATTERIELADEGERÄT ART. 620 – LEM61211
VOR DEM GEBRAUCH DES BATTERIELADEGERÄTES DIE HINWEISE UND DIE ANWEISUNGEN
AUFMERKSAM DURCHLESEN.
Dieses Ladegerät wurde dazu entworfen, um verschiedene Typen von Bleibatterien 6V und 12V , (wie
WET, GEL, AGM usw.) aufzuladen, die normalerweise in Autos, Motorrädern und anderen Arten von
Fahrzeugen verwendet werden, und die eine Kapazität von 12V 2,2Ah - 40Ah oder 6V 2,2Ah - 14Ah
haben. Laden Sie keine Batterien anderer Art oder defekte Batterien.
Schutzgrad IP65 gegen Staub und Wasser. Nicht geeignet, um ein elektrisches Niederspannungssystem
zu versorgen. Nicht für andere Zwecke verwenden.
1. TECHNISCHE DATEN
Versorgung
Stromaufnahme
Eingangsstrom
Abschaltspannung
Ladestrom
Rückstrom (Back Drain)
Ripple
Batterietyp
220/240V AC 50/60Hz
30W
0.35A RMS.Max
14.4 +/-0.25V oder 7.2+/-0.25V
1.1A +/- 10%
<5mA (No AC input)
150mV Max 0.3A
12V Blei: 2.2Ah - 40Ah
6V Blei: 2.2Ah - 14Ah
IP65
<50dB (Test bei 500mm Abstand)
0 - +40° C
1.0A/250V
Schutzgrad
Geräuschpegel
Gebrauchstemperatur
Innensicherung
2. LEUCHTANZEIGEN
Anzeige
Status
LED
ON (grün)
Modus STANDBY
LED
LED
ON (orange)
ON (rot)
Umgekehrte Polarität
Modus 1
Modus 2
Ladung im Gang
Erklärungen
Standby, Batterie in Ladung oder im
Falle von geöffnetem Kreislauf oder
Kurzschluss
Umgekehrte Polarität
Modus 6V (7.2V - 1.1A)
Modus 12V (14.4V - 1.1A)
Ladung im Gang (unter 25%)
Ladung im Gang
Ladung im Gang (unter 50%)
Ladung im Gang
Ladung im Gang (unter 75%)
Ladung im Gang
Ladung im Gang (unter 100%)
In Erhaltung
Ladung beendet, auf Erhaltung
umgeschaltet
Fehleranzeige
Batterie defekt
LED
ON (rot)
LED 25% blinkend (rot)
LED 25% ON,
LED 50% blinkend (rot)
LED 25%, 50% ON, LED 75%
blinkend (gelb)
LED 25%, 50% , 75% ON,
LED 100% blinkend (grün)
LED 25%, 50%, 75%, 100%
blinkend
LED
und LED 25%, 50%,
75%, 100% blinkend
14
3. AUSWAHL DER UNTERSCHIEDLICHEN MODALITÄTEN
Der Benutzer kann die gewünschte Modalität auswählen, indem er die Wahltaste MODE drückt.
4. LADEPROZESS
LADE-LED - Einheit von 4 LED, etikettiert von links nach rechts 25%, 50%, 75%, 100%. Die LED 25%
und 50% sind rot, die LED 75% gelb und die LED 100% grün. Diese LED zeigen den Prozentwert der
Ladung an, und wenn er 100 % erreicht, geht das Batterieladegerät in den Modus der Beibehaltung der
Ladung über.
LED AUSFALL - Diese orange LED-Anzeige
leuchtet auf und bleibt fest eingeschaltet im Falle einer
Umpolung. In allen anderen Fehlersituationen, (niedrige oder sonstige Spannung), blinkt die LED mit
den LED-Ladeanzeigen.
4.1. RESET
Wenn die Versorgung angelegt ist, stellt sich das Gerät automatisch zurück und bleibt im Modus Standby, wenn der Benutzer keine weiteren Eingriffe vornimmt.
4.2. MODUS STANDBY
Die grüne LED
blinkt solange, bis ein 12V- oder 6V-Modus ausgewählt wird. Im Standby-Modus
erzeugt das Batterieladegerät keinerlei Ladespannung. Um einen Lademodus auszuwählen, muss die
Batterie zunächst angeschlossen werden.
4.3. MODUS 6V:
Diese Modalität wird hauptsächlich dazu verwendet, um Batterien von 6V mit einer Kapazität über 2.2Ah
unter normalen Bedingungen zu laden. Vor dem Laden der Batterie müssen die Ausgangsklemmen des
Ladegerätes mit der korrekten Polarität an die Batterie angeschlossen werden (siehe die Anmerkungen
zum Anschluss), dann muss die Taste MODE gedrückt werden, um den 6V-Modus auszuwählen. Nach
dieser Operation blinkt die LED-Anzeige
und es beginnt der Ladeprozess mit Strom 1.1A +/- 10%.
Wenn alles OK ist, wird der gesamte Ladeprozess ausgeführt, bis 7.2V +/- 0.25V erreicht sind. Sobald
die Batterie vollständig aufgeladen ist, schalten sich die LEDs für 25%, 50%, 75% und 100% ein, und
es wird nur ein geringer Haltestrom für die Batterieladung abgegeben. Hinweis: Wenn die Spannung der
Batterie zwischen 0.6V+/-0.5V und 2V+/-0.5V liegt, beginnt das Ladegerät nicht mit dem Ladeprozess
der Batterie im 6V Modus, sondern nimmt den Ausfall-Modus ein; wenn sie dagegen zwischen 2V +/0.5V und 7V +/-0.25V liegt, beginnt das Batterieladegerät mit dem Ladeprozess. Wenn die
Batteriespannung über 7V +/-0.25V liegt, beginnt das Ladegerät nicht mit dem Ladeprozess, sondern
geht in den Fehlgeschlagen-Modus.
4.4. MODUS 12V:
Diese Modalität wird hauptsächlich dazu verwendet, um Batterien von 12V mit einer Kapazität über
2.2Ah unter normalen Bedingungen zu laden. Vor dem Laden der Batterie müssen die
Ausgangsklemmen des Ladegerätes mit der korrekten Polarität an die Batterie angeschlossen werden
(siehe die Anmerkungen zum Anschluss), dann muss die Taste MODE gedrückt werden, um den 12VModus auszuwählen. Nach dieser Operation blinkt die LED-Anzeige
und es beginnt der Ladeprozess
mit Strom 1.1A +/- 10%. Wenn alles OK ist, wird der gesamte Ladeprozess ausgeführt, bis 14.4V +/0.25V erreicht sind. Sobald die Batterie vollständig aufgeladen ist, schalten sich die LEDs für
25%,50%,75% und 100% ein, und es wird nur ein geringer Haltestrom für die Batterieladung
abgegeben. Hinweis: Wenn die Spannung der Batterie geringer als 7V +/- 0.25V ist, beginnt das
Ladegerät nicht mit dem Ladeprozess der Batterie im 12V-Modus, sondern geht in den FehlgeschlagenModus; wenn sie dagegen zwischen 7V +/- 0.25V und 14V +/0.25V liegt beginnt das Batterieladegerät
mit dem Ladeprozess. Wenn die Batteriespannung über 14V +/-0.25V liegt, beginnt das Ladegerät nicht
mit dem Ladeprozess, sondern geht in den Fehlgeschlagen-Modus.
5. RÜCKGEWINNUNG VON VERBRAUCHTEN BATTERIEN
Wenn das Gerät an eine Batterie angeschlossen wird und der Ladeprozess beginnt, ermittelt das
Batterieladegerät automatisch die Spannung der Batterie und geht in den Impulslademodus über, wenn die
Spannung zwischen 2V +/-0.5V und 5.25V +/- 0.5V für Batterie von 6V und zwischen 7V +/-0.25V und
10.5V +/-0.25V für Batterie von 12V liegt. Dieser Impulsladeprozess wird nicht gestoppt, bis die Spannung
der Batterie 5.25V +/-0.5V oder 10.5V +/-0.25V. erreicht ist. Jetzt schaltet das Batterieladegerät auf den
normalen, vom Benutzer zu Beginn ausgewählten Lademodus um, und die Batterie kann schnell und sicher
aufgeladen werden. Auf diese Weise kann der Großteil der sehr leeren Batterien wiedergewonnen werden.
Wenn die Impulsladung länger als 6 Stunden dauert, und die Spannung der Batterie unter dem Wert von
5.25V +/- 0.5V für Batterie von 6V oder 10.5V +/-0.25V für Batterie von 12V bleibt, geht das
Batterieladegerät in den Fehlgeschlagen–Modus.
15
6. SCHUTZ GEGEN STÖRUNGEN
Sollte es zu einer der folgenden Störungssituationen kommen: Kurzschluss, Rückgewinnungs-Modus
länger als 6 Stunden, Bulk Charging über 96 Stunden, Kreislauf geöffnet oder umgekehrter Anschluss
der Ausgangsklemmen, schaltet der integrierte elektronische Schalter das Ladegerät aus und stellt das
System zurück, um Schäden zu verhindern. Falls kein weiterer Befehl vorliegt, bleibt das Gerät im
Fehlgeschlagen-Modus und die entsprechende LED-Anzeige blinkt, um den Fehler anzuzeigen. Im Falle
einer Polaritätsumkehr schaltet sich außerdem die LED ein, um auf den Fehler hinzuweisen.
7. ÜBERHITZUNGSSCHUTZ
Wenn das Batterieladegerät während des Ladeprozesses aus irgendeinem Grund zu warm wird, vermindert
es die Ausgangsleistung, um mögliche Schäden zu verhindern.
8. ANZEIGE DES LADEZUSTANDES
LED 25%
LED 50%
Blinken
OFF
ON
Blinken
ON
ON
ON
ON
ON
ON
LED 75%
OFF
OFF
Blinken
ON
ON
LED 100%
OFF
OFF
OFF
Blinken
ON
LADEZUSTAND
Unter 25%
Unter 50%
Unter 75%
Unter 100%
Voll geladen
BITTE BEACHTEN SIE:
1. Wenn während der Erhaltungsladung die Spannung größer als 15V +/- 0.25V für 12V-Modalität oder
7.5V +/- 0.25V für 6V-Modalität ist, schaltet das Ladegerät den Ladestrom aus. Wenn die Spannung
weiter auf 12.8V oder 6.4V +/- 0.25V sinkt, nimmt das Ladegerät erneut die Ladung auf, aber ohne
dass sich die Lade-Anzeigen einschalten.
2. Wenn der Stecker des Ladegeräts an die Versorgung angeschlossen wird, leuchten alle LEDAnzeigen für etwa eine halbe Sekunde auf und gehen dann in den Standby-Modus über, es sei
denn, der Benutzer drückt innerhalb von 5 Sekunden die Taste MODE, um den Modus zu wechseln.
9. MAXIMALE LADEZEIT (BULK CHARGING)
Batterie (Ah) Für eine Ladung von circa 80% (Stunden)
6V
2.2
1.5
7.2
5
14
8.5
25
30
40
-
16
Für eine Ladung von circa 80% (Stunden)
12V
1.5
5
8.5
15.5
18
24.5
FR
LIRE ATTENTIVEMENT
• Ce chargeur de batteries est conçu pour charger différents types de batteries au plomb, (comme
WET, GEL, AGM etc.) principalement utilisées dans les automobiles, les motocyclettes et dans
d’autres types de véhicules. Ne pas charger les batteries d’un autre type ou défectueuses.
• Lire attentivement le mode d’emploi avant l'utilisation.
• Utiliser l’appareil uniquement à l’intérieur.
• Protéger le chargeur de batterie de l' humidité et de toute projection d' eau ou de pluie.
• Tenir l' appareil éloigné de toute surface chauffante pendant l' utilisation.
• Ne pas utiliser le chargeur de batteries si les câbles sont défectueux. Les remplacer immédiatement.
• Si l’on emploie une rallonge pour l'alimentation de l'appareil, sa section doit être adéquate.
• Ne pas utiliser l’appareil si son boîtier est endommagé et l’amener chez une personne qualifiée pour
le contrôler et le réparer.
• Ne pas démonter le chargeur de batteries, un montage incorrect pourrait causer des décharges
électriques ou des flammes.
• Utiliser la tension d’alimentation correcte sinon le fonctionnement du dispositif pourrait être
défectueux.
• Quand on branche l’appareil au réseau, il se réinitialise automatiquement et reste en veille si
l’opérateur n’effectue pas d’autres actions.
• Avant de charger les batteries, desserrer les bouchons des éléments de la batterie.
• L'électrolyte doit être à un niveau plus élevé de quelques millimètres par rapport aux séparateurs.
• Si la batterie est un modèle qui se rempli tout seul, produit par Dagenite ou Exide, le verre et le long
bouchon du filtre doivent être laissés à leur place pendant la charge.
• Placer le chargeur de batteries le plus loin possible de la batterie à charger.
• Les batteries produisent un gaz explosif pendant la charge, éviter toutes flammes et étincelles et
utiliser cet appareil dans des lieux bien aérés.
• Pour éviter la formation d'étincelles, s'assurer que les pinces aient un bon contact avec les bornes de
la batterie.
• Eviter de mettre en court-circuit les pinces du chargeur. Prendre soin de ne pas mettre en courtcircuit les pôles de la batterie car elle pourrait exploser.
• Ne jamais approcher le visage de la batterie en faisant les branchements.
• ATTENTION! L' acide des batteries est corrosif! Les éventuelles projection d'acide sur la peau ou
sur les vêtements doivent être lavées à l'eau et au savon. En cas de projection sur les yeux, rincer
immédiatement à l'eau et consulter un médecin.
• Débrancher la prise du chargeur de batteries du réseau avant de connecter ou déconnecter la
batterie.
• Si après 120 heures la batterie n’est pas complètement chargée, le chargeur de batteries doit être
débranché manuellement.
• Les batteries laissées à plat sont gravement endommagées par la sulfatation et gèlent facilement si
la température ambiante est trop basse.
• Ne jamais charger une batterie gelée.
• Ne pas charger des batteries non rechargeables.
• Ne pas utiliser le chargeur de batteries pour charger des batteries à sec car elles pourraient exploser
et créer des lésions et des dommages.
INSTRUCTIONS CONCERNANT LES BRANCHEMENTS:
Pour la connexion de l'appareil, exécuter successivement les opérations suivantes:
• Débrancher la prise du chargeur de batteries du réseau avant de connecter ou déconnecter la
batterie.
• Brancher le câble de sortie ROUGE à la borne de la batterie qui n’est pas connectée à la masse
• Brancher le câble de sortie NOIR (-) à la carrosserie de la voiture, loin de la batterie et de l'arrivée de
carburant.
Pour débrancher l' appareil, il faut:
• Débrancher l’alimentation de l’appareil.
• Oter le câble de la carrosserie (noir).
• Oter le câble de la borne de la batterie (rouge).
Utilisation des terminaisons à anneau.
17
• brancher le conducteur de sortie avec l’anneau noir à la borne (-) moins de la batterie.
• brancher le conducteur de sortie avec l’anneau rouge à la borne (+) plus de la batterie.
• S’assurer que les deux anneaux soient fixés correctement aux bornes de la batterie et garantissent
un contact électrique optimal.
Le connecteur rapide des conducteurs avec les terminaisons à anneau est muni d’un bouchon isolant de
protection qu’il faut toujours remettre en place une fois la charge terminée.
CARACTERISTIQUES
Les caractéristiques de charge du dispositif, permettent de charger la batterie à 100% de sa capacité et
en consentent une longue connexion au chargeur de batteries, même quand il ne charge pas pour la
maintenir toujours en bon état sans l’abîmer.
Différentes modalités de charge sont disponibles.
Une fonction spéciale pour récupérer les batteries épuisées est disponible
La protection complète contre les connexions erronées, l’inversion de polarité et les courts-circuits,
assure une charge en toute sécurité.
L’interrupteur électronique incorporé empêche au chargeur de batteries de s’activer immédiatement
quand il est branché à la batterie mais uniquement à la suite de la sélection d’une modalité de charge.
Le contrôle et l’exécution du cycle de charge sont gérés par un microprocesseur.
DOTATION STANDARD
Bornes de branchement à la batterie.
Câbles de branchement pour moto.
ENTRETIEN
Quand on ne l’utilise pas, le chargeur de batteries doit être conservé dans un endroit sec. Pour le
nettoyage externe, débrancher l’appareil et utiliser un chiffon humide, ne pas utiliser l’eau courante ou
les détergents. Pour les éventuelles réparations, s’adresser uniquement à un centre autorisé.
18
CHARGEUR DE BATTERIES ART. 620 – LEM61211
AVANT D’UTILISER LE CHARGEUR DE BATTERIES, LIRE ATTENTIVEMENT LE MODE D’EMPLOI
ET LES INSTRUCTIONS CONCERNANT LES BRANCHEMENTS.
Ce chargeur de batteries est conçu pour charger différents types de batteries à 6V et 12V au plomb,
(comme WET, GEL, AGM etc.), principalement utilisées dans les automobiles, les motocyclettes et dans
d’autres types de véhicules, avec une capacité de 2,2Ah - 40Ah à 12V ou 2,2Ah - 14Ah à 6V. Ne pas
charger des batteries d’un autre type ou défectueuses.
Degré de protection IP65 contre la poussière et l’eau.
Cet appareil n’est pas conçu pour fournir une alimentation à un système électrique de basse tension. Ne
pas utiliser pour tout autre emploi.
1. DONNEES TECHNIQUES
Alimentation
Courant absorbé
Courant d’entrée
Tension d’interruption de la charge
Courant de charge
Courant Back Drain
Ripple
Type de batterie
Degré de protection
Bruit
Température d’utilisation
Fusible interne
220/240V AC 50/60Hz
30W
0.35A RMS.Max
14.4 +/-0.25V o 7.2+/-0.25V
1.1A +/- 10%
<5mA (No AC input)
150mV Max 0.3A
12V au plomb: 2.2Ah - 40Ah
6V au plomb: 2.2Ah - 14Ah
IP65
<50dB (test de 500mm de distance)
0 - +40° C
1.0A/250V
2. SIGNALISATIONS LUMINEUSES
Indication
Etat
LED
ON (vert)
modalité STANBY
LED
LED
ON (orange)
ON (rouge)
Polarité inversée
Modalité 1
Modalité 2
En charge
Observations
Veille, batterie en charge ou en cas
de circuit ouvert ou court-circuit
Polarité inversée
Modalité 6V (7.2V - 1.1A)
Modalité 12V (14.4V - 1.1A)
En charge (en dessous de 25%)
En charge
En charge (en dessous de 50%)
En charge
En charge (en dessous de 75%)
En charge
En charge (en dessous de 100%)
En maintien
Charge complète, en maintien
Erreur
Batterie défectueuse
LED
ON (rouge)
LED 25% clignotant (rouge)
LED 25% ON,
LED 50% clignotant (rouge)
LED 25%, 50% ON, LED
75% clignotant (jaune)
LED 25%, 50% , 75% ON,
LED 100% clignotant (vert)
LED 25%, 50%, 75%, 100%
clignotants
LED
et LED 25%, 50%,
75%, 100% clignotants
19
3. COMMENT SELECTIONNER LES DIFFERENTES MODALITES
L’utilisateur peut sélectionner la modalité désirée en appuyant sur la touche de sélection MODE.
4. PROCEDE DE CHARGE
LED DE CHARGE - Groupe de 4 LED, étiquetés de gauche à droite 25%, 50%, 75%, 100%. Les LED
25% et 50% sont de couleur rouge, le LED 75% jaune et le LED 100% vert. Ces LED indiquent le
pourcentage de charge et quand cette dernière est à 100% le chargeur de batterie passe en modalité de
charge de maintien.
LED ECHEC - Ce LED
orange s’allumera et restera allumé en cas d’inversion de polarité. Dans tous
les autres cas d’erreur, (voltage bas ou haut), le LED clignotera avec les LED de charge.
4.1. REINITIALISATION
Quand le dispositif est branché à la tension d’alimentation. Il se réinitialise automatiquement et restera
dans la phase de veille si aucune autre action sera effectuée par l’utilisateur.
4.2. MODALITE STANDBY:
Le LED
vert clignotera jusqu’à la sélection d’une modalité, 12V ou 6V. Dans la modalité veille, le
chargeur de batteries ne produira aucun voltage de charge. Pour sélectionner une modalité de charge, il
faut d’abord brancher une batterie.
4.3. MODALITE 6V:
Cette modalité est principalement utilisée pour charger les batteries de 6V avec une capacité supérieure
à 2.2Ah en conditions normales. Avant de charger la batterie, brancher les terminaux de sortie du
chargeur à la batterie avec la correcte polarité (voirinstructions concernant les branchements) et appuyer
sur la touche MODE pour sélectionner la modalité 6V. Après avoir effectué cette opération, le LED
clignotera et le procédé de charge commencera avec un courant de 1.1A +/- 10%. Si tout se passe bien,
tout le procédé de charge se fera jusqu’à 7.2V +/- 0.25V. Quand la batterie sera complètement chargée,
les LED 25% 50% 75% 100% s’allumeront et il restera uniquement un courant bas de mantien de la
charge de la batterie. Note: si le voltage de la batterie est entre 0.6V+/-0.5V et 2V+/-0.5V, le chargeur de
batteries ne commencera pas la charge de la batterie en modalité 6V mais il se positionnera en modalité
échec, si il est entre 2V +/- 0.5V et 7V +/-0.25V, le chargeur de batteries comencera à charger. Si le
voltage de la batterie est supérieur à 7V +/-0.25V, le chargeur de batteries ne commencera pas la
charge et se positionnera en modalité échec.
4.4. MODALITE 12V:
Cette modalité est principalement utilisée pour charger les batteries de 12V avec une capacité
supérieure à 2.2Ah en conditions normales. Avant de charger la batterie, brancher les terminaux de
sortie du chargeur à la batterie avec la polarité correcte (voir instructions concernant les branchements)
et appuyer sur la touche MODE pour sélectionner la modalité 12V. Après avoir effecttué cette opération,
le LED
clignotera et le procédé de charge commencera avec un courant de 1.1A +/- 10%. Si tout se
passe bien, tout le procédé de charge se fera jusqu’à 14.4V +/- 0.25V. Quand la batterie sera
complètement chargée, les LED 25% 50% 75% 100% s’allumeront et il restera uniquement un courant
bas de mantien de charge de la batterie. Note: si le voltage de la batterie est inférieur à 7V +/- 0.25V, le
chargeur de batteries ne commencera pas la charge de la batterie en modalité 12V ma se positionnera
en modalité échec, si il est entre 7V +/- 0.25V et 14V +/- 0.25V, le chargeur de batteries commencera à
charger. Si le voltage de la batterie est supérieur à 14V +/-0.25V, le chargeur de batteries ne
commencera pas la charge mais se positionnera en modalité échec.
5. RECUPERATION DES BATTERIES EPUISEES
Quand on branche l’appareil à une batterie et que le procédé de charge commence, le chargeur de
batteries relève automatiquement le voltage de la batterie et passe en modalité de charge à impulsions
si le voltage est compris entre 2V +/-0.5V et 5.25V +/- 0.5V pour les batteries de 6V et de 7V +/-0.25V à
10.5V +/- 0.25V pour les batteries de 12V. Ce procédé de charge à impulsions ne s’arrêtera pas tant que
le voltage de la batterie n’arrivera pas à 5.25V +/- 0.5V ou 10.5V +/- 0.25V. Une fois arrivé à cette
valeur, le chargeur de batterie passera à la modalité normale de charge sélectionnée par l’utilisateur au
début de l’opération et la batterie pourra être chargée rapidement et en toute sécurité. Avec cette
méthode on peut récupérer la plupart des batteries très déchargées. Si la charge à impulsions dure plus
de 6 heures et le voltage de la batterie reste inférieur à 5.25V +/- 0.5V pour les batteries de 6V ou de
10.5V +/- 0.25V pour les batteries de 12V, le chargeur de batteries se positionnera en modalité échec.
6. PROTECTION POUR ANOMALIES
Si une des situations anormales suivantes devaient se produire : court circuit, modalité récupération
supérieure à 6 heures, bulk charging supérieur à 96 heures, circuit ouvert ou connexion inversée des
terminaux de sortie, l’interrupteur électronique intégré éteindra le chargeur de batterie et passera à la
modalité échec pour éviter les dommages. Si il ne reçoit aucun autre ordre, le dispositif restera dans la
20
modalité échec et le LED correspondant clignotera pour indiquer l’erreur. En outre, en cas d’inversion de
polarité, le LED s’allumera pour indiquer ce type d’erreur.
7. PROTECTION TEMPERATURE
Durant le procédé de charge, si la température du chargeur de batteries, pour un motif quelconque,
devient trop élevée, le dispositif réduira la puissance de sortie pour se protéger d’éventuels dommages.
8. INDICATION DE L’ETAT DE CHARGE
LED (25%)
LED (50%)
LED (75%)
Clignotant
OFF
OFF
ON
Clignotant
OFF
ON
ON
Clignotant
ON
ON
ON
ON
ON
ON
LED (100%)
OFF
OFF
OFF
Clignotant
ON
ETAT DE CHARGE
En dessous de 25%
En dessous de 50%
En dessous de 75%
En dessous de 100%
Complètement chargée
NOTA BENE:
1. Si, pendant la charge de maintien, le voltage devient supérieur à 15V +/- 0.25V en modalité 12V ou à
7.5V +/- 0.25V en modalité 6V, le chargeur de batteries interrompra le courant de charge. Quand le
voltage baissera à 12.8V ou 6.4V +/- 0.25V, le chargeur de batteries reprendra à nouveau la charge
mais sans l’allumage des indicateurs de charge.
2. Quand on branche la prise du chargeur de batteries à l’alimentation, tous les LED s’allument pendant
une demi-seconde puis le chargeur de batteries passe à la modalité veille ou dans à la dernière
modalité dans laquelle on l’avait laissé, à moins que dans les 5 secondes l’utilisateur n’appuie sur la
touche MODE pour changer de modalité.
9. TEMPS DE DEBIT CHARGE MAXIMUM (BULK CHARGING)
Batteries (Ah)
2.2
7.2
14
25
30
40
Pour une charge d’environ 80%
(heures)
6V
1.5
5
8.5
-
21
Pour une charge d’environ 80%
(heures)
12V
1.5
5
8.5
15.5
18
24.5
ES
LEER ATENTAMENTE LAS ADVERTENCIAS
• Este cargador está proyectado para cargar varios tipos de baterías de plomo (como WET, GEL,
AGM, etc.), utilizadas principalmente en coches, motos y otros tipos de vehículos. No cargar baterías
de otro tipo o defectuosas.
• Leer las instrucciones de uso antes de utilizar la máquina.
• Adecuado sólo para uso interno.
• Proteger el cargador de batería de la humedad y salpicaduras de agua y lluvia
• Mantener alejado de superficies calientes durante el funcionamiento.
• No accionarlo en caso de cables dañados hasta después de haberlos sustituidos.
• Los alargadores del cable de alimentación deben tener la sección adecuada.
• No utilizar el cargador si el embalaje está estropeado. Lleve el cargador a una persona cualificada
para que pueda controlarlo y arreglarlo.
• No abrir el cargador: un montaje incorrecto podría causar descargas eléctricas o llamas.
• Cerciorarse de que la tensión de la alimentación sea correcta; si no es así, el dispositivo podría
funcionar defectuosamente.
• Cuando se conecta a la alimentación, el dispositivo se reiniciará automáticamente y se mantendrá en
stand-by si no se lleva a cabo ninguna otra acción.
• Las baterías deben ser cargadas con las tapas de los elementos aflojados.
• El nivel del electrólito debe ser más alto de los separadores en unos milímetros.
• Si la batería es un modelo de auto-recarga, fabricada por Dagenite o Exide, el vidrio y la tapa larga
del filtro deben dejarse en su lugar durante la carga.
• Disponer el carga baterías lo más distante posible de la batería a cargar.
• Las baterías generan gases explosivos; por ello, hay que evitar la formación de llamas o chispas, así
como cargar la batería en ambientes no ventilados.
• Para evitar la formación de chispas asegurarse que las pinzas tengan un buen contacto con los
bornes de la batería.
• Evitar de poner en corto circuito las pinzas del aparato. Tener mucho cuidado de no poner en
cortocircuito los polos de la batería porqué la misma puede explotar.
• No póngase en ningún momento la cara por encima de la batería mientras se efectúen las
conexiones.
• ATENCIÓN, el ácido de la batería es corrosivo. Con salpicaduras en la piel o en la ropa debe
lavarse con agua y/o detergente. En caso de salpicaduras en los ojos, lavarse abundantemente con
agua y acudir a un medico.
• Desconectar la toma del cargador de batería a la red antes de conectar o desconectar la batería.
• Si en el plazo máximo de 120 horas la batería no se ha cargado completamente, el cargador deberá
ser desenchufado manualmente.
• Las baterías que se dejan descargadas se perjudican gravemente por azufración y con bajas
temperaturas ambiente hielan con facilidad.
• Nunca se debe cargar una batería helada.
• No recargar baterías no recargables.
• No usar el cargador para cargar baterías en seco. Podrían explotar y causar lesiones o daños.
NOTA DE CONEXIÓN:
Para conectar el aparato seguir en secuencia las siguientes instrucciones:
• Desconectar la toma del cargador de batería a la red antes de conectar o desconectar la batería.
• Conectar el cable de salida ROJO al borne de la batería no conectada a masa.
• Conectar el cable de salida NEGRO al chasis del vehículo, lejos de la batería y del conducto del
carburante.
Para desconectarlo de la batería:
• Desconectar la alimentación del aparato.
• Desconectar el cable del chasis (negro).
• Desconectar el cable del borne de la batería (rojo).
Uso de terminales redondos.
• Conectar el conductor de salida con el terminal redondo negro al borne (-) negativo de la batería.
• Conectar el conductor de salida con el terminal redondo rojo al borne (+) positivo de la batería.
22
• Asegurarse de que los dos terminales redondos se han fijado correctamente a los bornes de la
batería, a fin de garantizar un contacto eléctrico idóneo.
El conector rápido de los conductores con terminales redondos posee un capuchón aislante de
protección que se debe volver a introducir en el conector rápido al final del proceso de carga.
CARACTERÍSTICAS
Las características de carga del dispositivo permiten cargar la batería al 100% de su capacidad y una
conexión larga del cargador a la batería, incluso cuando no se está usando, para mantenerla siempre en
buen estado, sin dañarla.
Existen varias modalidades de carga.
Hay una función especial para recuperar las baterías gastadas.
La protección completa contra conexiones equivocadas, inversiones de polaridad y cortocircuitos
garantiza operaciones de carga segura.
El interruptor electrónico incorporado impide que el cargador se active inmediatamente cuando se
conecta a la batería. Se activará sólo después de haber seleccionado una modalidad de carga.
Un microprocesador se encarga del control y del ciclo de carga.
SUMINISTRO ESTÁNDAR
Bornes de conexión a la batería.
Cable de motocicleta con terminales redondos.
MANTENIMIENTO
Cuando no se está usando, el cargador de baterías se debe guardar en un lugar seco. Para limpiar el
cuerpo exterior del cargador, desconectar el aparato y utilizar un paño húmedo. Agua corriente o
detergentes no deben ser usados. Reparos en el cargador deben ser hechos solamente en un taller
autorizado.
23
CARGADOR DE BATERÍAS - ART. 620 – LEM61211
ANTES DE USAR EL CARGADOR, LEER ATENTAMENTE LAS ADVERTENCIAS Y LAS INSTRUCCIONES
Este cargador ha sido proyectado para cargar varios tipos de baterías de 6V y 12 V, de plomo (como
WET, GEL, AGM etc.), utilizadas principalmente en coches, motos y otros tipos de vehículos, con
capacidad de 12V 2,2Ah - 40Ah o de 6V 2,2Ah - 14Ah. No cargar baterías de otro tipo o defectuosas.
Grado de protección IP65 contra polvo y agua.
No ha sido proyectado para suministrar alimentación a un sistema eléctrico de baja tensión. No usar
para ningún otro fin.
1. CARACTERÍSTICAS TÉCNICAS
Alimentación
Corriente absorbida
Corriente de entrada
Tensión de interrupción de carga
Corriente de carga
Corriente Back Drain
Ripple
Tipo de batería
Grado de protección
Ruido
Temperatura de uso
Fusible interno
220/240V CA 50/60Hz
30W
0.35A RMS.Max
14.4 +/-0.25V o 7.2+/-0.25V
1.1A +/- 10%
<5mA (No AC input)
150mV Max 0.3A
12V de plomo: 2.2Ah - 40Ah
6V de plomo: 2.2Ah - 14Ah
IP65
<50dB (test realizado a 500mm de distancia)
0 - +40° C
1.0A/250V
2. INDICADORES LUMINOSOS
Indicación
LED
ON (verde)
LED
ON (naranja)
LED
ON (rojo)
LED
ON (rojo)
LED 25% intermitente (rojo)
LED 25% ON,
LED 50% intermitente (rojo)
LED 25%, 50% ON, LED 75%
intermitente (amarillo)
LED 25%, 50% , 75% ON,
LED 100% intermitente (verde)
LED 25%, 50%, 75%, 100%
intermitentes
LED
y LED 25%, 50%, 75%, 100%
intermitentes
Estado
Modalidad
STAND-BY
Polaridad
inversa
Modalidad 1
Modalidad 2
Cargando
Observaciones
Standby, batería en carga o en caso
de circuito abierto o cortocircuito
Cargando
Cargando (por debajo del 50%)
Cargando
Cargando (por debajo del 75%)
Cargando
Cargando (por debajo del 100%)
En
mantenimiento
Indicador de
error
Carga completada, en
mantenimiento
24
Polaridad inversa
Modalidad 6V (7.2V - 1.1A)
Modalidad 12V (14.4V - 1.1A)
Cargando (por debajo del 25%)
Fallo de la batería
3. CÓMO SELECCIONAR LAS DISTINTAS MODALIDADES
El usuario puede seleccionar la modalidad deseada apretando la tecla de selección MODE.
4. PROCESO DE CARGA
LED DE CARGA - Grupo de 4 LED, etiquetados de izquierda a derecha 25%, 50%, 75%, 100%. Los
LED 25% y 50% son de color rojo, el LED 75%, amarillo, y el LED 100%, verde. Estos LEDS indican el
porcentaje de carga; cuando la carga llega al 100%, el cargador pasa a la modalidad de carga de
mantenimiento.
LED DE FALLO - Este LED
naranja se iluminará y permanecerá fijo en caso de inversión de
polaridad. En todos los otros casos de error, (bajo o alto voltaje), el LED parpadeará con los LED de
carga.
4.1. RESET
Cuando se conecta a la tensión de alimentación, el dispositivo se reinicia automáticamente y, si el
usuario no lleva a cabo ninguna otra operación, se pone en stand by.
4.2. MODALIDAD STANDBY:
El LED
verde parpadeará hasta que se seleccione una modalidad 12V o 6V. En modalidad standby,
el cargador no producirá ningún voltaje de carga. Para seleccionar una modalidad de carga, es
necesario conectar primero una batería.
4.3. MODALIDAD 6V:
Esta modalidad se usa sobre todo para cargar baterías de 6V con capacidad superior a 2.2Ah, en
condiciones normales. Antes de cargar la batería, conecte los terminales de salida del cargador a la
batería con la polaridad correcta (ver nota de conexión) y pulse la tecla MODE para seleccionar la
modalidad 6V. Después de haber realizado esta operación, el LED
parpadeará y empezará el
proceso de carga con corriente 1.1A +/- 10%. Si todo funciona correctamente, el proceso de carga se
llevará a cabo hasta alcanzar 7.2V +/-0.25V. Cuando la batería esté completamente cargada, los LED
25% 50% 75% 100% se encenderán y se suministrará una pequeña corriente para mantener la carga
de la batería. Nota: si el voltaje de la batería está entre 0.6V +/-0.5V y 2V +/-0.5V, el cargador no
empezará a cargar la batería en modalidad 6V y se pondrá en modalidad de fallo, si está entre 2V +/0.5V y 7V +/-0.25V el cargador empezará a cargar. Si el voltaje de la batería es superior a 7V +/-0.25V,
el cargador no empezará a cargar y se pondrá en modalidad de fallo.
4.4. MODALIDAD 12V:
Esta modalidad se usa sobre todo para cargar baterías de 12V con capacidad superior a 2.2Ah, en
condiciones normales. Antes de cargar la batería, conecte los terminales de salida del cargador a la
batería con la polaridad correcta (ver nota de conexión) y pulse la tecla MODE para seleccionar la
modalidad 12V. Después de haber realizado esta operación, el LED
parpadeará y empezará el
proceso de carga con corriente 1.1A +/-10%. Si todo funciona correctamente, el proceso de carga se
llevará a cabo hasta alcanzar 14.4V +/-0.25V. Cuando la batería esté completamente cargada, los LED
25% 50% 75% 100% se encenderán y se suministrará una pequeña corriente para mantener la carga
de la batería. Nota: si el voltaje de la batería es inferior a 7V +/-0.25V, el cargador no empezará a cargar
la batería en modalidad 12V y se pondrá en modalidad de fallo, si está entre 7V +/-0.25V e 14V +/-0.25V
el cargador empezará a cargar. Si el voltaje de la batería es superior a 14V +/-0.25V, el cargador no
empezará a cargar y se pondrá en modalidad de fallo.
5. RECUPERACIÓN DE BATERÍAS GASTADAS
Cuando se conecta el aparato a una batería e inicia el proceso de carga, el cargador detecta
automáticamente el voltaje de la batería y pasa a la modalidad de carga por impulsos si el voltaje está
entre 2V +/-0.5V y 5.25V +/-0.5V para baterías de 6V y entre 7V +/-0.25V y 10.5V +/-0.25V para
baterías de 12V. Este proceso de carga por impulsos no se detendrá hasta que el voltaje de la batería
no llegue a 5.25V +/-0.5V o 10,5 V +/-0,25V. Llegados a este punto, el cargador volverá a pasar a la
modalidad normal de carga seleccionada por el usuario al principio y la batería podrá ser cargada de
manera rápida y segura. Con este método pueden recuperarse la mayor parte de las baterías muy
gastadas. Si la carga por impulsos dura más de 6 horas y el voltaje de la batería se mantiene por debajo
del valor equivalente a 5.25V +/-0.5V para baterías de 6V o 10,5 V +/-0,25V para baterías de 12V, el
cargador se pondrá en modalidad de fallo.
6. PROTECCIÓN CONTRA ANOMALÍAS
Si se presentara una de las siguientes situaciones anómalas: cortocircuito, modalidad de recuperación
superior a 6 horas, bulk charging superior a 96 horas, circuito abierto o conexión inversa de los
terminales de salida, el interruptor electrónico integrado apagará el cargador y pasará a la modalidad de
fallo para evitar daños. Si no recibirá ninguna otra señal, el dispositivo permanecerá en la modalidad de
25
fallo y el LED correspondiente parpadeará para indicar el error. Además, en caso de inversión de
se encenderá para indicar el error.
polaridad, el LED
7. PROTECCIÓN CONTRA TEMPERATURA
Durante el proceso de carga, si el cargador se calienta demasiado, sea cual fuere el motivo, reducirá la
potencia de salida para protegerse de eventuales daños.
8. INDICACIÓN DE LA SITUACIÓN DE CARGA
LED 25%
LED 50%
LED 75%
Intermitente
OFF
OFF
ON
Intermitente
OFF
ON
ON
Intermitente
ON
ON
ON
ON
ON
ON
LED 100%
OFF
OFF
OFF
Intermitente
ON
ESTADO DE CARGA
Por debajo del 25%
Por debajo del 50%
Por debajo del 75%
Por debajo del 100%
Carga completa
IMPORTANTE:
1. Si, durante la carga de mantenimiento, el voltaje es superior a 15V +/- 0.25V en modalidad 12V o
7.5V +/- 0.25V en modalidad 6V, el cargador apagará la corriente de carga. Al bajar el voltaje a
12.8V o 6.4V +/- 0.25V, el cargador empezará nuevamente a cargar pero sin que se enciendan los
indicadores de carga.
2. Cuando se conecta el enchufe del cargador a la alimentación, se encienden todos los LED durante
medio segundo y entonces el cargador pasa a la modalidad standby o a la última modalidad en la
que se había dejado, a menos que el usuario pulse, dentro de 5 segundos, la tecla MODE para
cambiar la modalidad.
9. TIEMPO DE SUMINISTRO DE CARGA MÁXIMA (BULK CHARGING)
Batería (Ah) Para una carga de alrededor del 80% (horas) Para una carga de alrededor del 80% (horas)
6V
12V
2.2
1.5
1.5
7.2
5
5
14
8.5
8.5
25
15.5
30
18
40
24.5
26
PT
ADVERTÊNCIAS QUE DEVEM SER LIDAS ATENTAMENTE
• Este carregador de bateria foi projectado para carregar vários tipos de baterias de chumbo, (como
WET, GEL, AGM, etc.), principalmente usadas em automóveis, motocicletas e outros tipos de
veículos. Não carregar baterias de tipo diverso ou com defeitos.
• Ler as instruções de utilização antes de usar o aparelho.
• Adequado somente para uso interno.
• Proteger o aparelho da humidade, água ou orvalho;
• Mantê-lo distante de superfícies aquecidas durante o funcionamento.
• Certificar-se de que os cabos estejam intactos, no caso contrário substitui-los.
• Eventuais extensões do cabo de alimentação devem ter secção adequada.
• Não utilizar o carregador de bateria se a embalagem estiver danificada. Deve ser controlado e
reparado por técnicos qualificados.
• Não desmontar o carregador de bateria, a montagem incorrecta pode provocar choques eléctricos ou
chamas.
• Certificar-se de que é usada a tensão de alimentação correcta, caso contrário o funcionamento do
dispositivo pode falhar.
• Quando conectado à alimentação, o dispositivo é reiniciado automaticamente e permanece em
modalidade de espera (stand-by) se nenhuma outra acção for realizada pelo utilizador.
• As baterias devem ser carregadas com as tampinhas um pouco abertas.
• O nível do electrólito deve estar alguns milímetros acima dos separadores.
• Se a bateria é um modelo com auto-abastecimento fabricada pela Dagenite ou pela Exide, o vidro e a
tampa longa do filtro devem ser deixados no lugar durante a carga.
• Colocar o carregador de baterias o mais longe possível da bateria a ser carregada.
• As baterias produzem gases explosivos, portanto deve-se evitar a formação de chamas ou fagulhas,
assim como a carga em ambientes não ventilados.
• Para evitar que se formem faíscas nas extremidades das pinças certificar-se de que haja um bom
contato dos mesmos com os bornes da bateria, antes de ligar o carregador de bateria.
• Evitar criar um curto-circuito com as pinças do aparelho. Prestar muita atenção para não criar curtocircuito com os pólos da bateria: poderia explodir.
• Nunca colocar o rosto acima da bateria enquanto se estiver efectuando as ligações.
• ¡ATENÇÃO! O acido das baterias é corrosivo. Se o acido das baterias entrar em contacto com a
pele ou com a roupa, lavar de imediato as zonas afectadas com água tépida e consultar um médico;
• Desligar a ficha do carregador de baterias da alimentação antes de ligar ou desligar a bateria;
• Se dentro de 120 horas (máx.) a bateria não estiver completamente carregada, o carregador de
bateria deverá ser desconectado manualmente.
• Danifica-se gravemente as baterias quando deixadas descarregadas por sulfatização, e se
submetidas a baixas temperaturas congelam-se facilmente.
• Nunca carregar uma bateria congelada!!!
• Não recarregar baterias não recarregáveis.
• Não usar o carregador de bateria para carregar baterias secas. Podem estourar e causar lesões e
danos.
INSTRUÇÕES DE CONEXÃO
Para ligar o aparelho, fazer as seguintes operações em sucessão:
• Desligar a ficha do carregador de baterias da alimentação antes de ligar ou desligar a bateria;
• Ligar o cabo VERMELHO ao borne da bateria não conectado com a massa;
• Ligar o cabo PRETO ao chassis da viatura, longe da bateria e dos tubos de carburante.
Para desligar a bateria, fazer o seguinte:
• Desligar o aparelho da corrente eléctrica;
• Desligar a pinça preta do chassis;
• Desligar a pinça vermelha do borne da bateria.
Utilização dos terminais de olhal.
• Ligue o condutor de saída com olhal negro ao pólo (-) negativo da bateria.
• Ligue o condutor de saída com olhal vermelho ao pólo (+) positivo da bateria.
• Assegure-se de que os dois olhais estão correctamente fixados aos bornes da bateria, garantindo um
contacto eléctrico perfeito.
27
O conector rápido dos condutores com terminais tipo olhal è provido de capuz isolante de protecção
que, terminada a carga, deve sempre ser colocado sobre o conector rápido.
CARACTERÍSTICAS
As características de carga do dispositivo permitem carregar 100% da capacidade da bateria e
permitem uma longa conexão com o carregador de bateria, mesmo se não estiver em uso, para mantêla sempre em bom estado sem danificá-la.
Estão disponíveis diversas modalidades de carga.
Está disponível uma função especial para recuperar baterias completamente descarregadas.
A protecção completa contra conexões erradas, inversão de polaridade e curto-circuitos garante
operações de carga seguras.
O interruptor electrónico incorporado impede que o carregador de bateria seja activado imediatamente
ao ser conectado com a bateria, o que ocorre somente depois de seleccionada uma modalidade de
carga.
O controlo e a execução do ciclo de carga são realizados por um microprocessador.
EQUIPAMENTO PADRÃO
Terminais de conexão com a bateria.
Cabo de motocicleta com terminais de olhal.
MANUTENÇÃO
Quando não esta a ser utilizado, o carregador de baterias deve ser conservado numa zona seca. Para a
limpeza do exterior do carregador de baterias, desligue o aparelho e use um pano úmido. Água corrente
ou detergentes não devem ser utilizados. Reparos no carregador devem ser feitos somente em uma
oficina autorizada.
28
CARREGADOR DE BATERIA ART. 620 – LEM61211
ANTES DE UTILIZAR O CARREGADOR, LER ATENTAMENTE AS ADVERTÊNCIAS E AS INSTRUÇÕES
Este carregador de bateria foi projectado para carregar diversos tipos de baterias de 6V e 12V de
chumbo, (como WET, GEL, AGM, etc.), usadas principalmente em automóveis, motocicletas e outros
tipos de veículos, com capacidade entre 2,2Ah e 40Ah para baterias de 12V ou entre 2,2Ah e 14Ah para
baterias de 6V. Não carregar baterias de tipo diverso ou com defeitos.
Grau de protecção IP65 contra poeira e água.
Não foi projectado para alimentar um sistema eléctrico de baixa tensão. Não usar para nenhum outro
tipo de finalidade.
1. ESPECIFICAÇÕES TÉCNICAS
Alimentação
Corrente absorvida
Corrente de entrada
Tensão de interrupção da carga
Corrente de carga
Corrente de retorno
Ripple
Tipo de bateria
Grau de protecção
Ruído
Temperatura de utilização
Fusível interno
220/240V AC 50/60Hz
30W
0.35A RMS.Max
14.4 +/-0.25V ou 7.2+/-0.25V
1.1A +/- 10%
<5mA (No AC input)
150mV Max 0.3A
12V, de chumbo: 2.2Ah - 40Ah
6V, de chumbo: 2.2Ah - 14Ah
IP65
<50dB (teste a 500mm de distância)
0 - +40° C
1.0A/250V
2. SINALIZAÇÕES LUMINOSAS
Indicação
Estado
LED
ON (verde)
Modalidade de
ESPERA
LED
ON (laranja)
LED
ON vermelho)
LED
ON (vermelho)
LED 25% intermitente (Vermelho)
LED 25% ON,
LED 50% intermitente (Vermelho)
LED 25%, 50% ON, LED 75%
intermitente (amarelo)
LED 25%, 50% , 75% ON,
LED 100% intermitente (Verde)
LED 25%, 50%, 75%, 100%
intermitentes
LED
e LED 25%, 50%, 75%, 100%
intermitentes
Polaridade
invertida
Modalidade 1
Modalidade 2
Em carga
Observações
Espera, bateria em carregamento ou
em caso do circuito aberto ou curto
circuito
Polaridade invertida
Modalidade 6V (7.2V - 1.1A)
Modalidade 12V (14.4V - 1.1A)
Em carga (abaixo de 25%)
Em carga
Em carga (abaixo de 50%)
Em carga
Em carga (abaixo de 75%)
Em carga
Em carga (abaixo de 100%)
Sob
manutenção
Indicador de
erro
29
Carga completa, sob manutenção
Bateria em falha
3. COMO SELECCIONAR AS DIVERSAS MODALIDADES
O utilizador pode seleccionar a modalidade desejada premendo a tecla de selecção MODE.
4. PROCESSO DE CARGA
LED DE CARGA - Grupo de 4 LEDs, etiquetados, da esquerda para a direita, 25%, 50%, 75%, 100%.
Os LEDs 25% e 50% são vermelhos, o LED 75%, amarelo e o LED 100%, verde. Estes LEDs indicam o
percentual de carga e quando a carga atinge 100% o carregador de bateria entra em modalidade de
carga de manutenção.
LED FALHA - Este LED
laranja se irá iluminar e permanecerá fixo em caso de inversão de
polaridade. Em todos os outros casos de erro (baixa ou alta voltagem), o LED irá piscar com os LED de
carga.
4.1. REINICIALIZAÇÃO
Quando conectado à tensão de alimentação, o dispositivo é reiniciado automaticamente e permanece
em modalidade de espera se nenhuma outra ação for realizada pelo utilizador.
4.2. MODALIDADE DE ESPERA
O LED
verde irá piscar até que não seja seleccionada uma modalidade 12V ou 6V. Em modalidade
espera, o carregador de bateria não irá produzir qualquer voltagem de carga. Para seleccionar uma
modalidade de carga, é necessário primeiro conectar uma bateria.
4.3. MODALIDADE 6V:
Esta modalidade é usada principalmente para carregar baterias de 6V com capacidades superiores a
2.2Ah em condições normais. Antes de carregar a bateria, conectar os terminais de saída do carregador
de bateria com a bateria com a polaridade correcta (ver instruções de conexão), e pressionar a tecla
MODE para seleccionar a modalidade 6V . Após ter realizado esta operação, o LED
irá piscar e
começará o processo de carga com corrente 1.1A +/- 10%. Se tudo estiver bem será feito todo o
processo de carregamento até se atingir 7.2V +/- 0.25V. Assim que a bateria estiver completamente
carregada, os LED 25% 50% 75% 100% se acenderão e será fornecida apenas uma pequena corrente
de manutenção da carga da bateria. Nota: se a voltagem da bateria é entre 0.6V+/-0.5V e 2V+/-0.5V, o
carregador de bateria não irá começar o carregamento da bateria em modalidade 6V mas colocar-se-à
em modalidade de falha; se for entre 2V +/- 0.5V e 7V +/-0.25V, o carregador de bateria começará a
carregar. Se a voltagem da bateria é superior a 7V +/-0.25V, o carregador de bateria não irá a começar
a carregar mas colocar-se-à em modalidade de falha.
4.4. MODALIDADE 12V:
Esta modalidade é usada principalmente para carregar baterias de 12V com capacidades superiores a
2.2Ah em condições normais. Antes de carregar a bateria, conectar os terminais de saída do carregador
de bateria à bateria com a polaridade correcta (ver instruções de conexão), e pressionar a tecla MODE
para seleccionar a modalidade 12V. Após ter realizado esta operação, o LED
irá piscar e começará
o processo de carga com corrente 1.1A +/- 10%. Se tudo estiver bem será feito todo o processo de
carregamento até se atingir 14.4V +/- 0.25V. Assim que a bateria estiver completamente carregada, os
LED 25% 50% 75% 100% se acenderão e será fornecida apenas uma pequena corrente de
manutenção da carga da bateria. Nota: se a voltagem da bateria é inferior a 7V+/-0.5V-2V+/0.25V, o
carregador de bateria não irá começar o carregamento da bateria em modalidade 12V mas colocar-se-à
em modalidade de falha; se for entre 7V +/- 0.25V e 14V +/- 0.25V, o carregador de bateria começará a
carregar. Se a voltagem da bateria é superior a 14V +/-0.25V, o carregador de bateria não irá a começar
a carregar mas colocar-se-à em modalidade de falha.
5. SALVAMENTO DE BATERIAS COMPLETAMENTE DESCARREGADAS
Quando o aparelho é conectado a uma bateria e o processo de carga é iniciado, o carregador de bateria
detecta automaticamente a voltagem da bateria e passa para a modalidade de carga por impulsos se a
voltagem estiver entre 2V +/-0.5V e 5.25V +/-0.5V para baterias de 6V e entre 7V +/-0.25V e 10.5V +/0.25V para baterias de 12V. Este processo de carga por impulsos não para enquanto a voltagem da
bateria não alcançar 5.25V +/-0.5V ou 10.5V +/-0.25V. A partir deste momento, o carregador de bateria
passará para a modalidade de carga normal seleccionada pelo utilizador no início e a bateria poderá ser
carregada rapidamente e de forma segura. Com este método podem ser recuperadas a maioria das
baterias excessivamente descarregadas. Se a carga por impulsos durar mais de 6 horas e a voltagem
da bateria permanecer abaixo do valor 5.25V +/-0.5V para baterias de 6V ou 10.5V +/-0.25V para
baterias de 12V, o carregador de bateria colocar-se-à em modalidade de falha.
30
6. PROTECÇÃO CONTRA ANOMALIAS
Se se apresentar uma das seguintes situações anómalas: curto-circuito, recuperação superior a 6
horas, bulk charging superior a 96 horas, circuito aberto ou conexão invertida dos terminais de saída, o
interruptor eletrónico integrado desligará o carregador de bateria e passará à modalidade de falha para
evitar danos. Se não receber qualquer outra ordem, o dispositivo permanecerá na modalidade de falha
e o respetivo LED piscará para indicar o erro. Além disso, em caso de inversão de polaridade, se
acenderá o LED para indicar este tipo de erro.
7. PROTECÇÃO DA TEMPERATURA
Durante o processo de carga, se o carregador de bateria aquecer demasiadamente, por um motivo
qualquer, a potência de saída será reduzida para protegê-lo contra eventuais danos.
8. INDICAÇÃO DO ESTADO DE CARGA
LED 25%
LED 50%
LED 75%
Intermitente
OFF
OFF
ON
Intermitente
OFF
ON
ON
Intermitente
ON
ON
ON
ON
ON
ON
LED 100%
OFF
OFF
OFF
Intermitente
ON
ESTADO DE CARGA
Inferior a 25%
Inferior a 50%
Inferior a 75%
Inferior a 100%
Completamente carregada
NOTA:
1. Se, durante a carga de manutenção, a voltagem for superior a 15V +/- 0.25V em modalidade 12V ou
7.5V +/- 0.25V em modalidade 6V, o carregador de bateria desligará a corrente de carga. Quando a
voltagem se baixar a 12.8V ou 6.4V +/- 0.25V, o carregador de bateria retomará novamente o
carregamento mas sem o acendimento dos indicadores de carga.
2. Quando se ligar a ficha do carregador de bateria à alimentação, acendem-se todos os LED durante
cerca de meio segundo, depois o carregador de bateria passa à modalidade de espera ou para a
última modalidade no qual foi deixado, a não ser que dentro de 5 segundos o utilizador não
pressione o botão MODE para mudar a modalidade.
9. TEMPO DE FORNECIMENTO DA CARGA MÁXIMA (BULK CHARGING)
Bateria (Ah)
Para uma carga de cerca de 80% (horas) Para uma carga de cerca de 80% (horas)
6V
12V
2.2
1.5
1.5
7.2
5
5
14
8.5
8.5
25
15.5
30
18
40
24.5
31
HSF REQUISITI – REQUIREMENTS – ERFORDERNISSE –REQUISITOS:- ROHS, REACH, 16PAHs<200ppm
IT
SMALTIMENTO APPARECCHIATURE ELETTRICHE ED ELETTRONICHE
Non smaltire le apparecchiature elettriche assieme ai rifiuti normali! In ottemperanza alla Direttiva Europea 2002/96/CE sui
rifiuti da apparecchiature elettriche ed elettroniche e relativa attuazione nell'ambito della legislazione nazionale, le
apparecchiature elettriche giunte a fine vita devono essere raccolte separatamente e conferite ad un impianto di riciclo
ecocompatibile. In qualità di proprietario delle apparecchiature dovrà informarsi presso il nostro rappresentante in loco sui
sistemi di raccolta approvati. Dando applicazione a questa Direttiva Europea migliorerà la situazione ambientale e la salute
umana!
GB
DISPOSAL OF ELECTRICAL AND ELECTRONIC EQUIPMENT
Do not dispose of electrical equipment together with normal waste! In observance of European Directive 2002/96/EC on
Waste Electrical and Electronic Equipment and its implementation in accordance with national law, electrical equipment that
has reached the end of its life must be collected separately and returned to an environmentally compatible recycling facility.
As the owner of the equipment, you should get information on approved collection systems from our local representative.
By applying this European Directive you will improve the environment and human health!
DE
ENTSORGUNG DER ELEKTRO- UND ELEKTRONIKGERÄTE
Elektrogeräte dürfen niemals gemeinsam mit gewöhnlichen Abfällen entsorgt werden!
In Übereinstimmung mit der Europäischen Richtlinie 2002/96/EG über Elektro- und Elektronik-Altgeräte und der jeweiligen
Umsetzung in nationales Recht sind nicht mehr verwendete Elektrogeräte gesondert zu sammeln und einer Anlage für
umweltgerechtes Recycling zuzuführen. Als Eigentümer der Geräte müssen Sie sich bei unserem örtlichen Vertreter über die
zugelassenen Sammlungssysteme informieren. Die Umsetzung genannter Europäischer Richtlinie wird Umwelt und
menschlicher Gesundheit zugute kommen!
FR
ÉLIMINATION D'ÉQUIPEMENTS ÉLECTRIQUES ET ÉLECTRONIQUES
Ne pas éliminer les déchets d’équipements électriques et électroniques avec les ordures ménagères! Conformément à la
Directive Européenne 2002/96/CE sur les déchets d’équipements
électriques et électroniques et à son introduction dans
le cadre des législations nationales, une fois leur cycle de vie terminé, les équipements électriques et électroniques doivent
être collectés séparément et conférés à une usine de recyclage. Nous recommandons aux propriétaires des équipements de
s’informer auprès de notre représentant local au sujet des systèmes de collecte agréés. En vous conformant à cette Directive
Européenne, vous contribuez à la protection de l’environnement et de la santé!
ES
RECOGIDA Y GESTIÓN DE LOS RESIDUOS DE APARATOS ELÉCTRICOS Y ELECTRÓNICOS¡
No está permitido eliminar los aparatos eléctricos junto con los residuos sólidos urbanos! Según lo establecido por la
Directiva Europea 2002/96/CE sobre residuos de aparatos eléctricos y electrónicos y su aplicación en el ámbito de la
legislación nacional, los aparatos eléctricos que han concluido su vida útil deben ser recogidos por separado y entregados a
una instalación de reciclado ecocompatible. En calidad de propietario de los aparatos, usted deberá solicitar a nuestro
representante local las informaciones sobre los sistemas aprobados de recogida de estos residuos. ¡Aplicando lo establecido
por esta Directiva Europea se contribuye a mejorar la situación ambiental y salvaguardar la salud humana!
PT
ELIMINAÇÃO DE APARELHAGENS ELÉCTRICAS E ELECTRÓNICAS
Não eliminar as aparelhagens eléctricas juntamente ao lixo normal! De acordo com a Directiva Europeia 2002/96/CE sobre
os lixos de aparelhagens eléctricas e electrónicas e respectiva execução no âmbito da legislação nacional, as aparelhagens
eléctricas que tenham terminado a sua vida útil devem ser separadas e entregues a um empresa de reciclagem ecocompatível. Na qualidade de proprietário das aparelhagens, deverá informar-se junto do nosso representante no local sobre
os sistemas de recolha diferenciada aprovados. Dando aplicação desta Directiva Europeia, melhorará a situação ambiental e
a saúde humana!
elettro c.f. s.r.l. - Via Miglioli, 24 - 40024 Castel S. Pietro Terme ( Bologna ) ITALY
Tel. +39 051941453 -Fax +39 051944602 – [email protected] - www.elettrocf.com
Cod. 381588 (05/2013)
32
Baixar