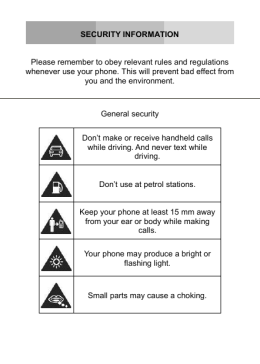
T7 USER MANUAL
Safety Precautions
Read these safety instructions before using your device and store them for possible future reference. Always
follow these basic safety precautions when using your Mobile device. This reduces the risk of fire, electric shock,
and injury.
●
●
●
●
●
●
●
●
●
●
●
●
●
●
●
●
●
●
●
●
Do not expose this product to rain or moisture.
Keep the device out of direct sunlight and heat sources.
Protect the power cord. Route power cords so that they are not likely to be walked on or pinched by
items placed on or against them. Pay particular attention to the point where the cord attaches to the
device.
Only use the AC adapter included with the device. Using any other power adapter voids your warranty.
Do not remove the cover. There are no user-serviceable parts inside.
If the charger cord is damaged, have it repaired by the manufacturer, its service or a similarly qualified
person in order to avoid any hazard.
The charger is not intended for use by persons (including children) with reduced physical, sensory or
mental capacity. Persons who have not read the manual, unless they have received explanations by a
person responsible for their safety and supervision should not use this unit.
Children should be monitored to ensure that they do not play with the charger.
The charger should always be readily accessible.
The device should not be exposed to dripping or splashing water.
No objects filled with liquids such as vases shall be placed on the device.
Always leave a minimum distance of 10 cm around the unit to ensure sufficient ventilation.
Naked flame sources, such as candles, should not be placed on top of the device.
The device is intended for use only in a temperate climate.
CAUTION: Danger of explosion if battery is incorrectly replaced or not replaced by the same type or
equivalent.
The battery should not be exposed to excessive heat such as sunshine, fire or similar.
Different types of batteries, new and used batteries should not be mixed.
The battery must be installed according to the polarity.
If the battery is worn, it must be removed from the product.
The battery must be disposed of safely. Always use the collection bins provided (check with your
dealer) to protect the environment.
CLEAN YOUR DEVICE
Treat the screen gently. To clean fingerprints or dust from the screen, we recommend using a soft, non-abrasive
cloth such as a camera lens cloth.
SWITCH OFF IN RESTRICTED AREAS
Turn off the power when the use of the mobile device is not authorized or when it may cause interference or danger,
for example; on board an aircraft, near medical equipment, fuel, chemicals or blasting sites.
1
ROAD SAFETY COMES FIRST
Check the current laws and regulations in the area where you drive, regarding the use of mobile devices such as this
mobile device.
•
•
•
•
Do not hold this mobile device while driving
Concentrate fully on the driving
Radio Frequency (RF) can affect certain electronic systems in your car, such as the audio-stereo system or
security equipment.
An airbag inflates with great force. Do not store the mobile device or any of its accessories in the area above
the bag or in its deployment area.
INTERFERENCE
All wireless devices are susceptible to interference which can affect their performance.
AUTHORISED PERSONNEL
Only qualified personnel are authorized to install or repair this product
ACCESSORIES
Only use batteries, chargers and other accessories which are compatible for this device. Do not connect
incompatible products.
KEEP YOUR DEVICE DRY
Your device is not water proof. Keep it dry.
CHILDREN
Keep the mobile device in a safe place out of the reach of young children. Your mobile device contains small pieces
which can present a choking hazard.
Specification
Display Type: 7 inch TFT panel
Max. Resolution: 800 x 480
Processor Type: 1.2 GHz
Storage drive type: 16GB
System RAM: 512M DDRIII
Operating System: Android 4.1
Touch Panel: Capacitive
Wireless connection: 802.11b/g/n
Built-in battery capacity: 2600mAH Li-Ion rechargeable battery.
Input: DC 5V---2A
2
1. Outlook Description
Charger Port
Microphone
Power Button
USB Port
Earphones
Volume +
Volume -
MicroSD Slot
2. Power Button Usage
Starting up: Long press the power button for 3 seconds.
Power off: Long press the power button for 3 seconds →click power off → click confirm
Screen off and on: Short press power button to turn off or turn on screen
Mandatory shutdown: If the device has no response, long press the power button for 6 seconds to perform
mandatory power off
3.Standby screen and applications
3-1 Introduction of Main Interface
Press and hold the power button to boot up the machine, the screen after boot-up is in a locked state, slide on
unlock icon to unlock, then you will enter the main interface as shown below.
Through this interface you can browse menu used recently, replace wallpaper, add widgets or program shortcut,
open procedures or carry out the other operations.
3
3-1-1. Status bar: tap on status bar at the lower right corner with finger, you can open notification bar to read
prompt message, networking status, battery status, and can also see today's date and time.
3-1-2. Return button: tap
with finger, you can return to the previous operation or exit the application program.
3-1-3. Main interface: tap main interface button
to enter the main interface:
3-1-4. Menu button recently used: touch
to pop up functional menus recently used as follows: Through this
shortcut button, you can quickly access to application programs running in the backstage and browse traces of
recent use.
3-1-5. Volume - / Volume +: touch this buttons to volume up or down the device.
3-1-6. Main menu button: touch
to open a full-function menu as follows:
This window shows all functional icons in this machine, touch any icon to enter the relevant functional interface,
functions of these icons are introduced briefly as follows:
Browser: touch to enter Internet interface and browsing websites.
Calendar: view calendar and settings.
Calculator.
4
Clock: can set alarm clock.
Music: can play music. Please refer to the introduction of (3-1.Music) for the method of operation.
Video: please refer to the introduction of (3-2. Video) for the method of operation.
Recorder: enter recording interface for recording. Please refer to the introduction of (3-3. Recording) for the
method of operation.
Camera: please refer to the introduction of (3-4. Camera) for the method of operation.
3-2.Applications Installation
This machine is free to install APK (abbreviation of Android Package, namely Android installation package) program,
you can get third-party application programs suitable for the Android system on the electronic market or through
Internet, and can install it on this machine by yourself.
First open "Settings/Security", tick items behind "Unknown Source".
3-2-1.Program access:
Download through Internet, then copy the application program into TF card or U disk and then insert it into the
machine; or copy files from your computer through USB cable to the machine.
5
3-2-2.Program Installation:
Touch main interface shortcut, select "File manager" and then enter root directory in the SD card, internal storage or
USB (corresponding U disk), then touch the file manager to be installed in accordance with the Setup Wizard.
3-2-3.Program Uninstall:
Touch main interface shortcut, select "Play Store" and then select "Manager" to enter software list, touch the
program to be uninstalled, select "Uninstall" in the pop-up check box, then touch "OK" to finish uninstall.
3-3. Text input
When you start up a program or select the text edit box needed for input texts or numbers, a screen keyboard will
appear.
4.Internet
4-1.Network setting
Touch status bar at the bottom right, select "Set/Wireless and Network" to enter network setting interface:
In the "Wireless and Network" setting interface, hold down "WI-FI" and drag to the right to open WI-FI.
6
After WI-FI open, it will automatically search wireless router network and display it in a list, touch on the wireless
router network to be connected (for example, d-link wireless router network illustrated by this machine), you will
enter the password input interface, input the network password and then touch "Connect", this machine will
automatically connect to a wireless router after a while, then you can connect it to the Internet in a normal state.
4-2. Web browser
Touch main interface shortcut, select “Browser" to enter browser interface, touch “Menu" button, it will pop up
browser setting menu; touch "Start", address bar will pop up, input website and confirm. After open a web page, you
can slide your finger up and down on the screen to browse and view the other parts of the webpage, it also support
simultaneous opening and free switches of multiple windows, which change a lot of inconvenience of single window
of Android 4.0 in the past.
7
4-3. E-mail
E-mail program can receive and send e-mail. E-mail application program is accompanied by e-mail setup wizard,
you can add external POP3 or IMAP e-mail account of familiar Web-based email service providers (such as Yahoo,
Gmail, Hotmail, etc.).
Note: prior to E-mail Setup Wizard, make sure that your network has been connected and the time setting is correct.
5. Multimedia Entertainment
5-1.Music
Select music icon, touch and enter music file list, in which touch the music you want to play as shown below:
/
Select previous/next song, fast backward/fast forward; you can also realize fast backward/fast forward by
directly sliding the progress bar.
/
: Play/pause music;
8
5-2. Video
Select video player icon, touch and enter video file list, in which you can hold down the bottom of the video files, it
will pop up a "Delete" menu, touch "Delete" to delete the video files. Select video and touch to enter video player
interface;
/
“
”:Volume up/down;
“ / ”:Select a previous/next video and fast backward/fast forward in the current video; you can also realize
fast backward/fast forward by directly touching on the progress bar.
“ /
“
Tap
”: Play/pause a video;
”: Return to previous menu;
for more settings.
5-3. Recording
Select recording icon, touch it to enter the recording interface:
In the recording interface, touch "
" to start recording, after the recording is finished, touch "
" to save
automatically. The recorded files will be saved in the "Recordings" file folder under root directory in
"recordingxxxxx.mp3" file format. All the recording files can be played in the music play mode.
9
5-4. Camera
Select camera icon to enter the shooting mode.
In the shooting mode, touch " ” to take photos. Photograph files are stored in the "internal
storage/DCIM/Camera" directory, file name will be generated automatically in order in the format of "year, month,
date, hour, minute, second. jpg". Touch "
" for browsing all photos taken.
6. Setting
6-1. Wireless and network: in this setting, you can set up network connection; the method of operation has been
described in detail in (2-1 Network Setting).
6-2. Date usage: you can set date, time, time zone and time display format you like.
6-3. Sound: you can set media volume, notification rings, select operating sound, screen lock prompt tone;
6-4. Display: rotate the screen automatically (if automatically change direction when rotating MID), wallpaper
(choose from dynamic wallpaper, photo gallery, wallpaper gallery), brightness (adjust brightness of the screen),
sleep (time setting of screen saver).
6-5. Storage: view available capacity of memory of SD card or the machine, uninstall SD card, format SD card.
6-6 Battery check battery’s state
6-7. Application program: in this menu, you can view the memory space, manage/delete installed applications, view
and manage running services.
6-8. Location and security: you can make the following setting: show my location when using the network, set
patterns for unlocking screen, if its characters shall be shown when entering password, set whether installation of
third-party application program is allowed in "Unknown sources".
6-9. Language & input , select language and set input method.
6-10back up& resest
6-11. About Tablet PC: view the status of the machine, power usage state, legal information, model and version
number of software.
10
Connect to a computer and file transfer
Connect the machine to a computer through a USB cable, the status bar at the bottom right of the screen will
prompt that USB has connected, default USB connection is "connect as a media device", then users can access to this
machine and take as a removable disk; If you need to connect applications, you should enable "USB debugging"
mode through "Settings" - "System" - "Developer's option".
11
Manual de usuario T7
Precauciones de seguridad
Lea estas instrucciones de seguridad antes de usar el dispositivo y almacénelo para futuras consultas. Siempre siga
estas precauciones básicas de seguridad al utilizar su dispositivo. Esto reduce el riesgo de incendio, electrocución y
lesiones.
●
●
●
●
●
●
●
●
●
●
●
●
●
●
●
●
●
●
●
●
No exponga este producto a la lluvia o humedad.
Mantenga el dispositivo fuera fuentes directas de calor y luz directa del sol.
Proteja el cable de alimentación. Acomode los cables para que no sean pisados, pellizcados por objetos
o sean colocados sobre o contra ellos. Preste especial atención al punto donde el cable se conecta al
dispositivo.
Utilice únicamente el adaptador incluido con el dispositivo. El uso de cualquier otro adaptador de
poder anula su garantía.
No retire la cubierta. No hay piezas reparables dentro.
Si se daña el cable del cargador, repárelo con el fabricante, su servicio técnico o una persona con
cualificación similar, para evitar cualquier riesgo.
El cargador no debe usarse por personas (incluyendo a niños) con capacidad física, sensorial o mental
reducida. Las personas que no han leído el manual, a menos que hayan recibido explicaciones por una
persona responsable de su seguridad y la supervisión, no deben usar esta unidad.
Los niños deben ser supervisados para asegurarse de que no jueguen con el cargador.
El cargador siempre debe estar accesible.
El dispositivo no debe ser expuesto a goteos ni salpicaduras de agua.
No coloque objetos llenos de líquidos tales como floreros encima del dispositivo.
Siempre deje una distancia mínima de 10 cm alrededor de la unidad para asegurar una ventilación
adecuada.
Fuentes de llama como velas, no deben colocarse en la parte superior del dispositivo.
El dispositivo está diseñado para uso sólo en un clima templado.
PRECAUCIÓN: Hay peligro de explosión si la batería se reemplaza incorrectamente o no es sustituida
por el mismo tipo o equivalente.
La batería no debe exponerse al calor excesivo como sol, fuego o similares.
Diferentes tipos de baterías, pilas nuevas y usadas no se deben mezclar.
La batería debe instalarse respetando la polaridad.
Si la batería está gastada, debe ser retirada del producto.
La batería debe eliminarse de forma segura. Siempre utilice los contenedores de reciclaje
proporcionados (consulte con su distribuidor) para proteger el medio ambiente.
LIMPIEZA DEL DISPOSITIVO
Trate suavemente la pantalla. Para limpiar las huellas dactilares o polvo de la pantalla, recomendamos utilizar un
paño suave no abrasivo como un paño para lentes de cámara.
APAGUE EL DISPOSITIVO EN AREAS RESTRINGIDAS
Apague el dispositivo cuando no está autorizado el uso de dispositivos móviles o si puede causar interferencia o
peligro, por ejemplo; a bordo de un avión, cerca de equipos médicos, combustible, productos químicos o sitios de
voladuras.
1
SEGURIDAD EN LA VIA PRIMERO
Revise las leyes y regulaciones en el área donde usted conduce, con respecto al uso de dispositivos móviles como
éste.
•
•
•
•
No sostenga este dispositivo móvil mientras conduce.
Concéntrese totalmente en la conducción.
La radio frecuencia (RF) pueden afectar a algunos sistemas electrónicos de su vehículo, tales como el sistema
de audio estéreo o equipos de seguridad.
La bolsa de aire se infla con mucha fuerza. No guarde el dispositivo móvil o cualquiera de sus accesorios en el
área encima de la bolsa o en su zona de despliegue.
INTERFERENCIA
Todos los dispositivos inalámbricos son susceptibles a la interferencia que puede afectar su rendimiento.
PERSONAL AUTORIZADO
Solamente el personal calificado está autorizado a desarmar o reparar este producto.
ACCESORIOS
Utilice sólo baterías, cargadores y otros accesorios que son compatibles con este dispositivo. No conecte productos
incompatibles.
MANTENGA SU DISPOSITIVO SECO
El dispositivo no es a prueba de agua. No lo moje.
NIÑOS
Mantenga el dispositivo móvil en un lugar seguro fuera del alcance de los niños pequeños. Su dispositivo móvil
contiene piezas pequeñas que pueden presentar un peligro de asfixia.
Especificaciones
Tipo de pantalla: Panel TFT de 7 pulgadas.
Resolución máxima: 480 x 800
Tipo de procesador: 1.2 GHz
Tamaño de almacenamiento: 16GB
Memoria RAM: 512MB DDRIII
Sistema Operativo: Android 4.1
Panel táctil: Capacitivo
Conexión inalámbrica: 802.11b/g/n
Batería incorporada: Batería recargable Li-Ion de 2600 mAh
Entrada: 5V DC --- 2A
2
1. Descripción física
Puerto de
carga
Micrófono
Botón de encendido
Puerto USB
Audífonos
+ Volumen
- Volumen
Ranura para
MicroSD
2. Uso del botón de encendido
Encendido: Mantenga y presione el botón por 3 segundos.
Apagado:Mantenga y presione el botón por 3 segundos y luego toque Apagar y confirme.
Encender y apagar la pantalla: Toque el botón de encendido para encender y apagar la pantalla.
Apagado forzado: Si el dispositivo no responde, presione el botón de encendido por 6 segundos para apagar.
3.Pantalla de espera y aplicaciones
3-1 Introducción a la pantalla de espera
Presione y mantenga presionado el botón de encendido para arrancar el dispositivo, la pantalla después del
arranque se representa el estado de bloqueo y debe deslizar el icono de desbloqueo hasta la acción desbloquear y
entrará en la pantalla de espera como se muestra a continuación.
A través de esta interfaz puede realizar búsquedas, entrar al menú, ver las aplicaciones utilizadas recientemente,
cambiar fondos, añadir widgets o accesos directos a programas y realizar otras operaciones.
3
3-1-1. Barra de estado: Toque en la barra de estado en la esquina inferior derecha con el dedo, puede abrir la barra
de notificaciones para leer mensajes, ver el estado de las redes, el estado de la batería y también puede ver la fecha
y hora actual.
3-1-2. Botón de regreso: toque
con su dedo, puede volver a la operación anterior o salir de la aplicación.
3-1-3. Pantalla de espera: toque el botón
3-1-4. Aplicaciones recientes: toque
para volver a la pantalla de espera.
y se mostrará una lista de aplicaciones usadas recientemente.
3-1-5. Volumen - / Volumen +: toque estos botones para aumentar o disminuir el volumen.
3-1-6. Menú principal: toque
para abrir el menú de aplicaciones.
Esta pantalla muestra todas las aplicaciones en el dispositivo. Toque cualquier ícono para acceder a la aplicación.
Algunas de las funciones se detallan a continuación:
Navegador: toque para entrar en el navegador de Internet y visitar sitios Web.
Calendario: ver el calendario y sus ajustes.
Calculadora: le permite realizar operaciones matemáticas.
4
Reloj: permite programar alarmas.
Música: le permite reproducir música. Por favor refiérase a la sección 3-1. Música para su uso.
Video: le permite reproducir videos. Por favor refiérase a la sección 3-2. Videos para su uso.
Grabador: le permite grabar sonidos. Por favor refiérase a la sección 3-3. Grabador para su uso.
Cámara: le permite tomar fotografías. Por favor refiérase a la sección 3-4. Cámara para su uso.
3-2.Instalación de aplicaciones
Este dispositivo le permite instalar APKs (abreviatura de paquete de instalación Android). Usted puede conseguir
paquetes de aplicaciones de terceros para el sistema operativo Android a través de Internet y puede instalarlos en
este equipo usted mismo.
Primero abra "Ajustes/seguridad" y luego marque la casilla "Orígenes desconocidos".
3-2-1.Acceso al paquete:
Descargue la aplicación a través de Internet, luego copie el paquete de la aplicación en la memoria interna o en la
tarjeta de memoria y luego insértela en el dispositivo o copie archivos desde su ordenador a través de cable USB.
5
3-2-2.Instalación del paquete:
Toque el ícono "Administrador de archivos" en la interfaz de aplicaciones y luego ingrese en el directorio de la tarjeta
SD, almacenamiento interno o USB donde se encuentre la aplicación y tóquela para realizar la instalación de acuerdo
al administrador de aplicaciones.
3-2-3.Desinstalación de aplicaciones:
Ingrese a la interfaz de aplicaciones y seleccione "Play Store" y luego seleccione "Mis Aplicaciones" para entrar en
lista de aplicaciones instaladas y toque el programa a desinstalar, luego toque seleccione "Desinstalar" para
completar la desinstalación.
3-3. Ingreso de texto
Al iniciar un programa o seleccionar un cuadro de edición de texto, aparecerá un teclado en pantalla.
4.Internet
4-1.Ajustes de red
Toque la barra de estado en la parte inferior derecha, seleccione "Configurar red" para entrar en la interfaz de
configuración de red:
En la interfaz de configuración “Conexiones inalámbricas y redes”, mantenga pulsado "WI-FI" y arrastre el botón
hacia la derecha para activar el WI-FI.
6
Después de activar el WI-FI, el dispositivo automáticamente buscará redes inalámbricas y mostrará una lista, toque
la red inalámbrica a la que desea conectarse (por ejemplo, red HV1) para entrar en la interfaz de ingreso de la
contraseña, introduzca la contraseña de la red y luego presione 'Conectar', el dispositivo se conectará
automáticamente a la red, luego podrás conectar a Internet normalmente.
4-2. Navegador
Toque el ícono en la interfaz aplicaciones y seleccione "Navegador" para entrar en la interfaz de navegador. Toque la
tecla "Menú" y se abrirá el menú de configuración del navegador. Después de abrir una página web, usted puede
deslizar el dedo hacia arriba y hacia abajo en la pantalla para navegar y ver otras partes de la Página Web, también
tiene la posibilidad de abrir páginas simultáneamente en diferentes pestañas.
7
4-3. Correo
La aplicación de correo puede recibir y enviar correo electrónico. La aplicación es acompañada por un Asistente de
configuración de correo electrónico que lo puede ayudar a agregar cuentas de correo electrónico POP3 o IMAP de
los proveedores de servicios de correo electrónico Web familiares (como Yahoo, Gmail, Hotmail, etc.) y otros.
Nota: antes de usar el Asistente de configuración de correo electrónico, asegúrese de que se ha conectado a la red y
la fecha y hora son correctas.
5. Entretenimiento Multimedia
5-1. Música
Seleccione el icono de música para entrar al reproductor y luego toque la música que quiera reproducir.
Utilice
Utilice
y/o
/
para seleccionar la canción previa o siguiente, también avanzar o retroceder rápidamente.
para pausar o reproducir la música.
8
5-2. Video
Seleccione el icono del reproductor de vídeo, tóquelo para entrar en lista de archivos de vídeo, también puede
mantener pulsado el archivo de vídeo y se abrirá un menú con la opción "Borrar". Seleccione video que desea
reproducir y tóquelo para abrir la interfaz de reproductor de vídeo.
Utilice
/
para subir y bajar volumen.
Utilice
/
para cambiar al video anterior o siguiente.
Utilice
/
para reproducir o pausar el video.
Utilice
para regresar al menú previo.
Toque
para más opciones.
5-3. Grabación
Toque el ícono de grabación para entrar en la interfaz del grabador.
En la interfaz de grabación, toque "
" para iniciar la grabación, después de que termine la grabación presione
"
" para guardar automáticamente. Los archivos grabados se guardarán en la carpeta "Grabaciones" con formato
de archivo "recordingxxxxx.mp3". Todos los archivos de grabación se pueden reproducir en el reproductor de
música.
9
5-4. Cámara
Seleccione el ícono de Cámara para entrar en el modo captura.
En el modo de captura, toque " ” para tomar fotos. Las fotografías se almacenan en "almacenamiento
interno/DCIM/Camera", el nombre de archivo se generará automáticamente en el siguiente orden "año, mes, fecha,
hora, minutos, segundos.jpg".
6. Ajustes
6-1. Conexiones y redes: aquí puede configurar la conexión de red. El uso de esta función se ha descrito a detalle en
la sección 2-1 configuración de red.
6-2. Ajustes de fecha y hora: puede fijar la fecha, hora, zona horaria y formato deseado.
6-3. Sonido: puede ajustar el volumen multimedia, sonido de notificaciones, tono de bloqueo de pantalla, etc.
6-4. Pantalla: permite seleccionar la rotación automática, fondo de pantalla, brillo, duración de encendido y otros.
6-5. Almacenamiento: muestra la capacidad de espacio disponible en la memoria extraíble y la memoria interna.
6-6 Batería: puede consultar el rendimiento y uso de la batería.
6-7. Aplicaciones: puede ver el espacio ocupado por las aplicaciones, así como administrar éstas o eliminarlas.
Además puede ver los servicios en ejecución.
6-8. Ubicación y seguridad: puede realizar los siguientes ajustes: mostrar mi posición utilizando la red, establecer la
configuración de desbloqueo, si los caracteres se indicarán cuando introduzca contraseña, si se permite la instalación
de programas de terceros y otros.
6-9. Idioma y entrada de texto: permite seleccionar el idioma del dispositivo y teclado.
6-10. Copia de seguridad: permite activar el respaldo de sus datos en la nube.
6-11. Acerca de: muestra el estado del dispositivo, uso de energía, información legal, modelo y número de versión de
software.
10
Conectar a una PC y transferir archivos
Conecte el dispositivo a un ordenador mediante un cable USB y en la barra de estado en la parte inferior derecha de
la pantalla indicará que ha conectado el USB, la conexión de USB por defecto es "conectar como un dispositivo de
medios" y los usuarios pueden acceder a este dispositivo como un disco extraíble. Si necesita conectar aplicaciones,
debe activar el modo "Depuración USB" a través de "Ajustes" - "Sistema" - "Opciones de desarrollo".
11
Download