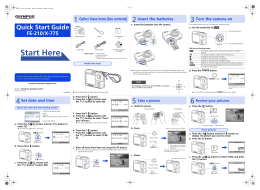
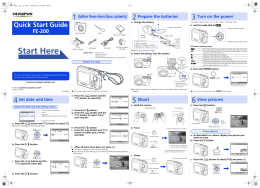
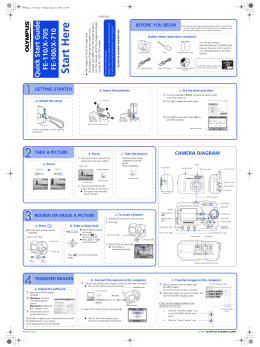
You can read the recommendations in the user guide, the technical guide or the installation guide for OLYMPUS FE-220. You'll
find the answers to all your questions on the OLYMPUS FE-220 in the user manual (information, specifications, safety advice, size,
accessories, etc.). Detailed instructions for use are in the User's Guide.
User manual OLYMPUS FE-220
User guide OLYMPUS FE-220
Operating instructions OLYMPUS FE-220
Instructions for use OLYMPUS FE-220
Instruction manual OLYMPUS FE-220
You're reading an excerpt. Click here to read official OLYMPUS
FE-220 user guide
http://yourpdfguides.com/dref/385596
Manual abstract:
Charge the battery 3 Power Cable Lithium Ion Battery Turn the camera on This section explains how to turn on the camera in shooting mode. Quick Start
Guide FE-220/X-785 Digital camera Strap Lithium Ion Battery (LI-42B) a. Set the mode dial to h When shooting movies 1 2 AC Wall Outlet Battery Charger
When shooting still pictures Mode dial Charging Indicator Red light on: Charging Light off: Charging complete (Charging time: Approx. 300 minutes) Still
picture shooting modes h h B E M f g The camera determines the optimum settings and shoots the picture. @@Suitable for taking pictures of people. Suitable
for taking pictures of landscapes. Suitable for taking pictures of people at night. @@@@Insert the battery in the camera 2 1 Insert the battery in the
direction indicated by the mark. · Advanced manual · Warranty card Contents may vary depending on purchase location. Attach the strap 4 5 3 b.
Press the o button X Y M D TIME Y/M/D o button ----.--.-- --:-- Battery lock knob CANCEL MENU This screen appears if the date and time have not been set.
To remove the battery, press the battery lock knob in the direction of the arrow. © 2007 Printed in China VH933601 Pull the strap tight so that it does not
come loose.
This camera does not require an optional xD-Picture CardTM (hereinafter referred to as "the card") to take pictures. For details on inserting an optional
Card, please refer to Advanced Manual. To turn off the camera, press the o button again. O Hint The directions of the arrow pad (ONXY) are indicated with
ONXY in this manual. X N Y Set date and time About the date and time setting screen X e.
Press the OF/< button and the NY button to select [D]. X Y M D TIME Y/M/D 2007.08 26 2007 08.26 --:-- Take a picture a. Hold the camera Horizontal grip
Vertical grip Review your pictures a. Press the q button. q button CANCEL MENU Y M D TIME Y/M/D ----.--.-- --:-- Y-M-D (Year-Month-Day) Hour Minute
Date format (Y-M-D, M-D-Y, D-M-Y) Cancel the setting f. Press the Y# button.
g. Press the OF/< button and the NY button to select "hour" and "minute". The time is displayed in the 24-hour format. X Y M D TIME Y/M/D [ ] [IN IN] [IN
IN] 4 HQ 3072 2304 3072×2304 2007.08 26 12:30 2007 08.26 12 30 3072×2304 3072 2304 0.0 HQ CANCEL MENU a. Press the OF/< button and NY
button to select [Y]. The first two digits of the year are fixed. OF/ < button X Next picture SET OK CANCEL MENU Arrow pad Previous picture '07.
08.26 12:30 100-0001 1 Y M D TIME Y/M/D 2007.--.-2007.--.
-- --:-- h. Press the Y# button. i. Press the OF/< button and NY button to select [Y/M/D]. b.
Focus X Place this mark over your subject. Erase pictures a. Press the X& button and the Y# button, to display the picture you want to erase. b. @@Press the
Y# button. j. @@@@Shoot Y# button The card access lamp blinks. X c. Press the OF/< button and the NY button to select [M]. c.
@@@@@@@@@@@@Indicado para fotografar fotografias tipo retrato. Indicado para fotografar paisagens. Indicado para fotografar pessoas à noite.
@@@@@@@@@@@@@@Prima o botão Y#. e. Prima o botão OF/< e o botão NY para seleccionar [D]. X AM D HORA A/M/D Fotografar a. Segurar a
câmara Segurar na horizontal Segurar na vertical Ver as suas imagens a. Prima o botão q. Botão q 2007.
08 26 2007 08.26 --:-- AM D HORA A/M/D ----.--.-- --:-- A-M-D (Ano-Mês-Dia) Hora Minuto Formato da data (A-M-D, M-D-A, D-M-A) Cancelar o acerto
CANCEL MENU CANCEL MENU f. Prima o botão Y#.
g. Prima o botão OF/< e o botão NY para seleccionar "hora" e "minuto". A hora é exibida no formato de 24 horas. [ ] [IN IN] X HQ 3072 2304 3072×2304 4
[IN IN] AM D HORA A/M/D 2007.08 26 12:30 2007 08.
26 12 30 a. Prima o botão OF/< e o botão NY para seleccionar [A]. Os primeiros dois dígitos do ano são fixos. Botão OF/< X Fotografia seguinte Selector
em cruz 3072×2304 3072 2304 0.0 '07.08.26 12:30 100-0001 1 HQ CANCEL MENU DEF OK b. Focar Fotografia prévia Posicione esta marca sobre o seu
motivo. AM D HORA A/M/D 2007.--.
-2007.--.-- --:-- h. Prima o botão Y#. i. Prima o botão OF/< e o botão NY para seleccionar [A/M/D]. Apagar imagens X AM D HORA A/M/D Botão
disparador Premir até meio [ ] [ IN ] Botão NY 2007.08 26 12:30 2007 08.26 12 30 CANCEL MENU a. Prima o botão X& e o botão Y# para fazer aparecer
a imagem que deseja apagar.
b. Prima o botão S. A PA G A R HQ 3072 2304 3072×2304 4 b. @@@@@@Fotografar A lâmpada de acesso ao cartão pisca. c.
Prima o botão OF/< para seleccionar [SIM] e então prima o botão i. Botão OF/< A PA G A R c. Prima o botão OF/< e o botão NY para seleccionar [M].
Botão disparador D HORA A/M/D AM 2007.08.
-2007 08.-- --:-- [ Botão i ] [ IN ] Premir totalmente SIM NAO HQ 3072 2304 3072×2304 CANCEL MENU 4 Botão i RETROCEDER MENU DEF OK .
You're reading an excerpt. Click here to read official OLYMPUS
FE-220 user guide
http://yourpdfguides.com/dref/385596
Powered by TCPDF (www.tcpdf.org)
Download