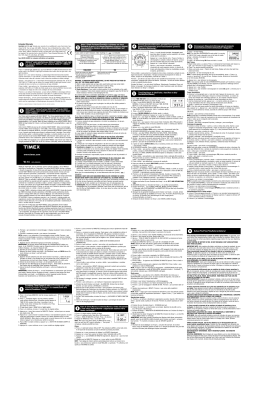
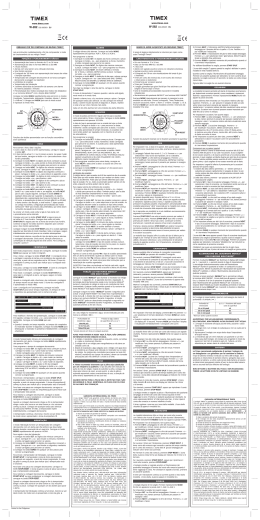
Extended Warranty
Available in U.S. only. Extend your warranty for an additional 4 years from date
of purchase for $5. You can pay with AMEX, Discover, Visa or MasterCard by calling 1 800-448-4639 during normal business hours. Payment must be made within
30 days of purchase. Name, address, telephone number, purchase date, and 5-digit
model number required. You can also mail a check for $5 to: Timex
Extended Warranty, P.O. Box 1676, Dept. EF, Little Rock, AR 72203.
Your model may not have all of the features described in this booklet.
F
C
E
D
B
Press to activate light. Patented (U.S. pat. 4,527,096) electroluminescent technology
used in the INDIGLO night-light illuminates entire watch face at night and in low
light conditions.
INDIGLO is a registered trademark of Indiglo Corporation in the U.S. and other countries.
Appuyer sur pour activer l’éclairage. La technologie électroluminescente
brevetée (brevet américain n° 4,527,096) utilisée dans la veilleuse INDIGLO permet d’illuminer toute la face de la montre la nuit et dans des conditions de faible
éclairage.
Oprima para activar la luz. La tecnología electroluminiscente patentada (Pat. de
EE.UU. 4,527,096) que se utiliza en el modelo INDIGLO night-light ilumina la cara
completa del reloj a la noche y en condiciones de baja visibilidad.
Prima o botão para activar a luz. A tecnologia electroluminescente patenteada
(patente 4,527,096 dos EUA) usada na luz nocturna INDIGLO ilumina todo o
mostrador do relógio de noite e em condições de fraca luminosidade.
Premere per attivare l'illuminazione. La luce notturna INDIGLO a tecnologia
elettroluminescente brevetta (brevetto statunitense 4.527.096) illumina l'intero
quadrante dell'orologio sia di notte che in condizioni di scarsa illuminazione.
Drücken Sie Knopf , um das Licht einzuschalten. Die für das INDIGLO-Nachtlicht
verwandte patentierte Elektroleuchttechnik (US-Patent 4.527.096) beleuchtet
nachts und bei ungünstigen Lichtbedingungen das gesamte Zifferblatt der Uhr.
NIGHT-MODE® Feature/Fonction NIGHT-MODE®/Función NIGHTMODE®/Caratteristica NIGHT-MODE®/Feature Função NIGHT-MODE®/
NACHTFUNKTION®//
2
Your TIMEX watch is equipped with the NIGHT-MODE feature. Using TIMEX patented
technology (U.S. Patent Number 4,912,688), this feature enhances the benefits of the
INDIGLO night-light. Once activated, push any button and the INDIGLO night-light will
stay on for 3 seconds.
W-11
777-095002
www.timex.com
TO ACTIVATE: Press and hold for 3 seconds. The watch will beep, indicating the
NIGHT-MODE feature is activated. The feature will stay activated for 2 hours unless
deactivated by pressing and holding for 3 seconds.
Votre montre TIMEX est pourvue de la fonction NIGHT-MODE. Grâce à la technologie brevetée TIMEX (brevet américain n° 4,912,688), cette fonction augmente les
bénéfices de la fonction de veilleuse INDIGLO. Une fois la fonction NIGHT-MODE
activée, appuyer sur n’importe quel poussoir, et la veilleuse s’allumera durant 3
secondes.
POUR ACTIVER : Garder le poussoir enfoncé pendant 3 secondes. La montre
émettra un son, indiquant l’activation de la fonction NIGHT-MODE. Cette fonction
restera active pour les 2 prochaines heures, à moins que vous la désactiviez en
gardant le poussoir enfoncé de nouveau durant 3 secondes.
Su reloj TIMEX está equipado con la función NIGHT-MODE. Esta función que utiliza tecnología patentada de TIMEX (Pat. de EE.UU. Número 4,912,688), realza los
beneficios de INDIGLO night-light. Una vez activada, oprima cualquier pulsador y
la luz INDIGLO night-light se encenderá por 3 segundos.
PARA ACTIVAR: Oprima y sostenga durante 3 segundos. El reloj emitirá una
señal aguda, indicando que se ha activado la función NIGHT-MODE. Esta función
permanecerá activada durante 2 horas salvo que usted la desactive oprimiendo y
sosteniendo nuevamente durante 3 segundos.
O seu relógio TIMEX possui a função NIGHT-MODE para uso nocturno. Utilizando
a tecnologia patenteada da TIMEX (patente 4,912,688 dos E.U.A.), esta função
aumenta as vantagens da luz nocturna INDIGLO. Uma vez activada, prima qualquer
dos botões e a luz nocturna INDIGLO permanecerá acesa durante 3 segundos.
PARA ACTIVAR: Prima e mantenha premido o botão durante 3 segundos. O
relógio emitirá um sinal sonoro, indicando que a função NIGHT MODE está activada.
DATUM, TAG und 12- oder 24-STUNDEN-ZEITANGABE zu bewegen.
3. Während dieses Durchlaufs können Sie jederzeit Knopf drücken, um die aufblinkende Ziffer vorwärts zu bewegen. Um schneller vorzurücken, drücken Sie
Knopf und halten Sie ihn fest.
4. Wenn ZEIT/DATUM eingestellt sind, drücken Sie Knopf .
ANMERKUNG: Die Angabe a.m. (vorm) - Mitternacht bis 12 Uhr mittags - oder
p.m. (nachm) - 12 Uhr bis Mitternacht - erscheint.
8
Ihre TIMEX-Uhr verfügt über eine NACHTFUNKTION. Diese Funktion mit der USPatentnummer 4.912.688 ergänzt das INDIGLO-Nachtlicht. Ist sie einmal
eingeschaltet, können Sie einen beliebigen Knopf drücken, und das INDIGLONachtlicht bleibt 3 Sekunden eingeschaltet.
EINSCHALTEN: Drücken Sie Knopf für 3 Sekunden. Die Uhr piept und zeigt damit
an, daß die NACHTFUNKTION eingeschaltet ist. Die Funktion bleibt 2 Stunden an,
es sei denn, man drückt erneut 3 Sekunden Knopf und schaltet sie damit aus.
A
INDIGLO ® night-light/Veilleuse INDIGLO®/INDIGLO®night-light/
Luz nocturna INDIGLO®/Luce notturna INDIGLO®/ INDIGLO®
Nachtlicht//
1
A função permanecerá activada durante 2 horas, a não ser que a desactive premindo
e mantendo premido o botão durante 3 segundos.
L'orologio TIMEX in dotazione è dotato della funzione NIGHT-MODE. Grazie alle
tecnologia TIMEX brevettata (brevetto statunitense 4.912.688), questa caratteristica
sfrutta appieno i vantaggi offerti dalla luce notturna INDIGLO. Una volta attivata,
premere qualsiasi pulsante e la luce notturna INDIGLO rimane accesa per 3 secondi.
ATTIVAZIONE: Premere e mantenere premuto per 3 secondi. L'orologio emette
una segnalazione acustica (bip) indicando l'attivazione della funzione NIGHT-MODE.
Questa funzione rimane attiva per 2 ore a meno di non disattivarla premendo e
mantenendo premuto un'altra volta per 3 secondi.
Chronograph (Stopwatch)/Chronographe/Cronógrafo/
Cronómetro/Cronometro/Zeitschauuhr (Stoppuhr)/ /
1. In CHRONO mode.
2. Press to START CHRONO, to STOP CHRONO.
3. Press again to RESET CHRONO. To return to TIME, press .
SPLIT TIME: To view multiple finish times without stopping CHRONO.
– To view 1st place time, press once.
– To view 2st place time, press again.
Continue until all finish times are noted.
NOTE: You have 7 seconds to note a SPLIT TIME. Watch then returns to elapsing
CHRONO time.
NOTE: If CHRONO is running while in TIME,
flashes to alert you CHRONO is
running.
1. Passer en mode CHRONOGRAPHE.
2. Appuyer sur pour DÉMARRER le CHRONOGRAPHE, et sur pour
ARRÊTER le CHRONOGRAPHE.
3. Appuyer de nouveau sur pour remettre le CHRONOGRAPHE à ZÉRO. Pour
retourner à l’HEURE normale, appuyer sur .
TEMPS INTERMÉDIAIRE : Permet d’enregistrer plusieurs temps chronométrés
sans arrêter le CHRONOGRAPHE.
- Pour enregistrer le temps de première place, appuyer une fois sur .
- Pour enregistrer le temps de deuxième place, appuyer de nouveau sur .
Répéter jusqu’à ce que tous les temps soient enregistrés.
NOTE : Vous disposerez de 7 secondes pour enregistrer un TEMPS
INTERMÉDIAIRE. Après 7 secondes, la montre affichera le temps qui s’écoule au
CHRONOGRAPHE.
NOTE : Si le CHRONOGRAPHE fonctionne pendant l’affichage de L’HEURE, le
symbole
clignotera.
1. De la modalidad CHRONO.
2. Oprima para INICIAR CHRONO, para PARAR CHRONO.
3. Oprima nuevamente para RECONFIGURAR CHRONO. Para regresar a HORA,
oprima .
FRACCIONES DE SEGUNDO: Para registrar horarios de llegada múltiples sin
detener la modalidad CHRONO.
- Para ver el tiempo de 1er. lugar, oprima nuevamente.
- Para ver el tiempo del 2do. lugar, oprima nuevamente.
Continúe hasta registrar el tiempo de llegada de todos los participantes.
AVISO: Tendrá 7 segundos para registrar las FRACCIONES DE SEGUNDO. El reloj
luego mostrará el tiempo transcurrido en la modalidad CHRONO.
AVISO: Si CRONO está funcionando en la modalidad HORA, el
se iluminará
de manera intermitente para alertarlo que la modalidad CHRONO está en
funcionamiento.
1. A partir do modo do CRONÓMETRO.
2. Prima o botão para PÔR O CRONÓMETRO A FUNCIONAR, e o botão para
PARAR O CRONÓMETRO.
3. Prima outra vez o botão para REPOR O CRONÓMETRO A ZERO. Para voltar
ao modo de HORA NORMAL, prima o botão .
TEMPO REPARTIDO: Esta função permite-lhe registar diversos tempos sem parar
o CRONÓMETRO.
– Para registar o primeiro tempo, prima uma vez o botão .
– Para registar o segundo tempo, prima outra vez o botão .
Continue a fazer isto até ter registado todos os tempos pretendidos.
NOTA: Terá 7 segundos para anotar um TEMPO REPARTIDO. Depois, o relógio
retomará a exibição pelo CRONÓMETRO do tempo total decorrido.
NOTA: Se o CRONÓMETRO estiver ligado no modo de HORA NORMAL, o símbolo
piscará para avisá-lo de que o CRONÓMETRO está ligado.
1. In modalità CRONOMETRO (CHRONO):
2. Premere per AVVIARE e per ARRESTARE IL CRONOMETRO.
3. Premere un'altra volta per AZZERARE IL CRONOMETRO. Premere per
tornare alla visualizzazione dell'ORA.
TEMPI PARZIALI: Questa funzione permette di cronometrare tempi di arrivo
multipli senza arrestare il CRONOMETRO.
- Per cronometrare il primo tempo di arrivo, premere .
- Per cronometrare il secondo tempo di arrivo, premere di nuovo .
Continuare nello stesso modo finché non vengono registrati tutti i tempi di arrivo
desiderati.
NOTA: I tempi parziali vengono visualizzati per 7 secondi, trascorsi i quali
l'orologio visualizza nuovamente il cronometro ed il tempo complessivo.
NOTA: Se il cronometro è in funzione mentre l'orologio è in modalità ORA (TIME),
l'icona
lampeggia per indicare che la funzione CRONOMETRO è tuttora attiva.
1. In der CHRONO-Funktion.
2. Drücken Sie Knopf , um CHRONO EINZUSCHALTEN, Knopf , UM CHRONO
AUSZUSCHALTEN.
3. Drücken Sie erneut Knopf , um CHRONO WIEDEREINZUSTELLEN. Um in die
Zeitfunktion zurückzukehren, drücken Sie Knopf .
3
Water Resistance/Étanchéité/Resistente al agua/Resistência
à água/Impermeabilità/Wasserbeständigkeit//
If your watch is water-resistant, meter marking or (
Water-Resistance Depth
Profondeur d’étanchéité
Profundidad a la cual es resistente al agua
Profundidade de resistência à água
Profondità di immersione
Tiefe der Wasserbeständigkeit
30m/98ft
50m/164ft
100m/328ft
*pounds per square inch absolute
*livres par pouce carré absolu
* Presión absoluta en libraspulgada2
*libras por polegada quadrada –
pressão absoluta
) is indicated.
p.s.i.a.* Water Pressure Below Surface
Pression de l’eau sous la surface en p.s.i.a.*
Presión del agua subsuperficie en p.s.i.a.*
Pressão debaixo de água – p.s.i.a.*
Pressione equivalente espressa in psia*
p.s.i.a.* Wasserdruck unterhalb der Oberfläche
60
86
160
*libbre assolute per pollice quadrato
*Absoluter Druck in psi
WARNING: TO MAINTAIN WATER-RESISTANCE, DO NOT PRESS ANY BUTTONS
UNDER WATER.
1. Watch is water-resistant only as long as lens, push buttons and case remain intact.
2. Watch is not a diver watch and should not be used for diving.
3. Rinse watch with fresh water after exposure to salt water.
4. Shock-resistance will be indicated on the watch face or caseback. Watches are
designed to pass ISO test for shock-resistance. However, care should be taken
to avoid damaging lens.
Si la montre est étanche, la profondeur d’étanchéité ou le symbole (
) est
indiqué.
MISE EN GARDE : POUR ASSURER L’ÉTANCHÉITÉ, NE PAS APPUYER SUR LES
POUSSOIRS LORSQUE LA MONTRE EST IMMERGÉE.
1. La montre est étanche uniquement dans la mesure où le verre, le poussoir et le
boîtier restent intacts.
2. La montre n’est pas conçue pour la plongée et ne doit pas être utilisée pour la
plongée.
3. Rincer la montre à l’eau douce après tout contact avec l’eau de mer.
4. La résistance aux chocs est indiquée sur la face ou au dos du boîtier de la montre.
Les montres sont conçues pour répondre aux exigences des tests ISO en
matière de résistance aux chocs. Veiller toutefois à ne pas endommager le verre.
Si su reloj es resistente al agua, se indicarán los metros o aparecerá el símbolo
(
).
ADVERTENCIA: PARA QUE EL RELOJ SEA RESISTENTE AL AGUA, NO OPRIMA
NINGÚN PULSADOR DEBAJO DEL AGUA.
1. El reloj es resistente al agua solamente si el cristal, los pulsadores y la caja
permanecen intactos.
2. El reloj no es un reloj para buzos y no debe usarse para submarinismo.
3. Enjuague el reloj con agua dulce en caso de exposición al agua salada.
4. Resistente al choque se indicará en la cara o tapa trasera del reloj. Los relojes
han sido diseñados para pasar la prueba ISO de resistencia de los choques.
No obstante, debe evitarse dañar el cristal.
Se o seu relógio é resistente à água, apresentará a indicação do número de metros
de profundidade ou o símbolo (
).
AVISO: PARA MANTER A RESISTÊNCIA À ÁGUA, NÃO PRIMA NENHUM DOS
BOTÕES DEBAIXO DE ÁGUA.
1. O relógio só é resistente à água enquanto o vidro, os botões e a caixa permanecerem intactos.
2. O relógio não é um relógio de mergulhador e não deve ser usado para mergulhar.
3. Lave o relógio com água doce depois de ter estado em contacto com água
salgada.
4. A resistência a choques estará indicada no mostrador ou no verso da caixa do
relógio. Os relógios estão concebidos de modo a passarem no teste ISO de
resistência a choques. Contudo, deve-se ter cuidado para evitar danificar o vidro.
Se l'orologio in dotazione è impermeabile, riporta una dicitura in metri di profondità o il contrassegno (
).
AVVERTENZA: PER SALVAGUARDARE L'IMPERMEABILITA' DELL'OROLOGIO,
NON PREMERE ALCUN PULSANTE SOTT'ACQUA
1. L'orologio è impermeabile purché il cristallo, i pulsanti e la cassa siano intatti.
2. L'orologio non è un orologio subacqueo e non va usato per le immersioni.
3. Sciacquare l'orologio con acqua dolce dopo l'esposizione all'acqua marina.
4. La resistenza antiurto è indicata sul quadrante o sul fondo della cassa. Gli
orologi sono stati studiati per superare il test ISO di resistenza agli urti.
Comunque, è opportuno evitare attentamente di danneggiare il cristallo.
MEHRERE ZEITEN: Um verschiedene Einlaufzeiten zu sehen, ohne die CHRONOFunktion auszuschalten, drücken Sie
- einmal Knopf , um den ersten Platz zu sehen.
- noch einmal Knopf für den zweiten Platz.
Drücken Sie weiter, bis alle Einlaufzeiten abgelesen sind.
ANMERKUNG: Sie haben 7 Sekunden, um MEHRERE ZEITEN abzulesen. Dann
kehrt die Uhr in die verbleibende CHRONO-Zeit zurück.
ANMERKUNG: Wenn die CHRONO-Funktion während der ZEIT-Funktion läuft, weist
Sie das Symbol
darauf hin.
9
Alarm/Alarme/Alarma/Despertador/Allarme/Wecker/
/
1. In ALARM mode.
2. Press and hold , HOURS flash.
3. Press to move thru cycle of HOURS and MINUTES.
4. During any portion of this cycle press to advance flashing digit.
Once ALARM time is set, press to return to TIME.
In ALARM mode, pressing turns ALARM “ON” or “OFF.”
NOTE: Alarm beeps for 20 seconds. To stop beeps, press any button.
1. Passer en mode ALARME.
2. Garder le poussoir enfoncé jusqu’à ce que l’HEURE clignote.
3. Appuyer sur pour alterner entre les HEURES et les MINUTES.
4. À n’importe quelle section de ce cycle, appuyer sur pour passer au chiffre
suivant.
Une fois l’ALARME réglée, appuyer sur pour retourner à l’HEURE.
En mode ALARME, appuyer sur pour activer ou désactiver celle-ci.
NOTE : L’alarme sonne durant 20 secondes. Pour l’arrêter, appuyer sur n’importe
quel poussoir.
1. En la modalidad ALARMA.
2. Oprima y sostenga . Las HORAS se iluminarán de manera intermitente.
3. Oprima para avanzar por el ciclo de HORAS y MINUTOS.
4. Durante cualquier porción de este ciclo oprima para adelantar el dígito intermitente.
Una vez que fije la ALARMA, oprima para para regresar a HORA.
En modalidad de ALARMA, al oprimir “enciende” o “apaga” la alarma.
AVISO: La alarma emitirá una señal aguda durante 20 segundos. Para detener la
señal, oprima cualquier pulsador.
1. A partir do modo do DESPERTADOR.
2. Prima e mantenha premido o botão . O número das HORAS começará a piscar.
3. Prima o botão para percorrer o ciclo das HORAS e dos MINUTOS.
4. Durante qualquer fase deste ciclo, prima o botão para adiantar o número
que estiver a piscar.
Quando a hora do DESPERTADOR estiver regulada, prima o botão para voltar
ao modo de HORA NORMAL.
No modo do DESPERTADOR, o botão serve para ligar (“ON”) ou desligar
(“OFF”) o DESPERTADOR.
NOTA: O despertador toca durante 20 segundos. Para fazer cessar o sinal sonoro,
prima qualquer dos botões.
1. In modalità ALLARME (ALARM):
2. Premere e mantenere premuto . Le ORE lampeggiano.
3. Premere per far lampeggiare in sequenza le ORE ed i MINUTI.
4. In qualsiasi fase di questo ciclo, premere per modificare la cifra lampeggiante.
Una volta impostato l’orario dell’ALLARME, premere per tornare alla visualizzazione dell’ORA.
L'ALLARME viene ATTIVATO e DISATTIVATO premendo in modalità ALLARME.
NOTA: L'allarme emette segnalazioni acustiche (bip) per 20 secondi. Per arrestare
l'allarme, premere un pulsante qualsiasi.
1. In der Alarmfunktion.
2. Drücken Sie Knopf und halten Sie ihn fest. STUNDEN blinken auf.
3. Drücken Sie Knopf , um sich durch den Durchlauf der STUNDEN und
MINUTEN zu bewegen.
4. Während dieses Durchlaufs können Sie jederzeit Knopf drücken, um die aufblinkende Zahl vorzurücken.
Wenn der WECKER eingestellt ist, drücken Sie Knopf , um in die ZEIT-Funktion
zurückzukehren.
In der WECK-Funktion drücken Sie Knopf , um den Wecker auf "AN" oder "AUS"
zu stellen.
ANMERKUNG: Der Wecker klingelt 20 Sekunden. Um das Klingeln abzustellen,
drücken Sie einen beliebigen Knopf.
Wenn Ihre Uhr wasserbeständig ist, ist eine Metermarke oder (
) angegeben.
WARNUNG: DAMIT IHRE UHR WASSERBESTÄNDIG BLEIBT, DRÜCKEN SIE
UNTER WASSER KEINE KNÖPFE.
1. Die Uhr ist nur dann wasserbeständig, wenn Glas, Krone und Gehäuse
unversehrt sind.
2. Die Uhr ist keine Taucheruhr und sollte nicht beim Tauchen verwendet werden.
3. Waschen Sie die Uhr, nachdem sie im Salzwasser war, mit Leitungswasser ab.
4. Auf dem Zifferblatt oder auf der Rückseite des Gehäuses ist die Stoßfestigkeit
der Uhr angegeben. Die Uhren sind so konstruiert, daß sie den ISO-Test auf
Stoßfestigkeit erfüllen. Es ist aber darauf zu achten, daß das Glas nicht
beschädigt wird.
4
Der “screen saver” ist eine Reihe von Mustern, die auf der Uhr auftauchen. Diese
Funktion können Sie einschalten, wenn Sie die Zeit nicht ablesen möchten. Zum
Einschalten drücken Sie Knopf , zum Ausschalten Knopf , oder .
ANMERKUNG: Wenn Sie den “screen saver” nicht benutzen, schadet dies der
Oberfläche nicht. Der Begriff “screen saver” beschreibt diese Funktion bloß.
Modes/Modes/Modalidades/Modos de operação/
Modalità/Funktionen//
6
Mystery Answer/Réponse-mystère/Respuesta misteriosa/
Resposta-mistério/Risposta misteriosa/Die GeheimnisAntwort//
L’ordre des réponses est aléatoire, ainsi vous ne saurez jamais quelle réponse
apparaîtra lorsque la fonction est activée. Pour ce qui est de votre réaction à la
réponse-mystère, la balle est dans votre camp! • Poser une question à laquelle on
répond par « oui » ou par « non ». • Appuyer sur pour obtenir une réponsemystère. • Appuyer de nouveau sur pour faire disparaître la réponse.
La secuencia de respuestas es aleatoria, por lo tanto nunca sabrá que respuesta
aparecerá. ¡Pero usted decide cómo actuar ante la Respuesta Misteriosa! • Haga
una pregunta que pueda responderse con un "sí" o un "no". • Oprima para la
Respuesta misteriosa. • Oprima nuevamente para borrar la respuesta.
A sequência das respostas é aleatória, por isso nunca saberá qual delas será
exibida. Atenção: A sua reacção à resposta-mistério exibida é exclusivamente da
sua conta! • Formule uma pergunta que possa ser respondida com um "sim" ou um
"não". • Prima o botão para obter a resposta-mistério. • Volte a premir o botão
para apagar a resposta.
La sequenza delle risposte è casuale, perciò è impossibile predire quale risposta
verrà fornita. L'utilizzo delle risposte misteriose è affidato alla discrezione del
richiedente. • Porre domande che richiedano una risposta affermativa • negativa.
• Premere per ottenere una risposta misteriosa e premere di nuovo lo stesso
pulsante per cancellarla.
Die Abfolge der Antworten ist willkürlich, so daß Sie nie wissen, welche als
nächste erscheinen wird. Wie Sie auf die "Geheimnis-Antwort" reagieren, bleibt
Ihnen überlassen! • Die Fragen müssen mit "ja" oder "nein" zu beantworten sein. • Drücken Sie , um die "Geheimnis-Antwort" zu erhalten. • Durch erneutes
Drücken auf schalten Sie die Antwort aus.
5
Screen Saver/Économiseur d’affichage/Protector de
pantalla/Protector de ecrã/Salvaschermo/Zifferblattschoner/
/
The “screen saver” is a series of patterns appearing on the watch. This can be
activated if you do not want to display the time. To activate, press . To deactivate
press , , or . NOTE: If you do not use “screen saver” the display will not be
damaged. “Screen saver” is only a descriptive name for this feature.
La fonction économiseur d’affichage consiste en une série de motifs qui apparaissent sur l’affichage de la montre. Il est possible d’activer cette fonction si vous
ne voulez pas afficher l’heure. Pour ce faire, appuyer sur . Pour désactiver la
fonction, appuyer sur , ou . NOTE : Si vous n’utilisez pas cette fonction,
l’affichage de la montre ne sera pas endommagé. Dans ce cas-ci, le nom « Économiseur d’affichage » ne décrit pas la fonction comme tel.
La función "protector de pantalla" consiste en una serie de patrones que aparecerán en el reloj. Esta función se puede activar si usted no quiere mostrar la hora.
Para activar, oprima . Para desactivar oprima , ó . AVISO: Si no utiliza el
"protector de pantalla" la esfera del reloj no se dañará. "Protector de pantalla" es
solamente un nombre descriptivo para esta función.
O "protector de ecrã" é uma série de padrões que serão exibidos pelo relógio. Esta
função pode ser activada se não quiser que o seu relógio exiba a hora. Para
activá-la, prima o botão . Para desactivá-la, prima os botões , ou .
NOTA: Se não usar o "protector de ecrã", o mostrador não será danificado. O
termo "protector de ecrã" é só um nome descritivo desta função.
La funzione “salvaschermo” prevede la visualizzazione casuale di una serie di
forme astratte sul display dell'orologio. Tale funzione può essere attivata se non si
desidera visualizzare l'ora. Per attivare questa funzione, premere . Per disattivarla premere , o . NOTA: Se non si usa la funzione salvaschermo il display
può subire danni. La denominazione “salvaschermo” ha uno scopo puramente
descrittivo.
E
E
E
D
The answer sequence is random so you will never know which answer will appear.
How you act upon the Mystery Answer's reply is up to you! • Ask a “yes” or “no” type
of question. • Press for Mystery Answer. • Press again to clear the answer.
E
E
Date can only be viewed in TIME mode. Press to view date. Watch auto-returns
back to TIME.
La date ne peut être affichée qu’en mode TIME (heure). Appuyer sur pour
afficher la date. La montre retourne à l’heure automatiquement.
La fecha solamente se puede ver cuando el reloj está en modalidad de HORA.
Oprima para ver la fecha. El reloj regresa por sí mismo a HORA.
A data só pode ser vista a partir do modo de HORA NORMAL. Prima o botão para ver a data. O relógio regressará automaticamente à HORA NORMAL.
La data può essere visualizzata solamente in modalità ORA (TIME), premendo .
L'orologio ritorna automaticamente alla visualizzazione dell'ora.
Das Datum läßt sich nur in der ZEIT-Funktion ablesen. Drücken Sie Knopf , um
das Datum zu sehen. Die Uhr geht automatisch wieder in die ZEIT-Funktion zurück.
7
Time/Date/Heure et date/Fecha y hora/Hora e data/
Ora/data/Zeit/Datum//
1. From TIME, press and hold , HOUR begins flashing.
2. Press to move thru cycle of HOURS, MINUTES, MONTH, DATE, DAY, and 12
or 24 HOUR TIME.
3. During any portion of this cycle press to advance the flashing digit. To
advance quickly, press and hold .
4. Once TIME/DATE is set, press .
NOTE: “AM” or “PM” will appear in 12-HOUR TIME and not in 24-HOUR TIME.
1. Lorsque l’HEURE NORMALE est affichée, garder le poussoir enfoncé jusqu’à
ce que l’HEURE clignote.
2. Appuyer sur pour alterner entre les HEURES, les MINUTES, le MOIS, la
DATE, le JOUR et le mode 12 ou 24 HEURES.
3. À n’importe quelle section de ce cycle, appuyer sur pour passer au
chiffre/mois/jour suivant. Pour un défilement plus rapide, garder le poussoir enfoncé.
4. Une fois l’HEURE et la DATE réglées, appuyer sur .
NOTE : « AM » ou « PM » apparaîtra en mode 12 HEURES seulement.
1. De la modalidad HORA oprima y sostenga , la HORA empiece a iluminarse de
forma intermitente.
2. Oprima para avanzar por el ciclo de HORAS, MINUTOS, MES, FECHA, DÍA, y
PERÍODO DE 12 o 24 HORAS.
3. Durante cualquier porción de este ciclo oprima para adelantar el dígito intermitente. Para avanzar rápidamente, oprima y sostenga .
4. Una vez que fija la HORA/DÍA, oprima .
AVISO: "AM" o "PM" aparecerá en el PERÍODO DE 12 HORAS y no en el PERÍODO
DE 24 HORAS.
1. A partir do modo de HORA NORMAL, prima e mantenha premido o botão . O
número das HORAS começará a piscar.
2. Prima o botão para percorrer o ciclo HORAS, MINUTOS, MÊS, DIA DO MÊS,
DIA DA SEMANA, e exibição das horas segundo o MODO DE 12 HORAS ou o
MODO DE 24 HORAS.
3. Durante qualquer fase deste ciclo, prima o botão para adiantar o número
que estiver a piscar. Para adiantá-lo rapidamente, prima e mantenha premido o
botão .
4. Quando a HORA e a DATA estiverem acertadas, prima o botão .
NOTA: A indicação "AM" (manhã) ou "PM" (tarde/noite) será exibida quando o relógio estiver regulado no MODO DE 12 HORAS, e não no MODO DE 24 HORAS.
1. In modalità ORA (TIME): Premere e mantenere premuto finché l'ORA non
lampeggia.
2. Premere per far lampeggiare in sequenza le ORE, i MINUTI, il MESE, la
DATA, il GIORNO, la modalità 12 ORE e 24 ORE.
3. In qualsiasi fase del ciclo, premere per modificare la cifra lampeggiante. Per
modificare la cifra più rapidamente, premere e mantenere premuto .
4. Una volta impostata l'ora e/o la data, premere .
NOTA: Le diciture delle ore antimeridiane "AM" e pomeridiane "PM" appaiono solamente in modalità 12 ORE.
1. Drücken Sie in der ZEIT-Funktion Knopf . Das Wort STUNDE blinkt auf.
2. Drücken Sie Knopf , um sich durch die STUNDEN, MINUTEN, MONATE,
10
Countdown Timer/Compte à rebours/Cronómetro de cuenta
regresiva/Contador de contagem decrescente/Conto alla
rovescia/Countdown-Timer//
1. In TIMER mode, press and hold , TENS OF HOURS digit flashes.
2. Press to move through the cycle of HOURS, MINUTES, SECONDS.
3. During any portion of this cycle press to advance flashing digit.
4. When timer amount is set press .
5. Press to start countdown. Press to stop. Press again to resume
countdown or to reload timer amount. Press to return to TIME.
NOTE: If TIMER is running while in TIME, flashes to alert you TIMER is running.
1. En mode COMPTE À REBOURS, garder le poussoir enfoncé jusqu’à ce que
les DIZAINES D’HEURES clignotent.
2. Appuyer sur pour alterner entre les HEURES, les MINUTES et les SECONDES.
3. Durant toute section de ce cycle, appuyer sur pour faire avancer le chiffre
clignotant.
4. Lorsque la durée du compte à rebours est réglée, appuyer sur .
5. Appuyer sur pour commencer le décompte, et sur pour l’arrêter. Pour
reprendre le décompte, appuyer sur ou pour revenir au réglage initial.
Appuyer sur pour retourner à l'HEURE.
NOTE : Si le COMPTE À REBOURS en mode HEURE NORMALE, le symbole
s’affiche.
1. En la modalidad de CRONÓMETRO (TIMER), oprima y sostenga . Se iluminará
de manera intermitente HORAS DE DIEZ EN DIEZ.
2. Oprima para avanzar a lo largo del ciclo de HORAS, MINUTOS y SEGUNDOS.
3. Durante cualquier porción de este ciclo oprima para avanzar el dígito intermitente.
4. Cuando fije el cronómetro en el lugar deseado, oprima .
5. Oprima para empezar la cuenta regresiva. Oprima para parar. Oprima nuevamente para resumir la cuenta regresiva o para reingresar la cantidad
de tiempo. Oprima para regresar a HORA.
AVISO: Si el CRONÓMETRO está en funcionamiento en HORA, el se iluminará de
manera intermitente para alertarle que el CRONÓMETRO está en funcionamiento.
1. A partir do modo do CONTADOR, prima e mantenha premido o botão . O
algarismo das DEZENAS DE HORAS começará a piscar.
2. Prima o botão para percorrer o ciclo dos algarismos das HORAS, dos MINUTOS e dos SEGUNDOS.
3. Durante qualquer fase deste ciclo, prima o botão para adiantar o algarismo
que estiver a piscar.
4. Quando a quantidade de tempo pretendida para a contagem decrescente estiver
regulada, prima o botão .
5. Prima o botão para iniciar a contagem decrescente. Para parar a contagem,
prima o botão . Para reatar a contagem decrescente, prima o botão , ou
prima o botão se quiser modificar a quantidade de tempo fixada para a contagem decrescente. Para voltar ao modo de HORA NORMAL, prima o botão .
NOTA: Se o CONTADOR estiver ligado quando o relógio estiver no modo de HORA
NORMAL, o símbolo piscará para avisá-lo de que o CONTADOR está ligado.
11
TMXTM Loss Protection PlanSM (U.S. Only)
TIMEX understands that kids often lose things, even their most prized possessions.
That is why your new TMX watch is covered by the exclusive TMX LOSS PROTECTION
PLANSM. If your new TMX watch is lost, TIMEX will replace it with the same style (or
similar if your style is not available) for $15.00 for up to one year from the original
date of purchase, with no questions asked. Simply send: (1) check or money order
for $15.00 made payable to TIMEX CORPORATION (residents of AR, CA, CT, FL, IL,
MA, MN, NY, VA, and WA, must also add applicable sales tax), (2) proof of purchase,
and (3) the five digit style number or a complete description of the watch to:
TIMEX CORPORATION, P.O. BOX 1676, Little Rock, AR 72203
Attention: Ann Rice
12
13
Fast Wrap® Strap Adjustment / Ajustement du bracelet Fast
Wrap®/ Ajuste de Correa Fast Wrap®/ Ajuste da pulseira Fast
Wrap®/ Regolazione del cinturino Fast Wrap®/ Fast Wrap®
Armbandanpassung/ /
Battery/Pile/Pilas/Pilha/Batteria/Batterie//
Timex strongly recommends that a retailer or jeweler replace battery. Battery type
is indicated on caseback. Battery life estimates are based on certain assumptions
regarding usage; battery life may vary depending on actual usage.
DO NOT DISPOSE OF BATTERY IN FIRE. DO NOT RECHARGE. KEEP LOOSE
BATTERIES AWAY FROM CHILDREN.
IMPORTANT NOTE: After replacing the battery and before you close the caseback, be
sure to quickly press the reset button if this is indicated. If after closing caseback,
display does not go on, press all buttons simultaneously.
Timex recommande vivement de faire changer la pile par un revendeur ou un
bijoutier. Le type de pile requis est indiqué au dos du boîtier. La durée des piles
varie en fonction du modèle et de l’usage réservé à la montre.
NE PAS JETER LA PILE DANS LE FEU. NE PAS RECHARGER. NE JAMAIS LAISSER LES PILES DÉTACHÉES À LA PORTÉE DES ENFANTS.
NOTE IMPORTANTE : Après avoir remplacé la pile et avant de refermer le boîtier,
s’assurer d’appuyer rapidement sur le pressoir de remise à zéro si c’est indiqué
sur la bride de fixation de pile. Si après la fermeture du boîtier, l’affichage ne s’allume pas, appuyer sur tous les pressoirs simultanément.
1. In modalità TIMER: Premere e mantenere premuto finché non lampeggiano
le DECINE DI ORE.
2. Premere per far lampeggiare in sequenza le ORE, i MINUTI ed i SECONDI.
3. In qualsiasi fase del ciclo, premere per modificare la cifra lampeggiante.
4. Una volta impostato il valore iniziale del conto alla rovescia, premere .
5. Premere per iniziare il conto alla rovescia. Premere per arrestarlo.
Premere un'altra volta per riprendere il conto alla rovescia o per ricominciarlo dall'inizio. Premere per tornare alla visualizzazione dell'ORA.
NOTA: Se il conto alla rovescia è in funzione mentre l'orologio è in modalità ORA
(TIME), l'icona lampeggia per indicare che la funzione è tuttora attiva.
Timex recomienda enfáticamente que un vendedor de relojes o joyero reemplace la pila. El tipo de pila se indica en la tapa trasera. La estimación de la
duración de la pila se basa en ciertos supuestos con respecto al uso; la duración
de la batería dependerá de su uso real.
NO TIRE LA PILA EN EL FUEGO. NO RECARGUE. MANTENGA LAS PILAS
SUELTAS LEJOS DEL ALCANCE DE LOS NIÑOS.
AVISO IMPORTANTE: Después de reemplazar la batería y antes de cerrar la tapa
trasera, recuerde oprimir rápidamente el pulsador de reconfiguración si esto se
indica en el retén de la pila. Si después de cerrar la tapa trasera, la esfera no se
enciende, oprima todos los pulsadores simultáneamente.
1. Drücken Sie in der TIMER-Funktion Knopf und halten Sie ihn fest. STUNDEN
IN ZEHNERREIHEN blinken auf.
2. Drücken Sie , um diese STUNDEN, MINUTEN und SEKUNDEN zu durchlaufen.
3. Während dieses Durchlaufs können Sie jederzeit Knopf drücken, um die aufblinkende Zahl vorzurücken.
4. Wenn die Länge der Timerzeit eingestellt ist, drücken Sie Knopf .
5. Drücken Sie Knopf , um den Countdown einzuschalten und Knopf zum
Abschalten. Drücken Sie Knopf , um den Countdown wiederaufzunehmen
oder Knopf , um die Länge der Timerzeit wiederherzustellen. Drücken Sie
Knopf , um zur ZEIT-Funktion zurückzukehren.
ANMERKUNG: Sollte der TIMER in der ZEIT-Funktion laufen, blinkt das Signal
auf und weist Sie darauf hin, daß der ZEITNEHMER in Betrieb ist.
A Timex recomenda vivamente que a pilha seja substituída por um relojoeiro
ou por um lojista. O tipo da pilha está indicado no verso da caixa. A estimativa da
vida útil da pilha baseia-se em certas suposições a respeito do uso; a duração da
pilha variará consoante o uso a que o relógio for submetido.
NÃO DEITE FORA A PILHA PARA DENTRO DO FOGO. NÃO A RECARREGUE. CONSERVE AS PILHAS SOLTAS FORA DO ALCANCE DAS CRIANÇAS.
NOTA IMPORTANTE: Depois de substituir a pilha e antes de fechar o verso da
caixa do relógio, lembre-se de premir rapidamente o botão de restabelecimento se
isto estiver indicado. Se, depois de ter fechado o verso da caixa, o mostrador não
funcionar, prima simultaneamente todos os botões.
La Timex consiglia vivamente di far sostituire la batteria dal venditore o da un
orologiaio. Il tipo di batteria è indicato sul fondo della cassa. La durata prevista
della batteria è basata su premesse generiche e può variare in funzione dell'uso.
NON GETTARE LA BATTERIA NEL FUOCO. NON RICARICARLA. MANTENERE LE
BATTERIE SFUSE FUORI DALLA PORTATA DEI BAMBINI.
NOTA BENE: Una volta sostituita la batteria e prima di richiudere la cassa, non
mancare di premere brevemente il pulsante di ripristino se ciò è indicato sull'alloggiamento della batteria stessa. Dopo la chiusura della cassa, se il display non si
attiva, premere contemporaneamente tutti i pulsanti.
Timex empfiehlt dringend, daß Sie die Batterie nur im Uhrengeschäft oder von
einem Juwelier auswechseln lassen. Auf der Rückseite des Gehäuses ist der
Batterietyp angegeben. Die Lebensdauer der Batterie ist vom Modell und dem jeweiligen Verbrauch abhängig.
BATTERIEN NICHT VERBRENNEN. NICHT WIEDERAUFLADBAR. VON KINDERN
FERNHALTEN.
WICHTIGE ANMERKUNG: Nach Einlegen der Batterie und vor dem Verschließen
des Gehäuses drücken Sie bitte rasch den Knopf für die Neueinstellung, falls dies
angezeigt wird. Wenn nach der Schließung des Gehäuses das Display nicht
erscheint, drücken Sie alle Knöpfe gleichzeitig.
Download